简介
Replacing the spring can be somewhat difficult, so be prepared to deal with a little frustration when removing the spring.
你所需要的
-
-
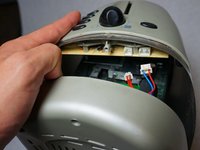
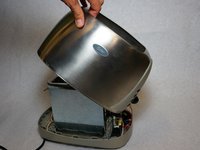
Using the Phillips-head #2 screwdriver, unscrew the three 1cm Phillips-head screws on the plastic base of the toaster to separate the outer metal shell from the plastic base.
 询问修复机器人
-
-
-
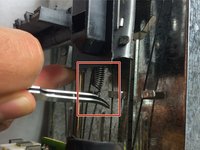
在这个步骤中使用的工具:Tweezers$4.99
-
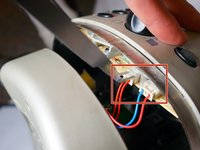
Insert the tweezers between the spring and the bottom of the lever to release the spring.
-


结论
To reassemble your device, follow these instructions in reverse order.
团队

Cal Poly, Team 13-15, Regan Winter 2014 Cal Poly, Team 13-15, Regan Winter 2014 的会员
CPSU-REGAN-W14S13G15
5 名成员
创作了6篇指南