简介
The Oregon Scientific is a great clock with projection and weather station. Unfortunately, the projection digits failed over time and started fading away.
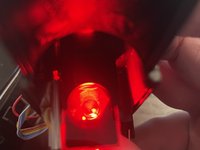
I tried to fix the segments and reposition the connecting strip connecting the LCD used for projection, the fix FAILED but I ended up with a new functionality - a weather station that projects Mars planet on my ceiling.
你所需要的
-
-
Instead of showing the clock/weather in the projection, you'll end up to see a large red disc.
-
This is going to REPLACE the existing functionality and is most likely not undoable.
-
Proceed at your own risk!
-
-
-
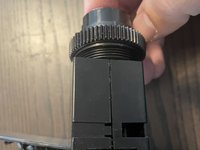
Gently pry open the front case of the projector module.
-
Undo the 6 screws using a small Phillips screwdriver and remove the cover.
-
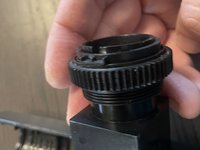
Pull on the projection assembly to detach it from the case. The top part, containing the lens is detachable by hand, the bottom one has 3 clips and a nut that secures it.
-
-
-
-
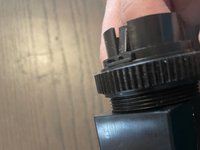
Using a flat screwdriver/pryer press on the tabs on both sides of the assembly to make them loose.
-
Gently press on the upper piece of plastic, to the top.
-
Unscrew the large nut.
-
-
-
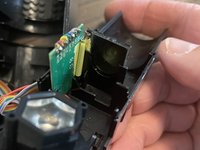
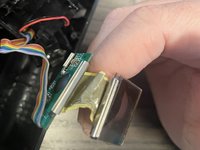
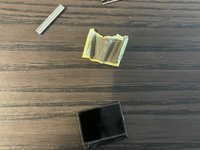
After you disassemble the projector case, you can see the projector light, the passthrough display and the board that powers it.
-
You have 2 options:
-
Try to remove the connecting flex cable between the display and the board and replace it/repair it or clean the contacts on both ends. [I have tried this without success as the wires ripped off because they were aged]
-
Remove the display from the position (with or without removing the flex cable) and allow the projecting light to go through the lens directly - this way you obtain a big round red light: Mars on your wall!
-


To reassemble your device, follow these instructions in reverse order.