跳转到主内容

Orbic Wonder Charging Port Circuit Board Replacement

你所需要的

  1. Orbic Wonder Charging Port Circuit Board Replacement, Battery: 步骤 1 中的图像 1,3 Orbic Wonder Charging Port Circuit Board Replacement, Battery: 步骤 1 中的图像 2,3 Orbic Wonder Charging Port Circuit Board Replacement, Battery: 步骤 1 中的图像 3,3
    • Remove two 2mm TR9 Torx screws from the bottoms of the device.

  2. Orbic Wonder Charging Port Circuit Board Replacement: 步骤 2 中的图像 1,3 Orbic Wonder Charging Port Circuit Board Replacement: 步骤 2 中的图像 2,3 Orbic Wonder Charging Port Circuit Board Replacement: 步骤 2 中的图像 3,3
    • There is a border between the black phone backing and the silver screen.

    • Place the Jimmy in this border, and cautiously torque it back and forth to part the two halves.

    • When the halves are parted correctly, the gap should look like this.

    • Be careful to avoid damaging any connecting circuitry between the two halves.

  3. Orbic Wonder Charging Port Circuit Board Replacement: 步骤 3 中的图像 1,3 Orbic Wonder Charging Port Circuit Board Replacement: 步骤 3 中的图像 2,3 Orbic Wonder Charging Port Circuit Board Replacement: 步骤 3 中的图像 3,3
    在这个步骤中使用的工具:
    Anti-Static Wrist Strap
    $7.95
    购买
    • Before continuing, tighten the anti-static wrist strap around your wrist and connect the alligator clips to a metal portion of the phone.

    • On the upper right side, there is a black ribbon cable in the shape of an “L”. Remove the single 1 mm Phillips #000 screw on the left side of the ribbon cable.

  4. Orbic Wonder Charging Port Circuit Board Replacement: 步骤 4 中的图像 1,3 Orbic Wonder Charging Port Circuit Board Replacement: 步骤 4 中的图像 2,3 Orbic Wonder Charging Port Circuit Board Replacement: 步骤 4 中的图像 3,3
    在这个步骤中使用的工具:
    Tweezers
    $3.99
    购买
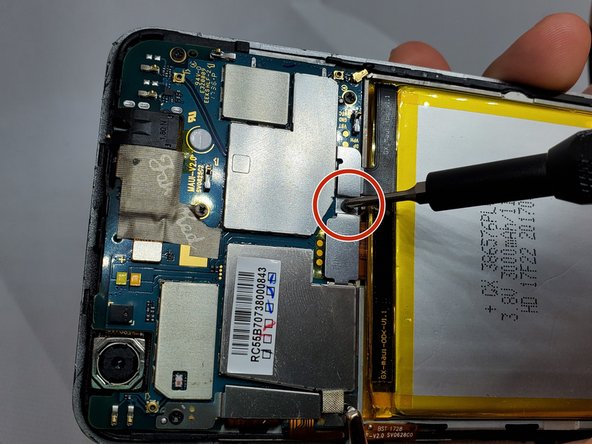
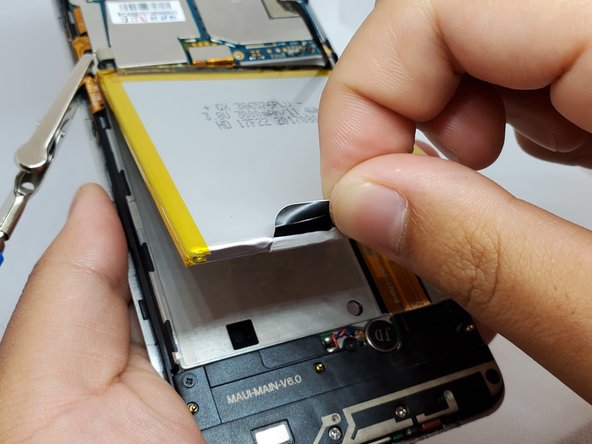
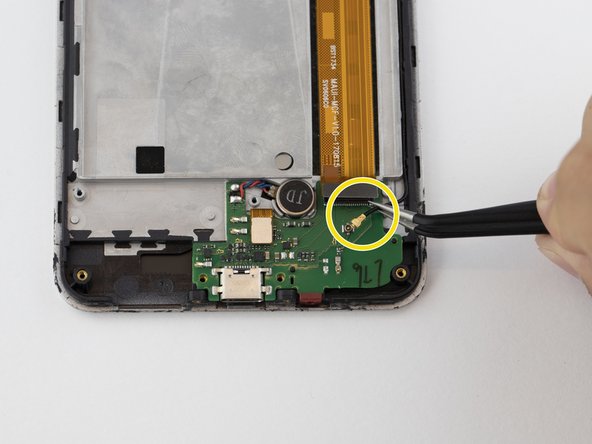
    • Use a pair of angled tweezers to carefully remove the metal casing of the ribbon cable.

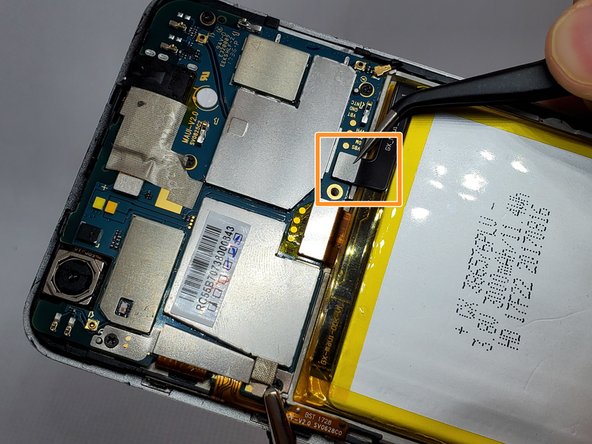
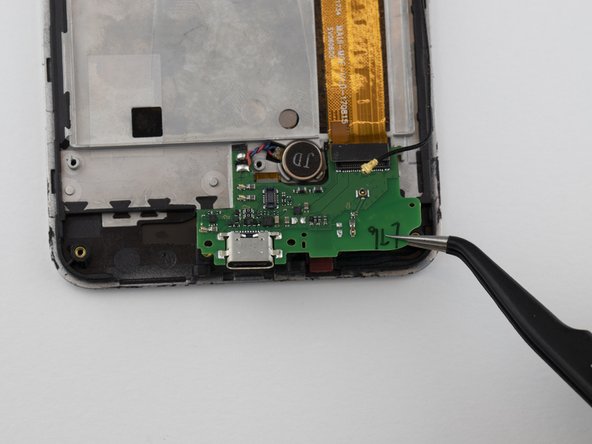
    • Use a pair of angled tweezers to detach the black ribbon cable. This is done to unplug the battery.

  5. Orbic Wonder Charging Port Circuit Board Replacement: 步骤 5 中的图像 1,3 Orbic Wonder Charging Port Circuit Board Replacement: 步骤 5 中的图像 2,3 Orbic Wonder Charging Port Circuit Board Replacement: 步骤 5 中的图像 3,3
    • There is a black flap on the bottom of the battery.

    • Using your fingers, pinch this flap and carefully pull the battery up and out of the phone.

  6. Orbic Wonder Charging Port Circuit Board Replacement, Speaker: 步骤 6 中的图像 1,3 Orbic Wonder Charging Port Circuit Board Replacement, Speaker: 步骤 6 中的图像 2,3 Orbic Wonder Charging Port Circuit Board Replacement, Speaker: 步骤 6 中的图像 3,3
    在这个步骤中使用的工具:
    Anti-Static Wrist Strap
    $7.95
    购买
    • Remove the anti-static wrist strap.

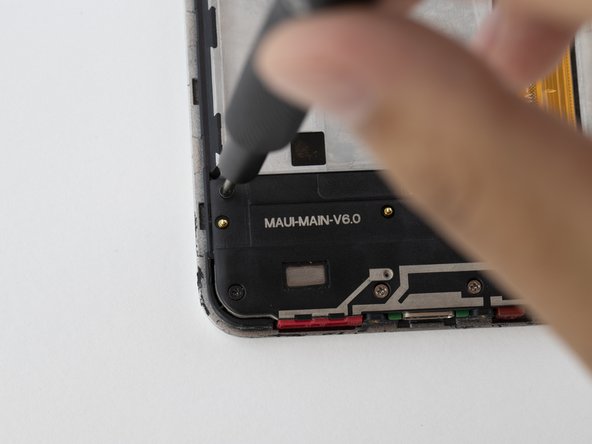
    • Use the Phillips #000 screwdriver to remove the five black 2 mm screws.

    • Use the Phillips #000 screwdriver to remove the two grey 2 mm screws.

  7. Orbic Wonder Charging Port Circuit Board Replacement: 步骤 7 中的图像 1,2 Orbic Wonder Charging Port Circuit Board Replacement: 步骤 7 中的图像 2,2
    在这个步骤中使用的工具:
    Tweezers
    $3.99
    购买
  8. Orbic Wonder Charging Port Circuit Board Replacement, Charging Port Circuit Board: 步骤 8 中的图像 1,3 Orbic Wonder Charging Port Circuit Board Replacement, Charging Port Circuit Board: 步骤 8 中的图像 2,3 Orbic Wonder Charging Port Circuit Board Replacement, Charging Port Circuit Board: 步骤 8 中的图像 3,3
    在这个步骤中使用的工具:
    Tweezers
    $3.99
    购买
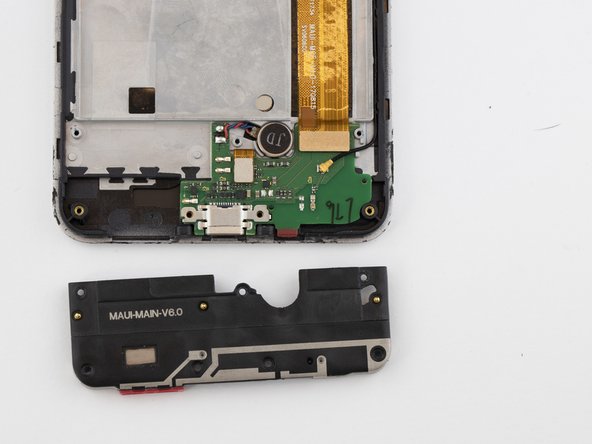
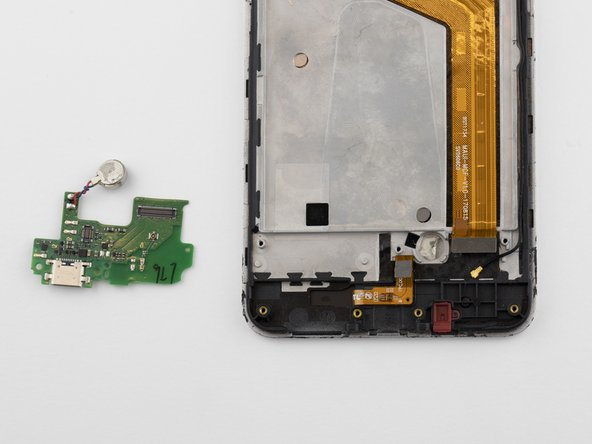
    • Detach the metal casing at the bottom of the phone.

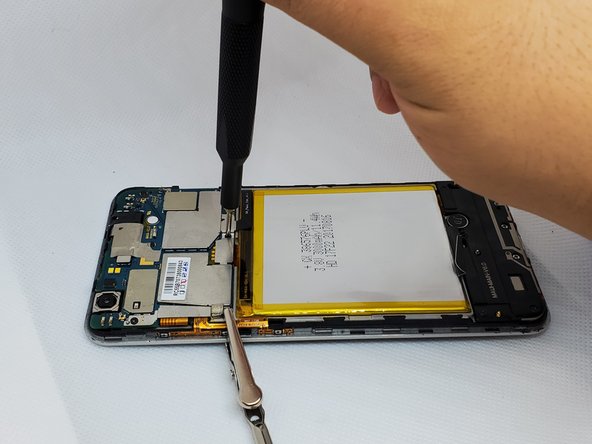
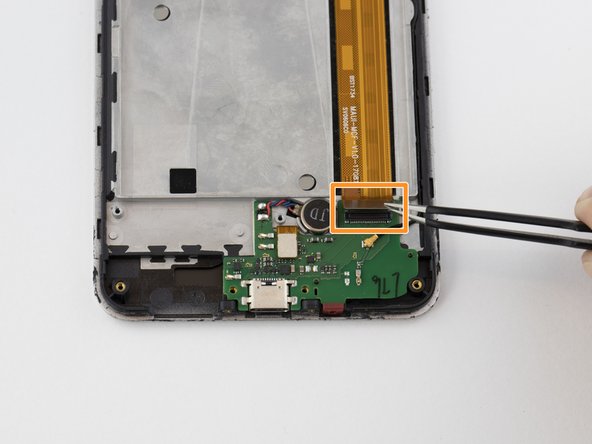
    • Unplug the cable connector.

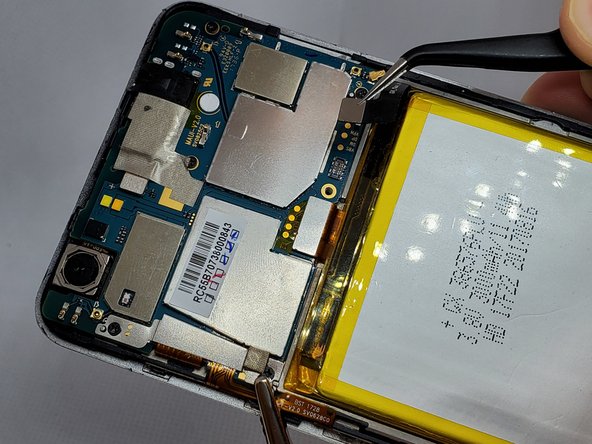
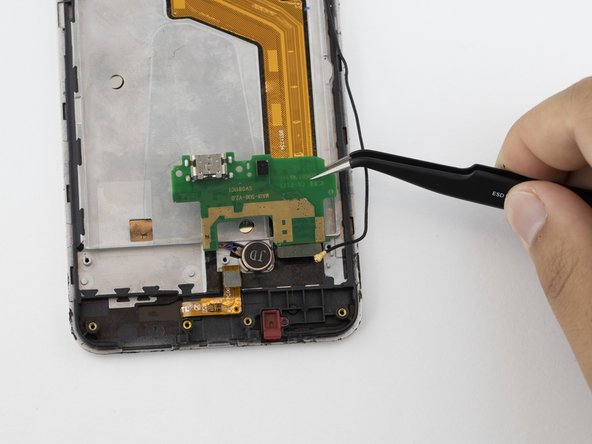
    • Use a pair of angled tweezers to unplug the black wire.

  9. Orbic Wonder Charging Port Circuit Board Replacement: 步骤 9 中的图像 1,3 Orbic Wonder Charging Port Circuit Board Replacement: 步骤 9 中的图像 2,3 Orbic Wonder Charging Port Circuit Board Replacement: 步骤 9 中的图像 3,3
    • Using a pair of angled tweezers, disconnect the connector chip.

    • With the angled tweezers, gently lift (but do not remove) the green circuit board from the phone.

  10. Orbic Wonder Charging Port Circuit Board Replacement: 步骤 10 中的图像 1,2 Orbic Wonder Charging Port Circuit Board Replacement: 步骤 10 中的图像 2,2
    • Using a pair of angled tweezers, disconnect the attachment to the microphone labeled "JD," and completely remove the circuit board.

结论

To reassemble your device, follow these instructions in reverse order.

2等其他人完成本指南。

0条评论

添加评论

浏览统计数据:

过去 24 小时: 1

过去 7 天: 7

过去 30 天: 26

总计 1,173