简介
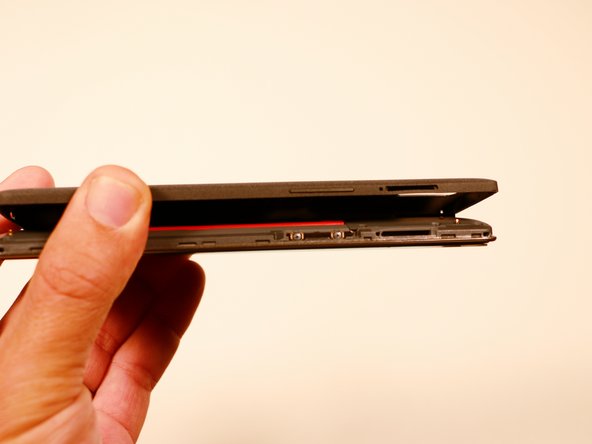
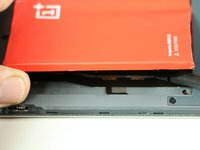
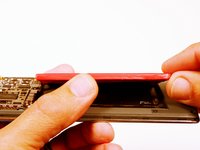
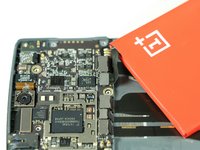
即使在2014年发布之后的几年,一加一也是一款受欢迎的智能手机。然而,这些年来使用后,其内置电池可能会磨损。尽管内置电池并非有意设计为由终端用户所替代,但仍然有可能。替换电池可通过网上商店购买。其中一些甚至保持了一加一电池的原始设计。换电池需要先仔细断开连接到主板的排线。然后你就打开智能手机并卸下主板盖。电池本身没有附在硬盖上。因此,移除它们时需要特别小心。本指南将一步步教导你移除电池的过程,并对可能产生的困难给予有用的建议。在你取出电池之后,你可以通过以相反的顺序执行步骤来换入自己的新电池。
你所需要的
-
-
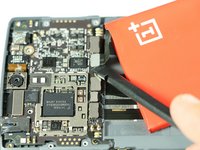
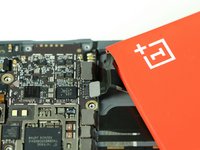
使用镊子,移除塑料塞子。
-
一旦隐藏的螺丝出现了之后,使用 PH #00 螺丝刀移除3个 3.175 mm的螺丝。
-
使用 PH #00 螺丝刀移除剩余的6个3.175 螺丝。
-
-


要重新组装您的设备,请按照本指南的相反顺序进行操作。
201等其他人完成本指南。


团队

USF Tampa, Team 3-3, Brown Fall 2014 USF Tampa, Team 3-3, Brown Fall 2014 的会员
USFT-BROWN-F14S3G3
3 名成员
创作了20篇指南
36指南评论
The Apple iPhone sim ejector is not long enough to work on an OPO. A paper clip is a better option.
There will be a compatible battery with one pin OnePlus
Successfully accomplished, thanks to your clear instructions. One note: the adhesive on my unit was applied in about a quarter inch strip along the right underside of the battery as you view it from the back. Peeling up the left side allowed me to reach and release the adhesive on the opposite side with the spudger or knife blade.
Thank you! I use a slim (but not sharp) butter knife to nudge the battery out slowly by poking the adhesive tape along its length. It was a bit unnerving because I was afraid of damaging the soft battery. Worked out in the end.
One note to add is that the original battery connector's top was glued to the motherboard cover. I had to remove the battery before I could successfully sepearte the 2. My phone is still working and I'm charging it right now! :)
Thanks for the very detailed guide.