跳转到主内容

OnePlus Nord Rear Glass Replacement

你所需要的

  1. OnePlus Nord Rear Glass Replacement, Loosen the rear glass adhesive: 步骤 1 中的图像 1,1
    • Switch off your phone.

    • Heat an iOpener to loosen the adhesive beneath the rear glass. Apply the iOpener for at least two minutes. You might want to repeat this step several times during the rear glass removal.

    • A hair dryer, heat gun, or hot plate may also be used, but be careful not to overheat the phone—the AMOLED display and internal battery are both susceptible to heat damage.

  2. OnePlus Nord Rear Glass Replacement, Create a gap: 步骤 2 中的图像 1,2 OnePlus Nord Rear Glass Replacement, Create a gap: 步骤 2 中的图像 2,2
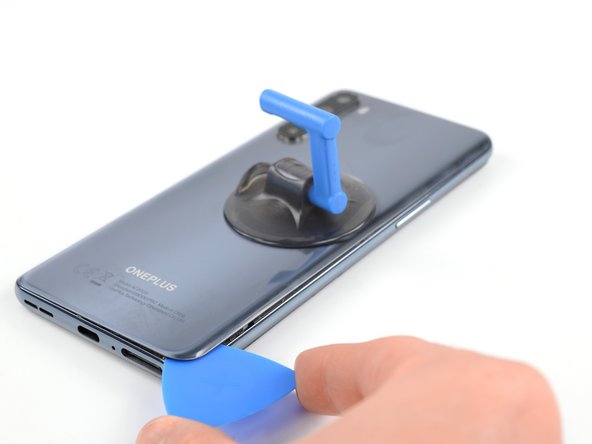
    • Apply a suction cup to the back of the phone, as close as possible to the center of the right edge.

    • Pull on the suction cup to create a gap between the rear glass and the frame.

    • Insert an opening pick into the gap.

  3. OnePlus Nord Rear Glass Replacement, Slice the adhesive: 步骤 3 中的图像 1,2 OnePlus Nord Rear Glass Replacement, Slice the adhesive: 步骤 3 中的图像 2,2
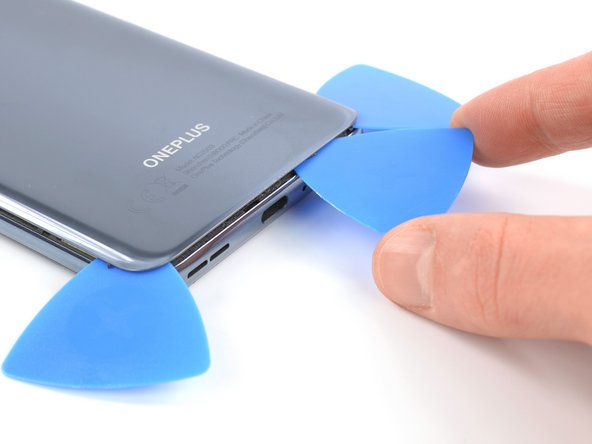
    • Slide the opening pick along the edge to the bottom right corner.

    • Leave the opening pick in its place to prevent the adhesive from resealing.

    • Once you have inserted an opening pick, feel free to remove the suction cup or continue to use it for a better grip during this process.

  4. OnePlus Nord Rear Glass Replacement: 步骤 4 中的图像 1,3 OnePlus Nord Rear Glass Replacement: 步骤 4 中的图像 2,3 OnePlus Nord Rear Glass Replacement: 步骤 4 中的图像 3,3
    • Insert a second opening pick under the bottom right corner.

    • Slide the opening pick along the edge to the top right corner.

    • If you have trouble with cutting, you can use the iOpener again to soften the adhesive.

    • Leave the opening pick in its place to prevent the adhesive from resealing.

  5. OnePlus Nord Rear Glass Replacement: 步骤 5 中的图像 1,3 OnePlus Nord Rear Glass Replacement: 步骤 5 中的图像 2,3 OnePlus Nord Rear Glass Replacement: 步骤 5 中的图像 3,3
    • Insert a third opening pick under the top right corner of the back cover.

    • Slide the tip of the opening pick along the edge of the phone to the top left corner to cut the adhesive.

    • Leave the opening pick in the top left corner to prevent the adhesive from resealing.

  6. OnePlus Nord Rear Glass Replacement: 步骤 6 中的图像 1,3 OnePlus Nord Rear Glass Replacement: 步骤 6 中的图像 2,3 OnePlus Nord Rear Glass Replacement: 步骤 6 中的图像 3,3
    • Insert a fourth opening pick under the top left corner.

    • Slide the opening pick along the edge to the bottom left corner to cut the adhesive.

    • Leave the opening pick in its place to prevent the adhesive from resealing.

  7. OnePlus Nord Rear Glass Replacement: 步骤 7 中的图像 1,2 OnePlus Nord Rear Glass Replacement: 步骤 7 中的图像 2,2
    • Insert a fifth opening pick under the bottom left corner.

    • Slide it along the the edge to the bottom right corner to cut the remaining adhesive.

  8. OnePlus Nord Rear Glass Replacement, Remove the back cover: 步骤 8 中的图像 1,1
    • Remove the back cover.

    • After installing the back cover, apply strong, steady pressure to your phone for several minutes to help the adhesive form a good bond—a stack of heavy books works well.

结论

Secure the new back cover with pre-cut adhesive or double-sided adhesive tape.

To reassemble your device, follow these instructions in reverse order. Apply new adhesive where necessary after cleaning the relevant areas with isopropyl alcohol (>90%).

Repair didn’t go as planned? Try some basic troubleshooting, or ask our Answers community for help.

另外一个人完成了本指南。

Adriana Zwink

于12/18/19注册

48,076 声望

创作了167篇指南

团队

iFixit iFixit 的会员

Staff

135 名成员

创作了16,757篇指南

0条评论

添加评论

浏览统计数据:

过去 24 小时: 2

过去 7 天: 47

过去 30 天: 173

总计 6,225