跳转到主内容

本指南有最近更改,您可查看未经巡查的最新版本

Olympus Stylus 725 SW Lens Replacement

你所需要的

  1. Olympus Stylus 725 SW Lens Replacement, Disassembling Olympus Stylus 725 SW Back Panel: 步骤 1 中的图像 1,3 Olympus Stylus 725 SW Lens Replacement, Disassembling Olympus Stylus 725 SW Back Panel: 步骤 1 中的图像 2,3 Olympus Stylus 725 SW Lens Replacement, Disassembling Olympus Stylus 725 SW Back Panel: 步骤 1 中的图像 3,3
    • Remove the four 3 mm long cover screws at the corners of the camera using a Phillips #00 screwdriver.

    • Remove the 2 mm long screws securing the sides of the camera which holds the back panel using a Phillips #00 screwdriver.

  2. Olympus Stylus 725 SW Lens Replacement: 步骤 2 中的图像 1,2 Olympus Stylus 725 SW Lens Replacement: 步骤 2 中的图像 2,2
    • Be careful when removing the back cover; you will need to detach the connecting ribbons. Use tweezers if necessary.

    • Detach the ribbons using your thumb, sliding them out of their slots.

    • Set the back panel face up to keep the ribbons from touching anything.

  3. Olympus Stylus 725 SW Lens Replacement, Front Panel: 步骤 3 中的图像 1,3 Olympus Stylus 725 SW Lens Replacement, Front Panel: 步骤 3 中的图像 2,3 Olympus Stylus 725 SW Lens Replacement, Front Panel: 步骤 3 中的图像 3,3
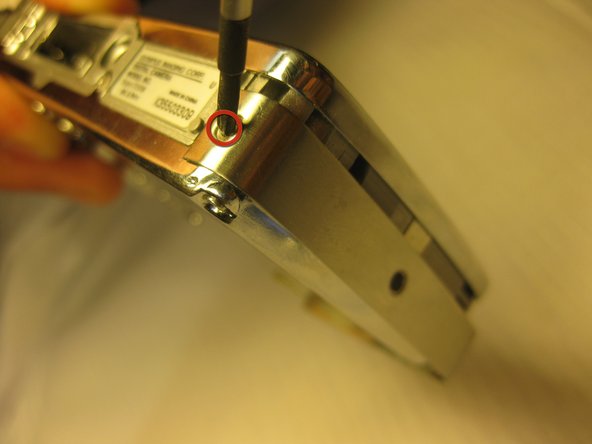
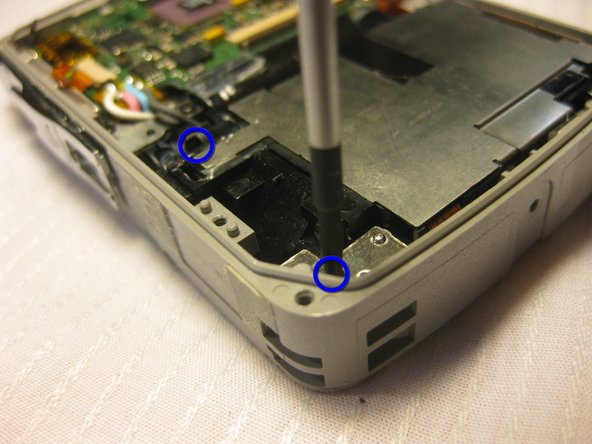
    • Remove the top screws using a 1.5 mm screwdriver.

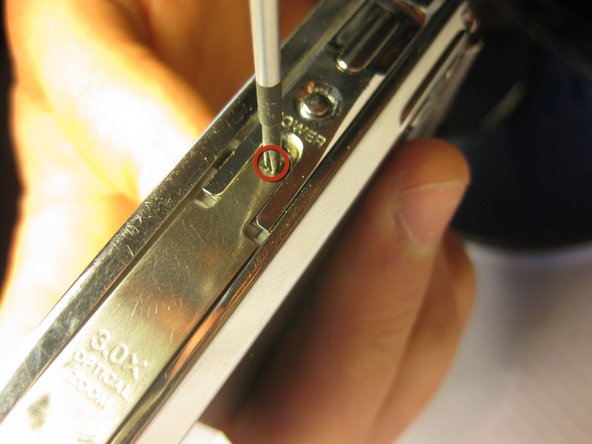
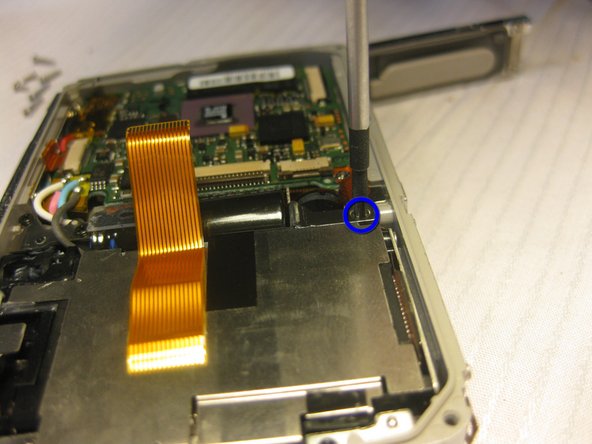
    • Remove the single side screw located on the side of the camera where the tab is, using a #00 screwdriver.

  4. Olympus Stylus 725 SW Lens Replacement, Side Panels: 步骤 4 中的图像 1,3 Olympus Stylus 725 SW Lens Replacement, Side Panels: 步骤 4 中的图像 2,3 Olympus Stylus 725 SW Lens Replacement, Side Panels: 步骤 4 中的图像 3,3
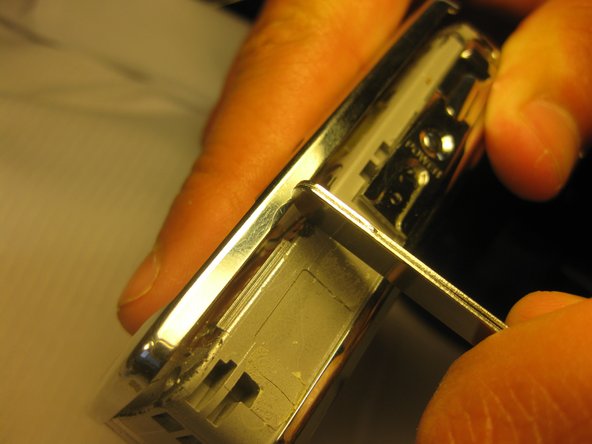
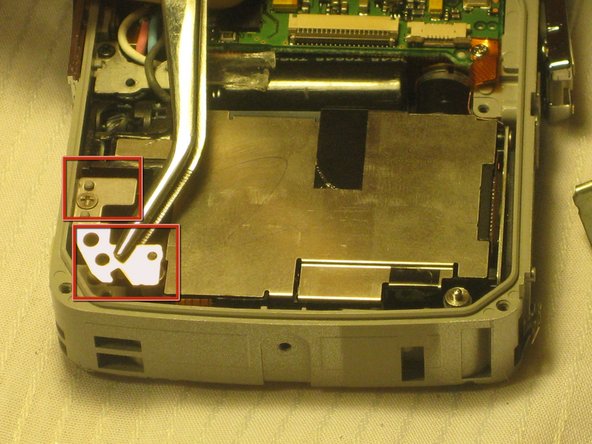
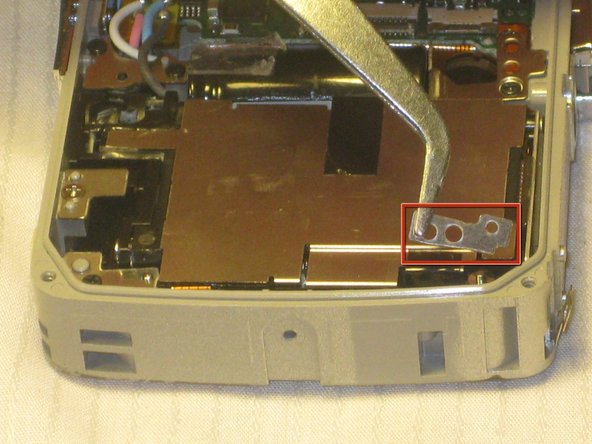
    • Using a #00 Philips Head Screwdriver, remove the screws located on all four sides of the camera.

  5. Olympus Stylus 725 SW Lens Replacement: 步骤 5 中的图像 1,3 Olympus Stylus 725 SW Lens Replacement: 步骤 5 中的图像 2,3 Olympus Stylus 725 SW Lens Replacement: 步骤 5 中的图像 3,3
    • After removing all four of the screws, pry the side covers off of the camera.

  6. Olympus Stylus 725 SW Lens Replacement, Lens: 步骤 6 中的图像 1,3 Olympus Stylus 725 SW Lens Replacement, Lens: 步骤 6 中的图像 2,3 Olympus Stylus 725 SW Lens Replacement, Lens: 步骤 6 中的图像 3,3
    • Unscrew four 2mm long screws using the #00 Phillips screwdriver.

  7. Olympus Stylus 725 SW Lens Replacement: 步骤 7 中的图像 1,3 Olympus Stylus 725 SW Lens Replacement: 步骤 7 中的图像 2,3 Olympus Stylus 725 SW Lens Replacement: 步骤 7 中的图像 3,3
    • Remove four metal tabs from corners where the 2mm long screws were attached using tweezers.

  8. Olympus Stylus 725 SW Lens Replacement: 步骤 8 中的图像 1,2 Olympus Stylus 725 SW Lens Replacement: 步骤 8 中的图像 2,2
    • Remove the viewfinder lens using a prying device.

    • There will be two ribbons attached to the viewfinder. Remove the ribbons by sliding them off the viewfinder with your thumb.

结论

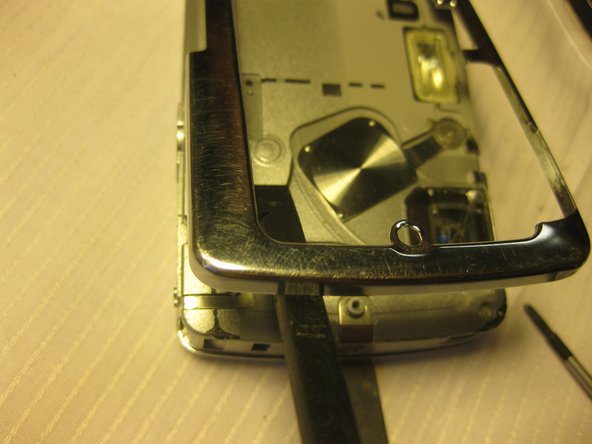
To reassemble your device, follow these instructions in reverse order.

Bobby Hodges

于04/18/10注册

49 声望

创作了6篇指南

团队

Cal Poly, Team 33-71, Johann Spring 2010 Cal Poly, Team 33-71, Johann Spring 2010 的会员

CPSU-JOHANN-S10S33G71

4 名成员

创作了6篇指南

0条评论

添加评论

浏览统计数据:

过去 24 小时: 0

过去 7 天: 0

过去 30 天: 2

总计 4,434