跳转到主内容

本指南有最近更改,您可查看未经巡查的最新版本

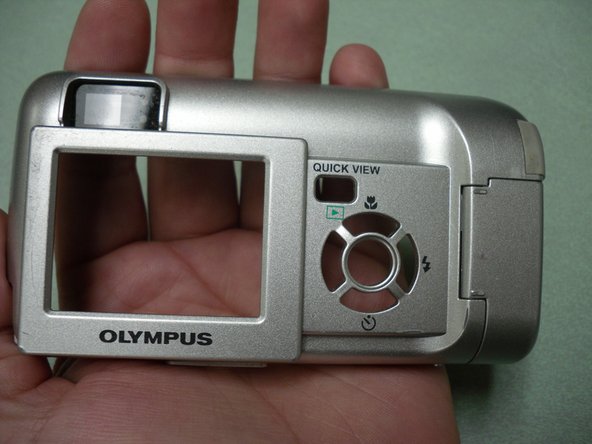
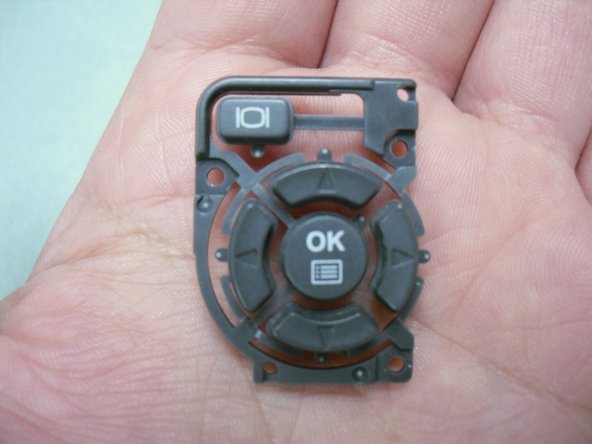
Olympus Camedia D560 Rear Panel Control Buttons Replacement

你所需要的

  1. Olympus Camedia D560 Rear Panel Control Buttons Replacement, Rear Panel Control Buttons: 步骤 1 中的图像 1,2 Olympus Camedia D560 Rear Panel Control Buttons Replacement, Rear Panel Control Buttons: 步骤 1 中的图像 2,2
    • Before disassembling your camera, be sure it is powered off.

    • Remove two screws from the video port located at the side panel of the camera.

    • Remove three screws from the bottom panel of the camera.

  2. Olympus Camedia D560 Rear Panel Control Buttons Replacement: 步骤 2 中的图像 1,2 Olympus Camedia D560 Rear Panel Control Buttons Replacement: 步骤 2 中的图像 2,2
    • Open the USB port cover, and remove three screws from inside.

    • Next, open the memory slot cover and remove the screw.

  3. Olympus Camedia D560 Rear Panel Control Buttons Replacement: 步骤 3 中的图像 1,3 Olympus Camedia D560 Rear Panel Control Buttons Replacement: 步骤 3 中的图像 2,3 Olympus Camedia D560 Rear Panel Control Buttons Replacement: 步骤 3 中的图像 3,3
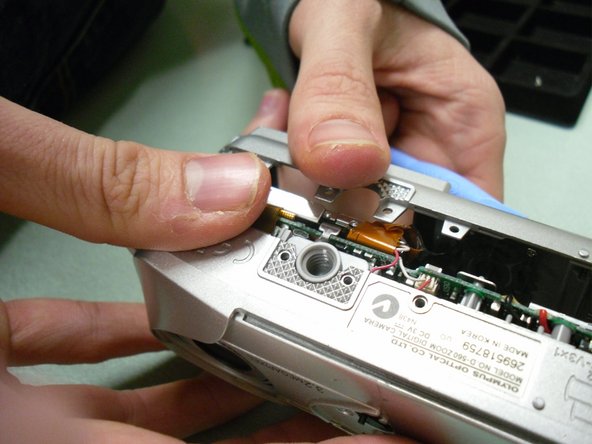
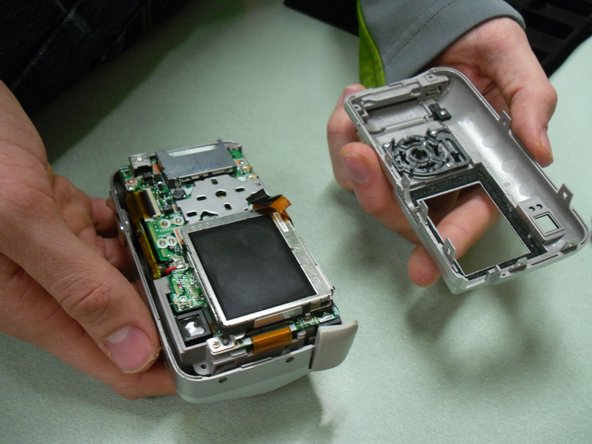
    • Use the blue opening tool to loosen and separate the back cover from the camera.

  4. Olympus Camedia D560 Rear Panel Control Buttons Replacement: 步骤 4 中的图像 1,3 Olympus Camedia D560 Rear Panel Control Buttons Replacement: 步骤 4 中的图像 2,3 Olympus Camedia D560 Rear Panel Control Buttons Replacement: 步骤 4 中的图像 3,3
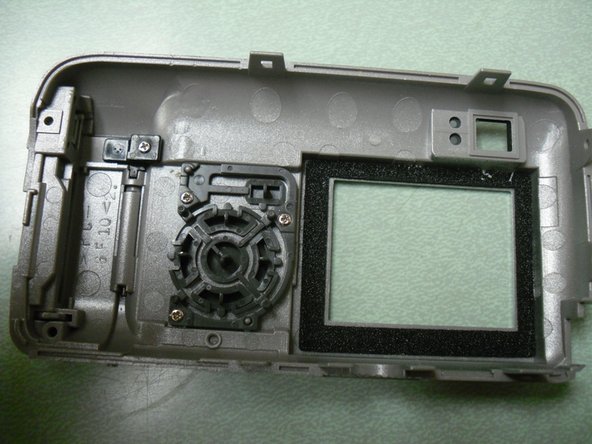
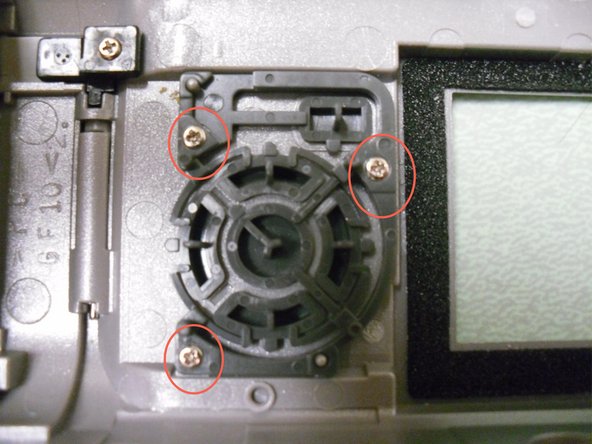
    • Locate and unscrew the three screws inside the back cover body (picture 3) .

    • Remove button pad assembly from the back cover.

  5. Olympus Camedia D560 Rear Panel Control Buttons Replacement: 步骤 5 中的图像 1,3 Olympus Camedia D560 Rear Panel Control Buttons Replacement: 步骤 5 中的图像 2,3 Olympus Camedia D560 Rear Panel Control Buttons Replacement: 步骤 5 中的图像 3,3
    • The button assembly is now separate from the back cover.

    • Inspect for broken areas. Replace or clean the button parts.

结论

To reassemble your device, follow these instructions in reverse order.

另外一个人完成了本指南。

团队

0条评论

添加评论

浏览统计数据:

过去 24 小时: 1

过去 7 天: 4

过去 30 天: 7

总计 1,015