简介
有关连接器的信息,请查阅 Recognizing & Disconnecting Cable Connectors (RDCC) guide 。
有关分步维修指南,请访问此处.。
你所需要的
-
-
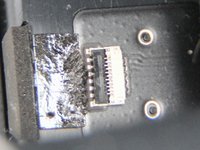
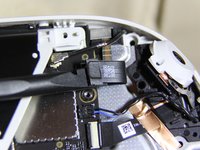
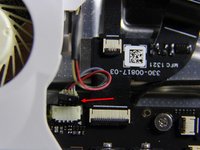
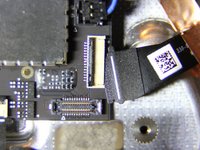
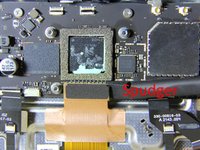
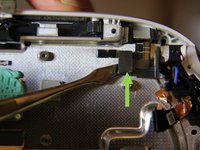
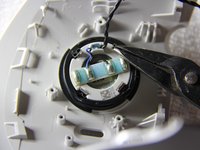
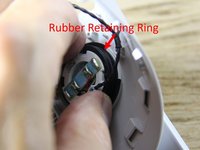
排线(图1 Ribbon)通过ZIF接口连接并通过胶块(图1 Adhesive)粘附到头显上。请参考认识和断开线缆连接头指南 步骤1来了解ZIF接口。
-
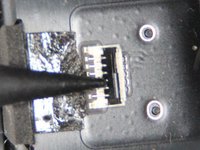
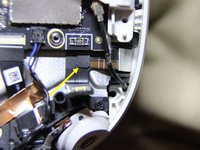
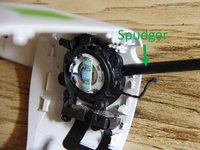
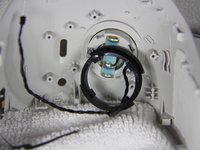
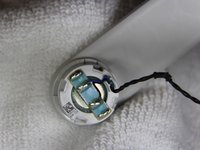
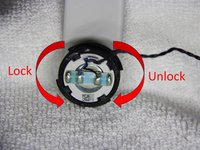
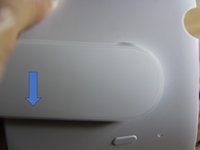
使用撬棒的尖端翻起锁定挡板(图1 Locking Flap)以断开排线。请参阅图2和3了解挡板的操作方式。
-
-
在这个步骤中使用的工具:Tweezers$4.99
-
拔下侧面的 WiFi 天线。 请参照认识和断开线缆连接头 步骤5。要断开电缆连接,可将防静电的撬刀或 镊子 插到连接器的金属颈下,然后从电路板上直接向上提起。
-
拆除单个 4.4mm P000螺丝。
-
拆除两个2.3mm P000螺丝。
-
-
-
拆除两个4.8mm P000螺丝。
-
拆除四个4.8mm P000螺丝。
-
拆除两个10.7mm P000螺丝。
-
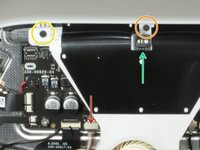
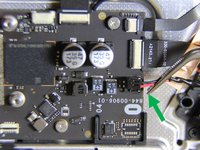
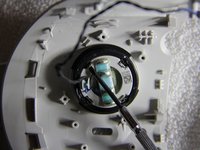
箭头指向蓝牙天线,请参照认识和断开线缆连接头 步骤5断开其连接。如图2所示,插入薄的防静电的撬刀或镊子到金属颈下后将接头从主板上直接撬开。
-
如图3所示,将天线拆除。
-
-
-
-
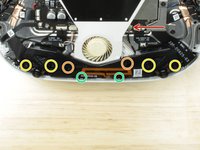
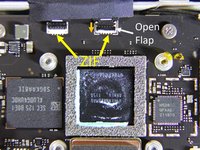
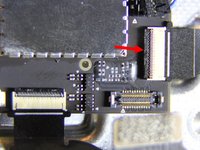
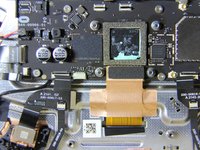
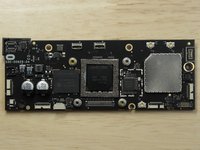
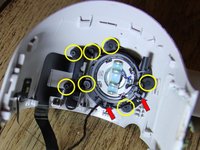
主板顶部附近有两个ZIF接口。如图1所示右侧的ZIF锁定片已经打开(图1所示Open Flap)。ZIF锁定片可以通过向下推(沿橙色箭头所示的方向)来打开。
-
卸下所有ZIF接头来断开排线。这些排线导向前部LED、IPD传感器和距离传感器。
-
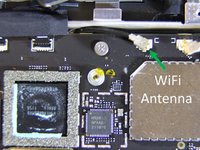
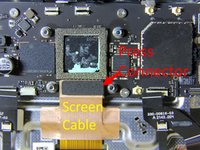
断开WiFi天线接头。请参照认识和断开线缆连接头 步骤5。要断开连接,应插入薄的防静电的撬刀或镊子到金属颈下后将接头从主板上直接撬开。
-
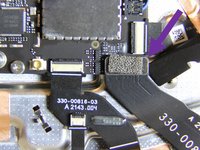
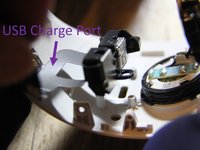
断开导向USB Type-C接口和耳机孔的排线。请参照认识和断开线缆连接头 步骤4用撬棒将压接式接口直接撬开。
-
-
-
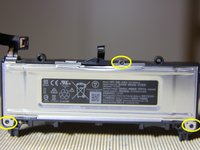
卸下四颗 P000 螺丝
-
解开侧面的 WiFi 天线。
-
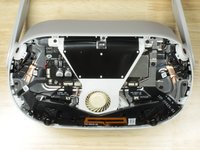
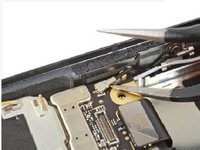
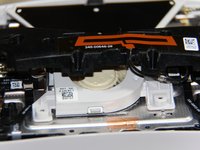
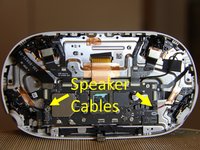
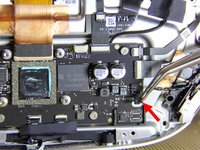
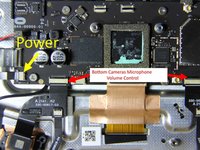
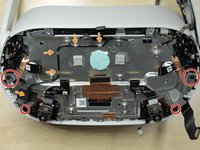
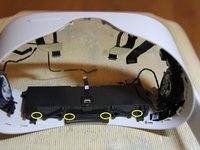
电池通过图示的排线来向中框部分供电。排线底部有一个金属垫用胶水粘在中框上。将排线接口底部的金属垫从中框上取下。
-
-
-
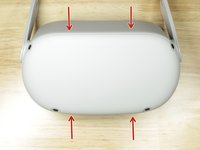
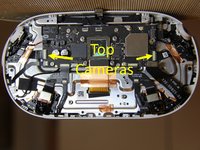
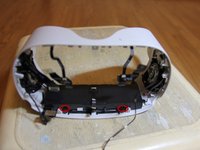
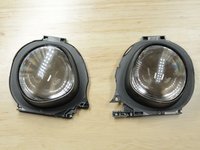
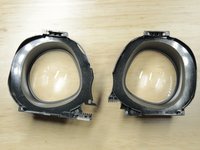
拆解靠近开关键的侧臂时,你必须将手穿过头显上通常是朝向你脸的那一部分来抓住挡圈。然后,朝着如图二的方向将侧臂推出。
-
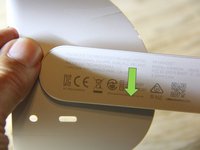
拆解靠近 USB 接口的侧臂时,你必须将手穿过头显的前部来抓住挡圈。然后,朝着如图三的方向将侧臂推出。
-


138等其他人完成本指南。


88指南评论
Thank you so much to me for making this guide. Helped me a lot!
It is worth emphasizing that this device has 2! WIFI antennas.
Anyone who wants to disconnect WIFI from their device must disconnect both.
Their connection to the motherboard, is right next to each other, but the right connection is immediately revealed while the left connection next to it is hidden under the black cover and requires a number of additional disassembly steps.
Alternatively, anyone who wants to disconnect WIFI from their device can disconnect the wires in the area where they connect to the antenna stickers on the right and left sides of the eyepieces of the glasses, thus saving all the disassembly of the front cover.
Thanks!! this really helped me, I have already customized mine with an official custom filter, but this will add an additional layer of Kashrus.
If you just need to replace a camera… it’s 14 screws. You need a T2 and a PH0 (not a P0…) Pretty easy once you get the front cover off and not covered here. It’s pretty easy to see what you do once you get in there though. Good luck!
Chris Madson - 回复 分享
Bravo pour ces informations. Un grand merci