跳转到主内容

Nvidia Shield Display Assembly Replacement

你所需要的

  1. Nvidia Shield Display Assembly Replacement, Remove Front Panel: 步骤 1 中的图像 1,3 Nvidia Shield Display Assembly Replacement, Remove Front Panel: 步骤 1 中的图像 2,3 Nvidia Shield Display Assembly Replacement, Remove Front Panel: 步骤 1 中的图像 3,3
    • Remove the seven 6.4mm T5 Torx screws from the back panel.

    • Use the spudger to separate the front and back panels.

    For the rubber screw covers, it is easiest to push at them at the top, otherwise you have the possibility of damaging the surrounding rubber.

    Any hints at getting the center plastic screw cover out?

    Miles Raymond - 回复

  2. Nvidia Shield Display Assembly Replacement, Remove Green Grill: 步骤 2 中的图像 1,2 Nvidia Shield Display Assembly Replacement, Remove Green Grill: 步骤 2 中的图像 2,2
    • The green grill is not screwed in so it can be pulled right out.

  3. Nvidia Shield Display Assembly Replacement, Remove Battery Cables: 步骤 3 中的图像 1,3 Nvidia Shield Display Assembly Replacement, Remove Battery Cables: 步骤 3 中的图像 2,3 Nvidia Shield Display Assembly Replacement, Remove Battery Cables: 步骤 3 中的图像 3,3
    • Remove the six 6.5mm T5 Torx screws.

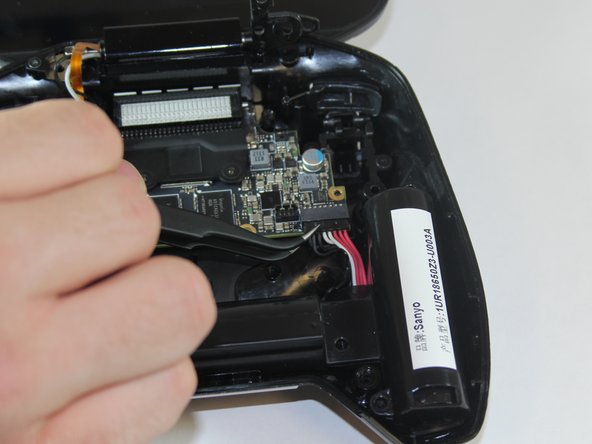
    • Disconnect the power wires.

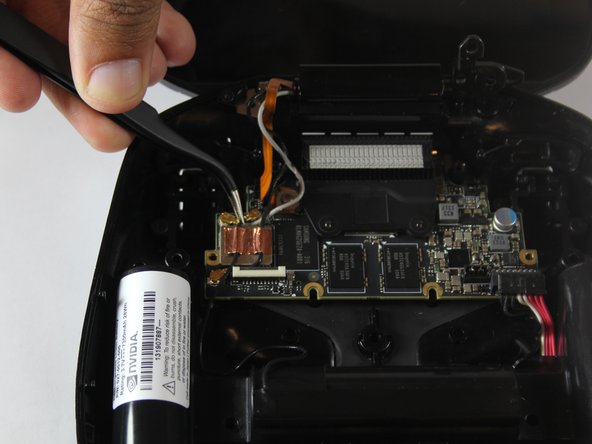
    • Peel back the copper tape and disconnect the black and white wires.

  4. Nvidia Shield Display Assembly Replacement, Remove Battery Apparatus: 步骤 4 中的图像 1,1
    • Pull the battery apparatus out once all cables are removed.

  5. Nvidia Shield Display Assembly Replacement, Removing Fan: 步骤 5 中的图像 1,3 Nvidia Shield Display Assembly Replacement, Removing Fan: 步骤 5 中的图像 2,3 Nvidia Shield Display Assembly Replacement, Removing Fan: 步骤 5 中的图像 3,3
    • Cooling is important for electronics, the last thing they want is to overheat.

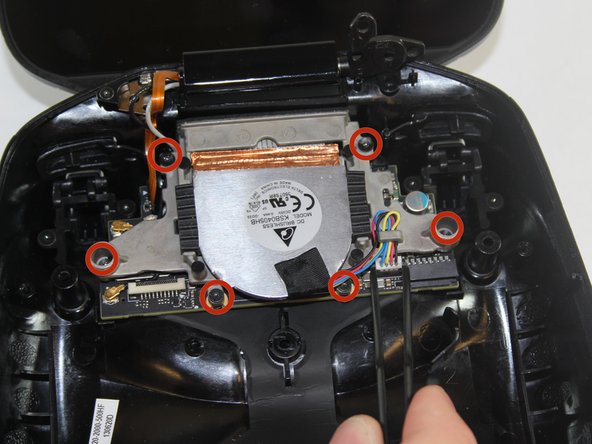
    • Remove the two 7.3mm and four 8.4mm T5 Torx screws and disconnect the power cable.

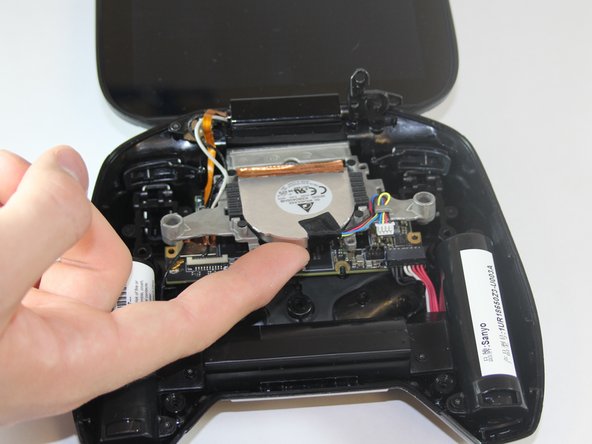
    • Lift the fan free after the screws and cable are removed.

  6. Nvidia Shield Display Assembly Replacement, Disconnecting from logic board: 步骤 6 中的图像 1,1
    • On the left side from where the display is attached to the back panel there is one 3.8mm T5 Torx screw that needs to be removed.

    • Once removed, the display should be able to be detached.

    There is also a screw holding down the ribbon cable to the main board. which needs to be removed prior to display assembly removal.

    Miles Raymond - 回复

    Any one know size of screw holding down ribbon cable?

    tgl030 - 回复

结论

To reassemble your device, follow these instructions in reverse order.

5等其他人完成本指南。

Noel Fletcher

于09/22/14注册

116 声望

撰写一个指南

团队

USF Tampa, Team 1-1, Hickman Fall 2014 USF Tampa, Team 1-1, Hickman Fall 2014 的会员

USFT-HICKMAN-F14S1G1

4 名成员

创作了18篇指南

一条评论

Where can o get a replacement screen

jorge valenzuela - 回复

添加评论

浏览统计数据:

过去 24 小时: 1

过去 7 天: 3

过去 30 天: 20

总计 6,425