跳转到主内容

Nokia XL Dual Sim Front Camera Replacement

你所需要的

  1. Nokia XL Dual Sim Front Camera Replacement, Back Cover Removal: 步骤 1 中的图像 1,1
    • You will first need to separate the back cover from the device.

    • Gently pry open each side of the device at the indicated locations. It is best to use a plastic opening tool or similar tool.

  2. Nokia XL Dual Sim Front Camera Replacement, Battery Removal: 步骤 2 中的图像 1,2 Nokia XL Dual Sim Front Camera Replacement, Battery Removal: 步骤 2 中的图像 2,2
    • Remove the back cover.

    • Use a plastic opening tool to lift the battery. Then, remove it.

  3. Nokia XL Dual Sim Front Camera Replacement, Screen Separation part 1: 步骤 3 中的图像 1,2 Nokia XL Dual Sim Front Camera Replacement, Screen Separation part 1: 步骤 3 中的图像 2,2
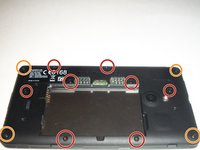
    • To access the inner components of the device, remove the various screws. Keep them separate, and organize them by size.

    • You will need a T5 Precision Torx screw driver to remove the screws.

    • The locations of the T5x3.4mm screws are indicated in the picture.

    • The locations of the T5x4.1mm screws are indicated in the picture.

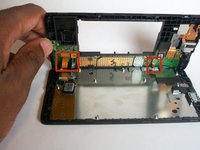
  4. Nokia XL Dual Sim Front Camera Replacement, Screen Separation part 2: 步骤 4 中的图像 1,3 Nokia XL Dual Sim Front Camera Replacement, Screen Separation part 2: 步骤 4 中的图像 2,3 Nokia XL Dual Sim Front Camera Replacement, Screen Separation part 2: 步骤 4 中的图像 3,3
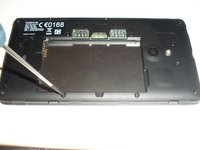
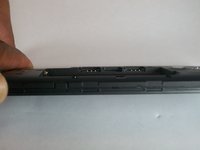
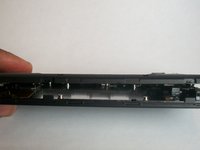
    • Use the plastic opening tool to gently pry the device apart.

    • There are flaps on both sides of the phone as indicated in the picture. This is what you will need to pry apart.

    • Please be cautious when opening the device. There are various connectors inside the device that must be handled with care.

  5. Nokia XL Dual Sim Front Camera Replacement, System components: 步骤 5 中的图像 1,1
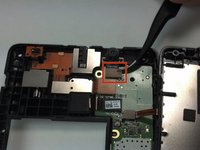
    • Once the device is open, take note of all the components.

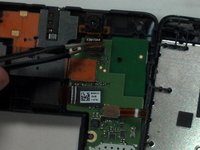
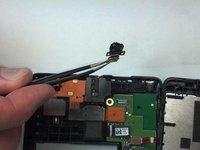
  6. Nokia XL Dual Sim Front Camera Replacement, Camera Removal: 步骤 6 中的图像 1,3 Nokia XL Dual Sim Front Camera Replacement, Camera Removal: 步骤 6 中的图像 2,3 Nokia XL Dual Sim Front Camera Replacement, Camera Removal: 步骤 6 中的图像 3,3
    • With Tweezers, gently unsnap the front camera motherboard connector.

    • The front camera component can now be gently removed.

结论

To reassemble your device, follow these instructions in reverse order.

6等其他人完成本指南。

Shadeed Bilal

于09/25/14注册

231 声望

创作了4篇指南

团队

USF Tampa, Team 1-4, Brown Fall 2014 USF Tampa, Team 1-4, Brown Fall 2014 的会员

USFT-BROWN-F14S1G4

3 名成员

创作了7篇指南

一条评论

merci 1000 fois pour ce cite

zmohye - 回复

添加评论

浏览统计数据:

过去 24 小时: 0

过去 7 天: 1

过去 30 天: 2

总计 1,043