跳转到主内容
加入维修社区 - 创建账户

Nintendo Wii U Fan Replacement

浏览量: 2.7万

浏览统计数据:

过去24小时
8
过去 7 天:
78
过去 30 天:
312
总计
27,390
评论: 10

2 comments on steps, 8 guide comments.

Go to guide comments
已完成: 42

42 人已将本指南标记为“已完成”。你会是下一个完成的人吗?

收藏: 8

8 人已收藏(并订阅)本指南。你会是下一个吗?

所需时间: 15 - 30 分钟
难度: 中等
社区贡献指南

我们社区的一个非常棒的成员制作了本指南。它不是由 iFixit 工作人员创建的。

Nintendo Wii U Fan Replacement

The fan is one of the most essential parts in a device such as a computer or game console. The fan helps keep the CPU, GPU, and other vital parts cool. Without a fan your device might overheat and fry. This guide will help you replace the important fan in your Wii U.

你所需要的

配件

工具

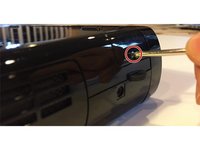
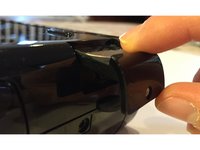
    1. Nintendo Wii U Fan Replacement, Remove Stickers Covering Screws: 步骤 1 中的图像 1,1
      在这个步骤中使用的工具:
      Tweezers
      $4.99
      • Using a flathead screwdriver, spudger, or tweezers, remove the stickers covering the screws on the bottom of the Wii U and on the side of the Wii U.

      • Do not try to use your fingernails. It would only hurt.

      询问修复机器人

      添加评论

    2. Nintendo Wii U Fan Replacement, Unscrew All of the Screws on the Back of the Wii U: 步骤 2 中的图像 1,3 Nintendo Wii U Fan Replacement, Unscrew All of the Screws on the Back of the Wii U: 步骤 2 中的图像 2,3 Nintendo Wii U Fan Replacement, Unscrew All of the Screws on the Back of the Wii U: 步骤 2 中的图像 3,3
      • Remove three Phillips screws with a Phillips #00 screwdriver.

      • Remove three Tri-Wing screws with a Y1 Tri-Wing screwdriver.

      添加评论

    3. Nintendo Wii U Fan Replacement, Remove the Battery: 步骤 3 中的图像 1,2 Nintendo Wii U Fan Replacement, Remove the Battery: 步骤 3 中的图像 2,2
      • To remove the battery, unscrew the screw holding it in place with a Phillips #00 screwdriver.

      • Then pull the battery free.

      • Once you reassemble the Wii U, you might need to set the date and time.

      询问修复机器人

      添加评论

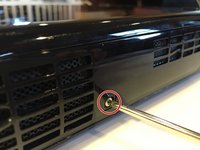
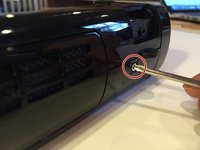
    4. Nintendo Wii U Fan Replacement, Unscrew the Screws on the Side of the Wii U: 步骤 4 中的图像 1,2 Nintendo Wii U Fan Replacement, Unscrew the Screws on the Side of the Wii U: 步骤 4 中的图像 2,2
      • Unscrew the two screws on the side of the Wii U near the air vents with a Phillips #00 screwdriver.

      • EDIT 9/26/16: There are stickers covering these screws too. Remove them.

      添加评论

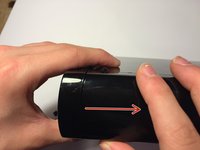
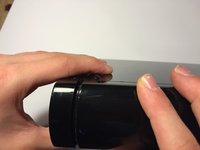
    5. Nintendo Wii U Fan Replacement, Pull off the Side Cover: 步骤 5 中的图像 1,3 Nintendo Wii U Fan Replacement, Pull off the Side Cover: 步骤 5 中的图像 2,3 Nintendo Wii U Fan Replacement, Pull off the Side Cover: 步骤 5 中的图像 3,3
      • Slide the side cover to your right.

      • Lift the side cover off.

      询问修复机器人

      添加评论

    6. Nintendo Wii U Fan Replacement, Unscrew the Screws Under the Side Cover: 步骤 6 中的图像 1,1
      • Remove three Tri-Wing screws with a Y1 Tri-Wing screwdriver.

      询问修复机器人

      添加评论

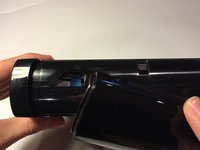
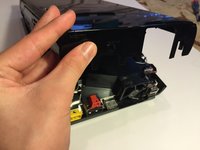
    7. Nintendo Wii U Fan Replacement, Removing the Top Cover: 步骤 7 中的图像 1,3 Nintendo Wii U Fan Replacement, Removing the Top Cover: 步骤 7 中的图像 2,3 Nintendo Wii U Fan Replacement, Removing the Top Cover: 步骤 7 中的图像 3,3
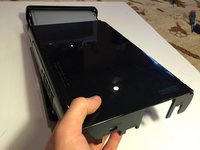
      • Lift the top cover.

      • Pull the top cover towards you.

      • Do not lift the top cover up all the way at first! Make sure to pull it towards you (shown in picture #2 and the video on the next step), then lift it up all the way. If you don't remove the top cover this way, U may damage your U. ):

      询问修复机器人

      添加评论

      • Video of removing the top cover.

      询问修复机器人

      添加评论

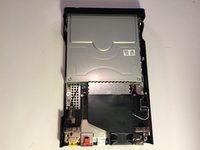
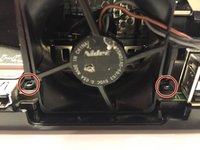
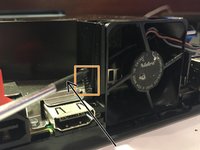
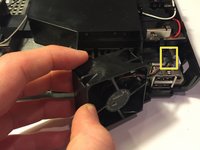
    8. Nintendo Wii U Fan Replacement, Removing the Fan: 步骤 9 中的图像 1,3 Nintendo Wii U Fan Replacement, Removing the Fan: 步骤 9 中的图像 2,3 Nintendo Wii U Fan Replacement, Removing the Fan: 步骤 9 中的图像 3,3
      • Remove the two Phillips screws securing the fan in place with a Phillips #00 screwdriver.

      • Use a magnet or a magnetic screwdriver to lift up the screws once they're fully loosened, as seen in the second picture.

      • Screwdrivers with a black tip usually mean that they're magnetic, as shown with the black arrow in the second picture.

      • Remove the fan from its socket.

      • Set the fan's wires free from under the clamp (see the yellow box on picture #3).

      询问修复机器人

      添加评论

      • Unplug the fan's power cable by tugging on its wires.

      • Do not tug the fan.

      • Do not tug the wires from too far or else the wires/power connector may break.

      询问修复机器人

      添加评论

结论

Congrats if you've made it this far! Click the button below if you successfully replaced your fan! To reassemble your Wii U, follow these instructions in reverse order. Note that you will not be able to put the stickers back on that were covering the screws on the bottom cover of the Wii U — well, who really cares about a sticker covering a screw!?

Thank you all for viewing this guide. Keep on fixing!

取消:我没有完成这个指南。

42等其他人完成本指南。

作者

与

Reid Fleishman

于02/12/16注册

1,666 声望

撰写一个指南

8指南评论

Is it red = +5V, black = GND, grey = ¿PWM? - can't find original fan to buy [don't want to order from overseas] so trying to go with a 40mm 5V replacement, reusing the original connector.

facebook - 回复 分享

No that doesn't seem right. If someone knows the pinout with some certainty, please do tell.

facebook - 回复 分享

Here’s the fan pinout if someone’s going to splice in a new 40mm fan while reusing the original connector:

Black - Ground

Red - RPM signal

Grey - +5V

Ran across the pinout while splicing in a new 40mm fan because the original broke

Yevgney Sliosarenko - 回复 分享

so, has anyone had any luck with replacing the stock fan with a noctua fan? I’m gonna try it myself and see if its any quieter since the stock fan is really loud

Joshua Bishell - 回复 分享

No luck for me with Noctua fan unfortunately. But I suspect some defect with the WiiU itself. All fans always run at full blast for me. Tried Noctua, and Aliexpress replacement part which looks like original also same color wires.

facebook - 回复 分享

添加评论

浏览统计数据:

过去 24 小时: 8

过去 7 天: 78

过去 30 天: 312

总计 27,390