简介
Use this guide to replace the buckle lock in a Nintendo Switch Joy-Con with a metal one, or a new plastic one.
There are a few minor differences between the left and right Joy-Cons, but none that will affect the procedure. These steps apply to both Joy-Cons.
你所需要的
-
-
Use a Tri-point Y00 driver to remove the four 6.3 mm-long screws from the back panel of the Joy-Con.
-
-
-
Insert an opening pick into the seam at the bottom edge of the controller (opposite the L and ZL buttons).
-
Slowly slide the flat edge of your opening pick up the side of the Joy-Con.
-
-
-
With the charging rail facing away from you, open the the Joy-Con like a book.
-
-
-
-
Use a Phillips #00 driver to remove the 2.5 mm screw securing the charging rail.
-
-
-
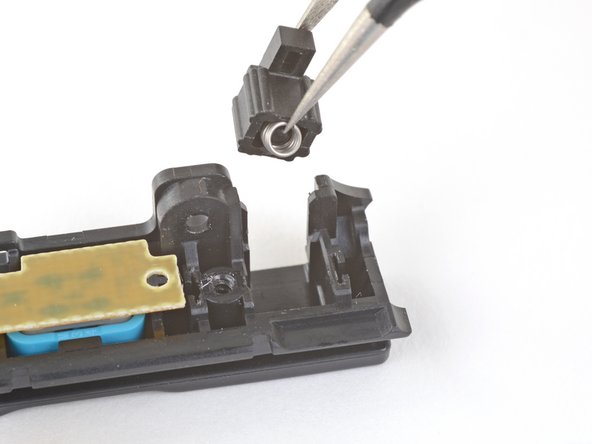
Use a Phillips #00 driver to remove the screw securing the buckle lock retaining bracket.
-
-
-
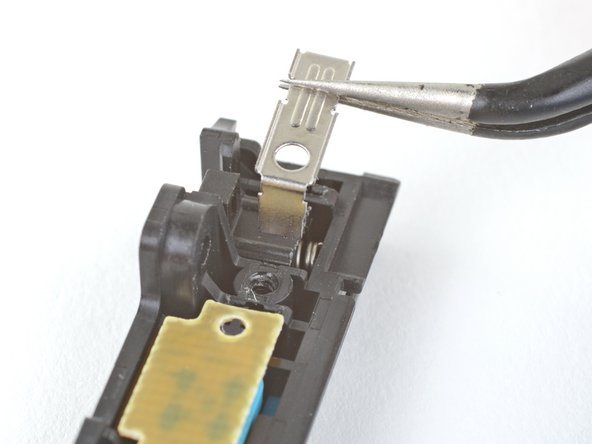
Lift the buckle lock slightly out of its slot in the charging rail, just until the spring is exposed enough that you can grab it with tweezers.
-
Grab the buckle lock such that the tweezers are around both sides of the lock and holding the spring inside the lock.
-
Pull the buckle lock out of its slot in the charging rail.
-


To reassemble your device, follow the above steps in reverse order.
Take your e-waste to an R2 or e-Stewards certified recycler.
Repair didn’t go as planned? Check out our Answers community for troubleshooting help.
To reassemble your device, follow the above steps in reverse order.
Take your e-waste to an R2 or e-Stewards certified recycler.
Repair didn’t go as planned? Check out our Answers community for troubleshooting help.
112等其他人完成本指南。

34条评论
I tried to do this carefully, but I ended up removing the side rail ribbon cables and I had to disassemble the whole thing just to try to get to the inside of these babies. However it seems I messed up, and now I could use some help here. I don't want to lose my left Joy-Con.
It seems rather strange.. Its pretty easy to reattach. All I have is a $@$*!& ph00 + y00 that stripped the screws so I broke the cover. Technically not my fault. I have done multiple reshells.
I tryed to do this but the 2nd at the bottom would not come out now my buckle is chiped
You mean the screws? Break off the shell! A perfect opportunity to put some clear ones :))
I bought this kit of replacement metal buckles, and they work beautifully: https://www.amazon.com/gp/product/B07BDH...
This kit comes with four buckles, two for the left Joy Con, and two for the right. If you happen to have two sets (or plan to get a second set) of Joy Cons, a whopping $9.00 will set you up right.
I did have a bit of trouble replacing the metal cover that holds the buckle in place, but that was my own stupidity as I was trying to do this repair with insufficient light. Once I shed some light on the subject and I could see what I was doing, everything went back together smooth as silk. I replaced the buckles on both of my Joy Cons, and they’re both rock solid now.