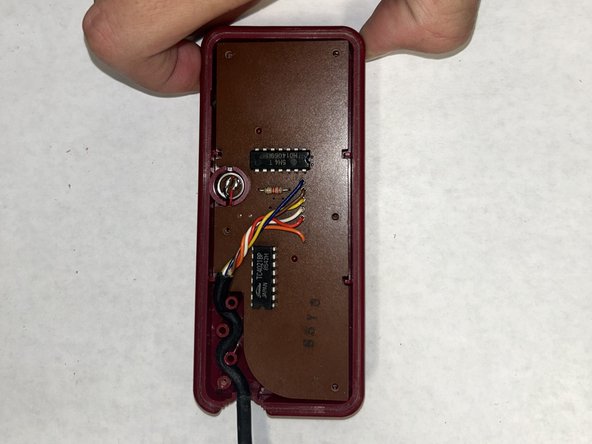
跳转到主内容

Nintendo Family Computer (Famicom) Controller Motherboard Replacement

你所需要的

  1. Nintendo Family Computer (Famicom) Controller Motherboard Replacement, Controller Motherboard: 步骤 1 中的图像 1,2 Nintendo Family Computer (Famicom) Controller Motherboard Replacement, Controller Motherboard: 步骤 1 中的图像 2,2
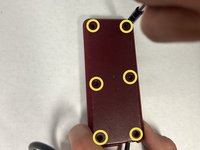
    • Use a Phillips screwdriver to remove the six 13.5 mm screws that secure the lower case.

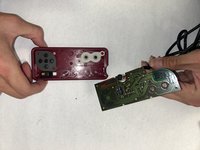
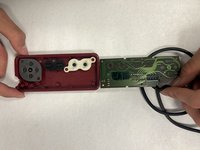
    • Remove the lower case.

  2. Nintendo Family Computer (Famicom) Controller Motherboard Replacement: 步骤 2 中的图像 1,2 Nintendo Family Computer (Famicom) Controller Motherboard Replacement: 步骤 2 中的图像 2,2
    • Carefully disconnect the faulty controller's connector from the motherboard port.

    • Pull only on the connector; do not pull on the wires. The connector can be quite strenuous to remove. A pry tool or pliers may be helpful to disconnect the connector.

  3. Nintendo Family Computer (Famicom) Controller Motherboard Replacement: 步骤 3 中的图像 1,2 Nintendo Family Computer (Famicom) Controller Motherboard Replacement: 步骤 3 中的图像 2,2
    • Use a Phillips screwdriver to remove the six 9.3 mm screws from the back side of the controller.

    • Remove the back cover of the controller.

  4. Nintendo Family Computer (Famicom) Controller Motherboard Replacement: 步骤 4 中的图像 1,2 Nintendo Family Computer (Famicom) Controller Motherboard Replacement: 步骤 4 中的图像 2,2
    • Remove the controller motherboard, noting its orientation.

    • The Player 1 and Player 2 controller motherboards are not identical and differ from one another.

结论

To reassemble your device, follow these instructions in reverse order.

Trenton Saint

于04/02/24注册

109 声望

撰写一个指南

团队

IUPUI, Team 2-2, Harley Spring 2024 IUPUI, Team 2-2, Harley Spring 2024 的会员

IUPUI-HARLEY-S24S2G2

4 名成员

创作了3篇指南

0条评论

添加评论

浏览统计数据:

过去 24 小时: 3

过去 7 天: 15

过去 30 天: 16

总计 58