当前版本的文档还未经巡查,您可以查看最新的已查核版本。
这个步骤还没有翻译 帮忙翻译一下
Use a push pin to remove the four plastic screw covers on the front bezel.
Remove four Phillips screws securing the front bezel to the rear bezel.
Using two hands, gently slide the rear bezel upwards.
The rear bezel will move only about 2 mm.
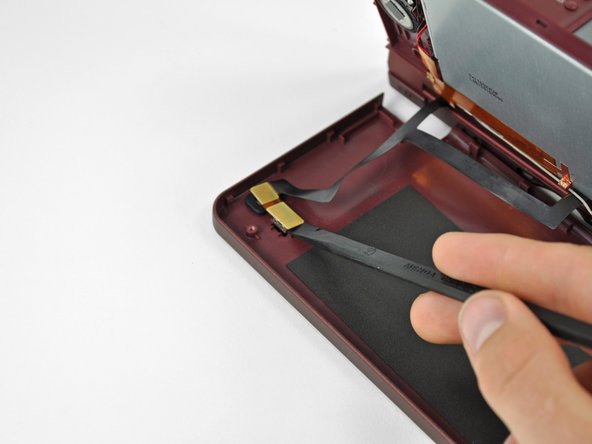
Insert a spudger into the gap between the front and rear bezel
Rotate the spudger away from the DSi XL, prying the two bezels apart.
In the same manner as described above, continue prying along the top edge of the front and rear bezels.
Separate the rear bezel from the front bezel.
Do not attempt to completely remove the rear bezel yet. It is still attached to the front bezel by the rear-facing camera.
Use the flat end of a spudger to pry the rear camera off the rear bezel.
Remove the rear bezel.
取消:我没有完成这个指南。
3等其他人完成本指南。
与3其他贡献者
于01/05/10注册
39,500 声望
创作了67篇指南
徽章: 47
+ 44更多徽章
选择一个尺寸并复制下面的代码,将本指南作为一个小插件嵌入到你的网站/论坛中。
过去 24 小时: 1
过去 7 天: 9
过去 30 天: 29
总计 5,075