跳转到主内容
加入维修社区 - 创建账户

Nintendo DS Main Circuit Board Replacement

你所需要的

    1. Nintendo DS Main Circuit Board Replacement, Battery: 步骤 1 中的图像 1,3 Nintendo DS Main Circuit Board Replacement, Battery: 步骤 1 中的图像 2,3 Nintendo DS Main Circuit Board Replacement, Battery: 步骤 1 中的图像 3,3
      • Remove the cartridge from the console.

      • Use a Phillips #00 Screwdriver to remove the screw securing the battery door to the rear case.

      • Remove the battery door.

      • In the images, it shows that the fixer is using a flathead screwdriver. This flathead screwdriver will work just like the Phillips #00 Screwdriver.

      询问修复机器人

      添加评论

    2. Nintendo DS Main Circuit Board Replacement: 步骤 2 中的图像 1,1
      • Use a plastic opening tool or spudger to pry out the battery from the bottom. If a plastic opening tool or spudger isn't available, your fingernails may work.

      询问修复机器人

      添加评论

    3. Nintendo DS Main Circuit Board Replacement: 步骤 3 中的图像 1,1
      • Remove the battery from the Nintendo DS.

      询问修复机器人

      添加评论

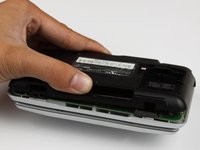
    1. Nintendo DS Main Circuit Board Replacement, Back Panel: 步骤 4 中的图像 1,1
      • Remove the seven 6.4mm Y00 screws located on the back.

      • If your DS has a lanyard attached to it, you can remove it to make the process of opening the top-left screw easier.

      添加评论

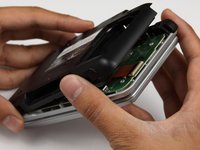
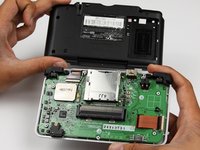
    2. Nintendo DS Main Circuit Board Replacement: 步骤 5 中的图像 1,3 Nintendo DS Main Circuit Board Replacement: 步骤 5 中的图像 2,3 Nintendo DS Main Circuit Board Replacement: 步骤 5 中的图像 3,3
      • With your hands, pry the back panel off the main case.

      • Separate the back from the front, and set it aside.

      添加评论

    1. Nintendo DS Main Circuit Board Replacement, Motherboard replacement.: 步骤 6 中的图像 1,1
      • Using a Phillips #00 screwdriver, remove the four screws on the circuit board.

      • Be careful NOT to slip with the screwdriver, you can damage the circuit board!

      询问修复机器人

      添加评论

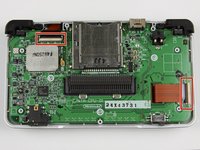
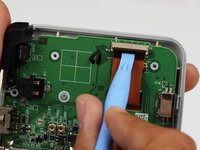
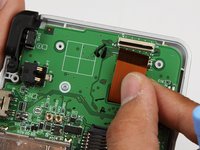
    2. Nintendo DS Main Circuit Board Replacement: 步骤 7 中的图像 1,3 Nintendo DS Main Circuit Board Replacement: 步骤 7 中的图像 2,3 Nintendo DS Main Circuit Board Replacement: 步骤 7 中的图像 3,3
      • Unlock the two large ribbon cables by moving the black clip up.

      • Carefully pull the ribbon cables down and out with your fingers.

      • Do not use pliers to pull the cables, as they can be damaged easily.

      添加评论

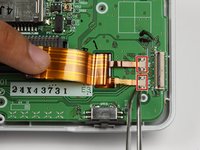
    3. Nintendo DS Main Circuit Board Replacement: 步骤 8 中的图像 1,2 Nintendo DS Main Circuit Board Replacement: 步骤 8 中的图像 2,2
      在这个步骤中使用的工具:
      Tweezers
      $4.99
      • Locate the two small ribbon cables, beneath the rightmost large ribbon cable.

      • Slide the locks for the small ribbon cables down to the side, and remove the cables.

      • It may be useful to use tweezers to remove the small ribbon cables.

      • Be careful not to damage the delicate ribbon cables.

      添加评论

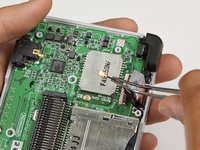
    4. Nintendo DS Main Circuit Board Replacement: 步骤 9 中的图像 1,2 Nintendo DS Main Circuit Board Replacement: 步骤 9 中的图像 2,2
      • Locate the Wifi antenna pigtail connector.

      • Remove the antenna by grasping it at the head with tweezers. Using a slight rocking motion, pull up to dislodge the connector.

      询问修复机器人

      添加评论

    5. Nintendo DS Main Circuit Board Replacement: 步骤 10 中的图像 1,1
      • Feed the ribbon cables through the opening on the board.

      • Pull up and remove the circuit board, and set it aside.

      添加评论

结论

To reassemble your device, follow these instructions in reverse order.

取消:我没有完成这个指南。

24等其他人完成本指南。

kingdesmond

于10/27/09注册

2,249 声望

撰写一个指南

团队

Cal Poly, Team 18-3, Maness Fall 2009 Cal Poly, Team 18-3, Maness Fall 2009 的会员

CPSU-MANESS-F09S18G3

4 名成员

创作了55篇指南

2指南评论

This was really helpful. Thank you!

Jess Anderson - 回复 分享

I need a ds ribbon bale ?

Shan Southern - 回复 分享

添加评论

浏览统计数据:

过去 24 小时: 9

过去 7 天: 69

过去 30 天: 253

总计 34,329