简介
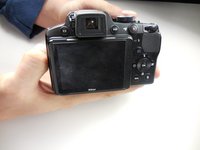
This guide will take you very little time to accomplish. The part is easy to get off and you will need very little tools to do so.
你所需要的
-
-
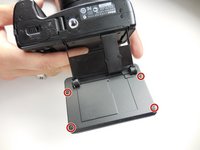
Flip the camera over and push the tab on the battery cover to open the battery compartment.
-
-
-
-
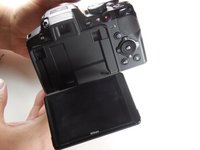
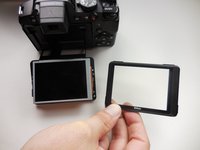
Extend the LCD screen out and turn the camera upside down to get access to the screws on the bottom.
-


To reassemble your device, follow these instructions in reverse order.
3等其他人完成本指南。
团队

Colorado Springs, Team 2-2, Panko Spring 2015 Colorado Springs, Team 2-2, Panko Spring 2015 的会员
UCCS-PANKO-S15S2G2
3 名成员
创作了15篇指南
3指南评论
hello :)
my lsd works , but the flat cable what goes into the body has a little damage , so the screen is black with only little shine on it ! i do think it is the cable , but dont know how to fix it :(
who could help PLEASE .............
the problem is , where the flat screen cable goes into the body of the camera .
Where is the rest of the guide? Once the parts are separated, as shown, the next part is separating the replaceable items. Key to that is releasing the ribbon cable of the old screen fron it's socket. How?
The replacement screen had a metal back similar to the existing part. However, the existing part has a flexible circuit "board" glued to the back. This board has an attached ribbon that goes to the camera and has the female ribbon connector for the new part. The replacement part looks like it assumes the small circuit board can be removed from the old part and gluedto the back of the new part. If so what kind of glue would work?
Otherwise, it appears that both the old frame for the screen has to be disassembled (difficult) and the new part would have to be disassembled in order to complete the proper connections from new screen to camera.
In either case, it's unclear how to insert the ribbon cable from the new part into the female socket on the small circuit board.
Fixit instructions are incomplete
planetchet - 回复
This guide got me started and I was able to complete the replacement of the old screen.
1. gently pull the cable of the old screen from the female part.
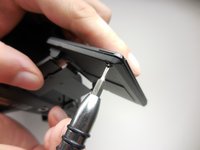
2. Remove the frame that holds the screen. There are some notches in the frame that need a screendriver inserted GENTLY to pry it apart.
3. Place the new screen inside the frame (taking care that the black part of the screen faces out) and gently snap the frame so the screen fits snugly inside the frame.
4. Insert the male part of the screen into the female part. This is really tricky, but there are plastic nobs on either side of the male part. Use a plastic tool (I used a metal screwdriver and was very careful not to damage the nobs) to push the male part into the female part ALL THE WAY. It requires a steady hand and patience. If the male part is not pushed in far enough, the screen will just be gray without an image.
5. Reassemble.
I was SO happy when it worked for me! I had bought the replacement screen for only $8 (including shipping from China, via eBay).
Larry Kies - 回复