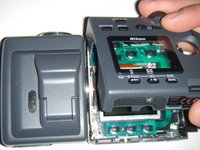
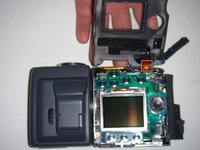
跳转到主内容

Nikon Coolpix 995 LCD Replacement

你所需要的

  1. Nikon Coolpix 995 LCD Replacement, LCD: 步骤 1 中的图像 1,2 Nikon Coolpix 995 LCD Replacement, LCD: 步骤 1 中的图像 2,2
    • Turn the lens/flash assembly 90 degrees, until you see the two Phillips #00 screws,

    • Remove the two screws with a Phillips #00 screwdriver.

    • Flip the flash so that you can access the remaining two screws. Remove these screws following the same method as before.

    • Refer to the second image to locate the second set of screws. The relevant screws are highlighted in red.

  2. Nikon Coolpix 995 LCD Replacement: 步骤 2 中的图像 1,1
    • Flip the camera up-side down.

    • Remove the two Phillips #00 screws located near the battery compartment.

  3. Nikon Coolpix 995 LCD Replacement: 步骤 3 中的图像 1,1
    • Open the memory card compartment cover.

    • You can now see four screws under the cover. Remove all four screws.

    • Refer to the image to locate the four screws. Make sure that you remove only the four screws identified in the image.

  4. Nikon Coolpix 995 LCD Replacement: 步骤 4 中的图像 1,2 Nikon Coolpix 995 LCD Replacement: 步骤 4 中的图像 2,2
    • Use your thumb to carefully lift the bottom side of the casing near the battery.

    • Pay attention to a cable located at the top of the assembly, as it is prone to breakage. Refer to the second image to locate the cable.

  5. Nikon Coolpix 995 LCD Replacement: 步骤 5 中的图像 1,1
    • Use a spudger to flip the tabs that hold the screen.

    • Refer to the image for more details. The tabs are circled in red.

  6. Nikon Coolpix 995 LCD Replacement: 步骤 6 中的图像 1,1
    • Carefully lift the LCD from the bottom. It should come out fairly easily.

结论

To reassemble your device, follow these instructions in reverse order.

Cory Layman

于10/04/11注册

89 声望

创作了3篇指南

团队

UW Stout, Team 1-5, Zhou Fall 2011 UW Stout, Team 1-5, Zhou Fall 2011 的会员

UWSTOUT-ZHOU-F11S1G5

5 名成员

创作了6篇指南

0条评论

添加评论

浏览统计数据:

过去 24 小时: 0

过去 7 天: 2

过去 30 天: 10

总计 2,272