简介
Sometimes, dust appear on all your pictures. It may only be a dust on the sensor. It's quite quick to remove. To check if the issue is coming from a sensor dust, you must have a blurry dot on all your pictures, that may or may not change in size and shape with different aperture. Check first that the dust is not on the lens.
你所需要的
-
-
Remove all screws from the bottom, sides and top of the camera. All screws don't have the same size, be careful when replacing them.
-
Pull gently but firmly the back cover of the camera to remove it and reveal the inside.
-
-
-
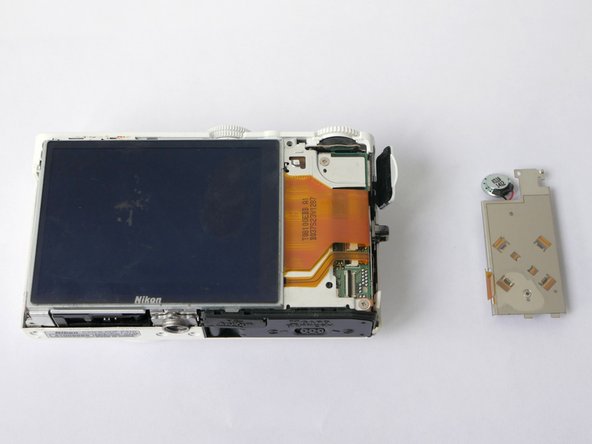
Remove the plastic part with all buttons.
-
Lift up the the buttons block from the left side, to access its ZIF connector.
-
-
-
-
With a plastic spudger, open the ZIF connector and release the button block. It opens from the right side - the black part is to be gently lifted up.
-
-
-
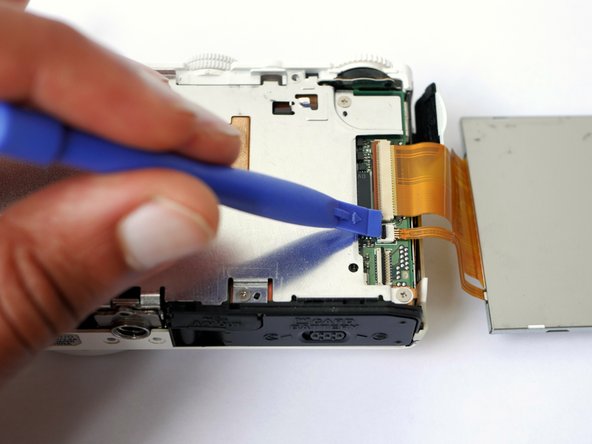
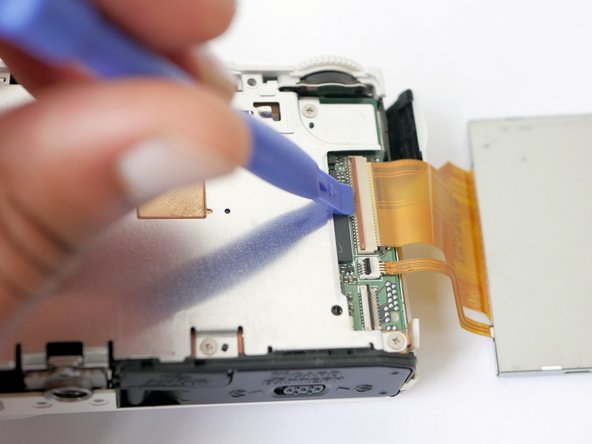
Lift up the screen from the left side, to access its two ZIF connectors.
-
Open the small and the large ZIF connectors with a spudger.
-
The small connector is opened by lifting the black part.
-
The large connector is released thanks to the orange part. This longer connector needs to be opened carefully.
-
-
-
Remove the 3 screws to release the image sensor PCB.
-
Release the ZIF connector lifting it up gently using a plastic spudger.
-
You can then remove the image sensor and clean it. Avoid to scratch the sensor or the inner lens glass, as these would be unrepairable damages.
-


To reassemble your device, follow these instructions in reverse order.
To reassemble your device, follow these instructions in reverse order.
