跳转到主内容

Nikon 1 J3 Motherboard Replacement

你所需要的

  1. Nikon 1 J3 Motherboard Replacement, LCD Screen: 步骤 1 中的图像 1,2 Nikon 1 J3 Motherboard Replacement, LCD Screen: 步骤 1 中的图像 2,2
    • Using a Phillips #000 screwdriver, remove the three bottom screws connected to the back plate on the bottom of the device.

    • Remove the screws under the flaps covering the HDMI and mini USB ports.

  2. Nikon 1 J3 Motherboard Replacement: 步骤 2 中的图像 1,1
    • Carefully pry back the back plate.

    • The plastic of the back plate may crack.

  3. Nikon 1 J3 Motherboard Replacement: 步骤 3 中的图像 1,1
    • Lift up the screen, and use a Phillips #000 screwdriver to remove the (6) six screws holding down the underlying metal plate.

  4. Nikon 1 J3 Motherboard Replacement: 步骤 4 中的图像 1,1
    • Pull back the black switch holding the orange screen ribbon in place, and remove the screen.

  5. Nikon 1 J3 Motherboard Replacement, Motherboard: 步骤 5 中的图像 1,3 Nikon 1 J3 Motherboard Replacement, Motherboard: 步骤 5 中的图像 2,3 Nikon 1 J3 Motherboard Replacement, Motherboard: 步骤 5 中的图像 3,3
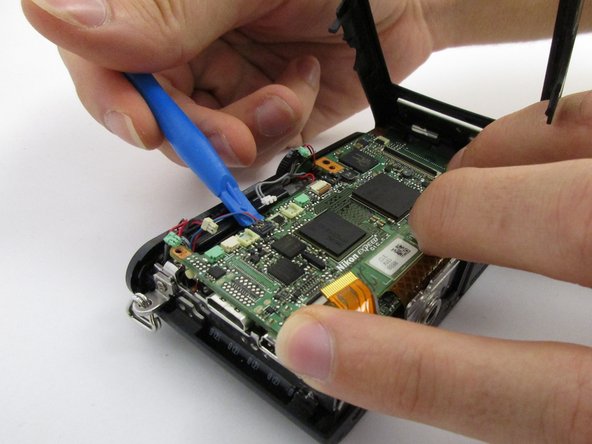
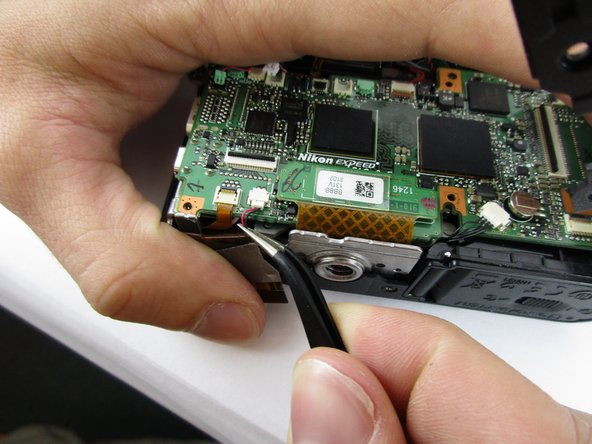
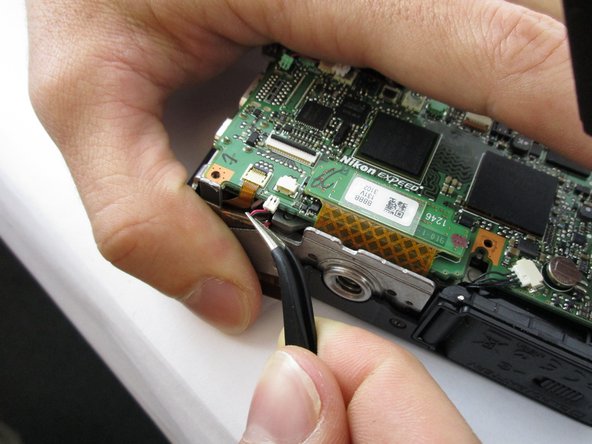
    • Use the plastic opening tool to pry off the connectors shown

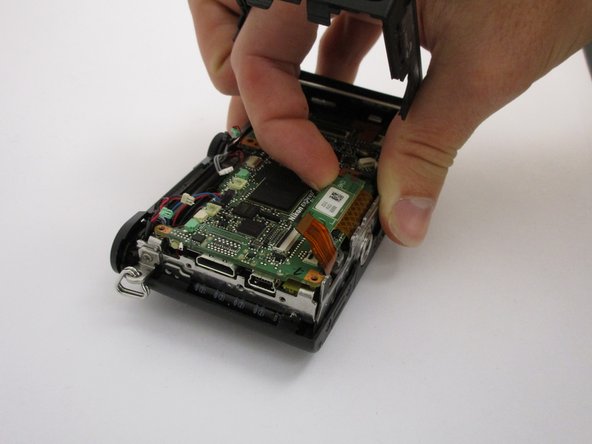
    • Using your finger, pry off the connection flap.

  6. Nikon 1 J3 Motherboard Replacement: 步骤 6 中的图像 1,3 Nikon 1 J3 Motherboard Replacement: 步骤 6 中的图像 2,3 Nikon 1 J3 Motherboard Replacement: 步骤 6 中的图像 3,3
    • Using tweezers, pull out the shown connectors

  7. Nikon 1 J3 Motherboard Replacement: 步骤 7 中的图像 1,1
    • Pull back the black switches holding the connecting ribbons in place, and pull out the ribbons.

    • Remove the motherboard.

结论

To reassemble your device, follow these instructions in reverse order.

另外一个人完成了本指南。

Austin Lackey

于09/26/17注册

479 声望

创作了4篇指南

团队

USF Tampa, Team S11-G4, Passmore Fall 2017 USF Tampa, Team S11-G4, Passmore Fall 2017 的会员

USFT-PASSMORE-F17S11G4

3 名成员

创作了4篇指南

0条评论

添加评论

浏览统计数据:

过去 24 小时: 0

过去 7 天: 1

过去 30 天: 11

总计 978