跳转到主内容

当前版本的文档还未经巡查,您可以查看最新的已查核版本

你所需要的

  1. 这个步骤还没有翻译 帮忙翻译一下

    : 步骤 1 中的图像 1,2 : 步骤 1 中的图像 2,2
    • Using two fingers, push up on the rear cover.

  2. 这个步骤还没有翻译 帮忙翻译一下

    : 步骤 2 中的图像 1,1
    • The rear cover slides up and off.

  3. 这个步骤还没有翻译 帮忙翻译一下

    : 步骤 3 中的图像 1,1
    • Using the plastic opening tools, pry the left bottom corner of the battery up.

  4. 这个步骤还没有翻译 帮忙翻译一下

    : 步骤 4 中的图像 1,1
    • Pull the battery up and out.

  5. 这个步骤还没有翻译 帮忙翻译一下

    : 步骤 5 中的图像 1,1
    • Remove the two Torx T5 screws.

    • Remove the one Philips #00 screw.

  6. 这个步骤还没有翻译 帮忙翻译一下

    : 步骤 6 中的图像 1,2 : 步骤 6 中的图像 2,2
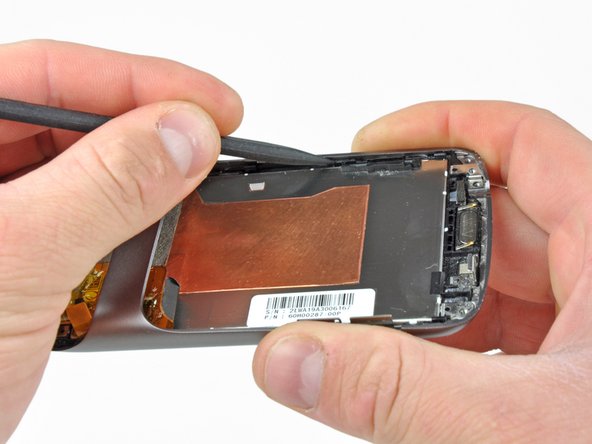
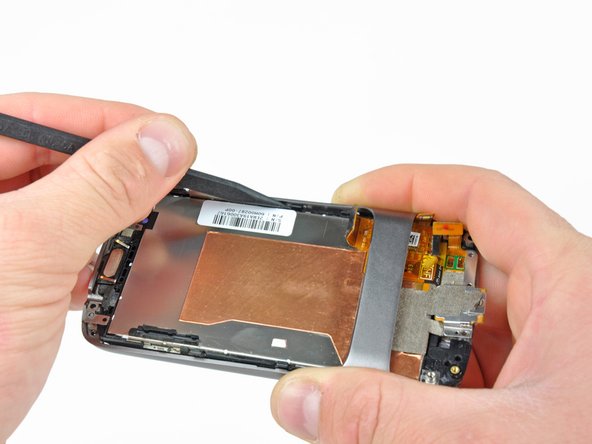
    • Using the plastic opening tool, pry up the battery housing upwards.

    • Push pry tool down, undoing the plastic tab.

  7. 这个步骤还没有翻译 帮忙翻译一下

    : 步骤 7 中的图像 1,2 : 步骤 7 中的图像 2,2
    • Pry the upper left tab open on the battery housing.

  8. 这个步骤还没有翻译 帮忙翻译一下

    : 步骤 8 中的图像 1,2 : 步骤 8 中的图像 2,2
    • Pry the top tab of the battery housing.

  9. 这个步骤还没有翻译 帮忙翻译一下

    : 步骤 9 中的图像 1,2 : 步骤 9 中的图像 2,2
    • Pry the right side tab of the battery housing.

  10. 这个步骤还没有翻译 帮忙翻译一下

    : 步骤 10 中的图像 1,2 : 步骤 10 中的图像 2,2
    • Pull up on the battery housing.

    • Slide the battery housing out to remove it.

  11. 这个步骤还没有翻译 帮忙翻译一下

    : 步骤 11 中的图像 1,2 : 步骤 11 中的图像 2,2
    • Using the plastic opening tool, push the blade into the space between the case and lower cover.

    • Turn the opening tool slightly, the lower cover will detach on that side.

    • Repeat on other side of the seam.

    • The lower cover will slide off.

  12. 这个步骤还没有翻译 帮忙翻译一下

    : 步骤 12 中的图像 1,1
    • Remove the one T5 Torx screw

    • Remove the one #00 Philips screw

    • Lift up the end of the antenna housing and slide it outwards.

  13. 这个步骤还没有翻译 帮忙翻译一下

    : 步骤 13 中的图像 1,2 : 步骤 13 中的图像 2,2
    • Pry the antenna cable up.

  14. 这个步骤还没有翻译 帮忙翻译一下

    : 步骤 14 中的图像 1,1
    • Carefully pull up on the microphone board to release the tape from the phone.

  15. 这个步骤还没有翻译 帮忙翻译一下

    : 步骤 15 中的图像 1,2 : 步骤 15 中的图像 2,2
    • Insert the spudger under the connector.

    • Push the spudger up and twist to release the connector.

    • Repeat for the next connector.

  16. 这个步骤还没有翻译 帮忙翻译一下

    : 步骤 16 中的图像 1,3 : 步骤 16 中的图像 2,3 : 步骤 16 中的图像 3,3
    • Push on the USB port to expose the black connector.

    • Use the spudger to pry the connector upwards.

  17. 这个步骤还没有翻译 帮忙翻译一下

    : 步骤 17 中的图像 1,2 : 步骤 17 中的图像 2,2
    • Place the spugder under the antenna connector.

    • Pry connector up vertically.

  18. 这个步骤还没有翻译 帮忙翻译一下

    : 步骤 18 中的图像 1,3 : 步骤 18 中的图像 2,3 : 步骤 18 中的图像 3,3
    • Insert the spudger into tab above the camera.

    • Slide upwards until the board detaches from the case.

  19. 这个步骤还没有翻译 帮忙翻译一下

    : 步骤 19 中的图像 1,1
    • Press the pointed tip of the spudger into the space below the button assembly.

    • Wiggle the spudger tip towards the outside of the button.

    • The button assembly is under some tension and may fly off.

  20. 这个步骤还没有翻译 帮忙翻译一下

    : 步骤 20 中的图像 1,1
    • Push the pointed tip of the spudger into the base of the side button board.

    • Lift up, the board will disconnect from the case.

  21. 这个步骤还没有翻译 帮忙翻译一下

    : 步骤 21 中的图像 1,3 : 步骤 21 中的图像 2,3 : 步骤 21 中的图像 3,3
    • Push on the lower motherboard until it slides under the case support.

    • The motherboard assembly comes out as a single piece.

    • Save the small black rubber rectangular sound guide under the motherboard, to replace over the microphone.

  22. 这个步骤还没有翻译 帮忙翻译一下

    : 步骤 22 中的图像 1,1
    • Remove the seven #00 Philips screws

  23. 这个步骤还没有翻译 帮忙翻译一下

    : 步骤 23 中的图像 1,3 : 步骤 23 中的图像 2,3 : 步骤 23 中的图像 3,3
    • Use the spudger to pop the 3 latches holding the screen down.

  24. 这个步骤还没有翻译 帮忙翻译一下

    : 步骤 24 中的图像 1,1
    • Pull up on the screen so it slides out of the case.

  25. 这个步骤还没有翻译 帮忙翻译一下

    • Make sure to peel off the digitizer connector from the back of the LCD

终点

5等其他人完成本指南。

Niklas Johnson

于01/31/12注册

1,207 声望

创作了18篇指南

0条评论

添加评论

浏览统计数据:

过去 24 小时: 0

过去 7 天: 0

过去 30 天: 0

总计 7,684