简介
Replacement instructions for the screen or digitizer. The level of tear down is essentially the same, so both will be covered in this guide.
你所需要的
-
-
To begin, turn off the power to the device and remove the screen from the keyboard.
-
Open the 2-in-1, and hold the screen.
-
Press the silver button at the top of the keyboard.
-
When the screen lifts up, gently lift the screen away from the keyboard.
-
-
-
You may use your fingers, or a spudger. Be careful not to break your cover OR your fingernail. Removing the cover requires good judgement.
-
The goal is to separate the black from the silver. Start in a corner, or a flat edge -- whichever works best for you. Remember to not use too much force.
-
Once you start the initial separation, keep going until you free one edge. The goal now is to free three edges of the rectangle.
-
If your progress stops on one side of the rectangle, go to the other side and try there.
-
-
-
-
Once you have the cover off, remove the screws from the outer perimeter of the board assembly with a PH0 head screw driver. See arrows.
-
-
-
The order in which you remove these cables is not particularly important.
-
1 - Gently lift up the black flap and remove the keyboard port ribbon cable.
-
2 - Remove tape and gently pry up cameras. These are held on with an adhesive.
-
3 - Lift up tape. Gently lift up black tab and remove the ribbon cable that leads to the buttons.
-
4 - Gently lift away tape and remove speaker connector. Best to use a back and forth motion while gently pulling, or separate black from white with a flat screwdriver.
-
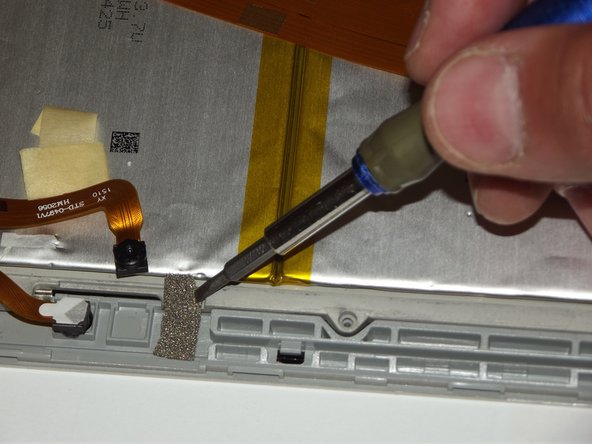
5 - Gently lift black tab and remove cable. This ribbon cable leads to the screen.
-
6 - You will need to carefully free one side of the silver foam that is under the tape by the cameras. This is shown in the second picture.
-
-
-
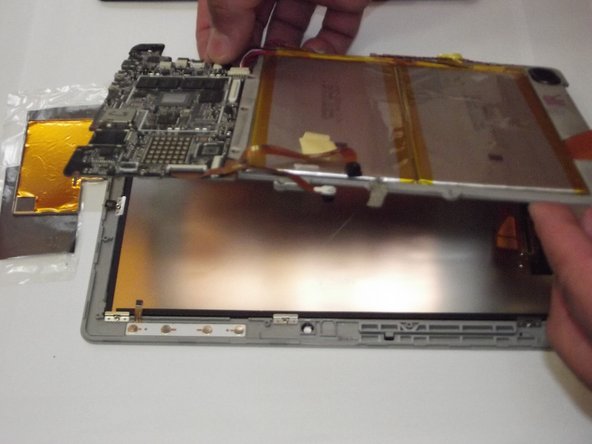
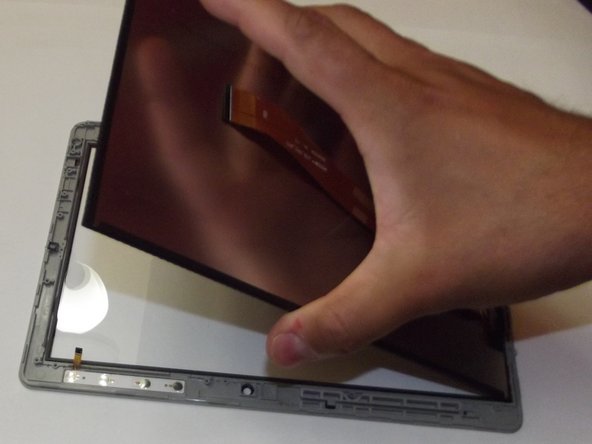
Once you have removed all of the screws and unhooked all of the cables, gently lift the board assembly away from the screen assemble, freeing any components that may get caught up. Ribbon cables frequently catch.
-
(We have removed some things that you do not need to in the second picture, so please disregard these. If you have followed the instructions so far, you should be fine.)
-
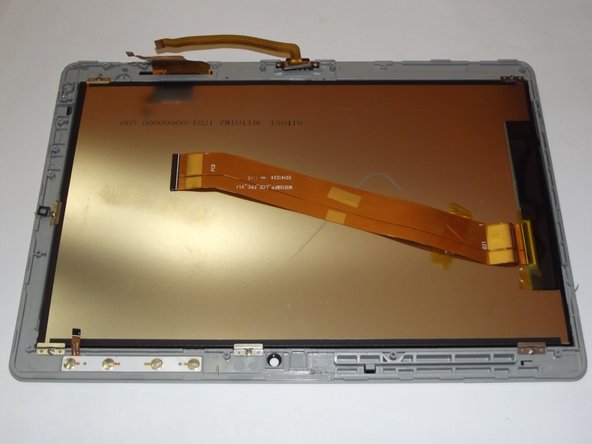
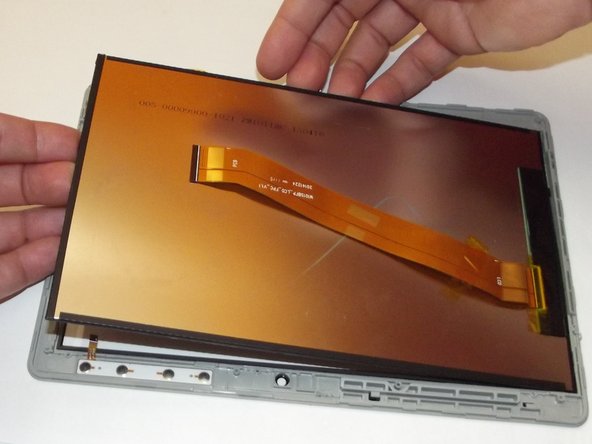
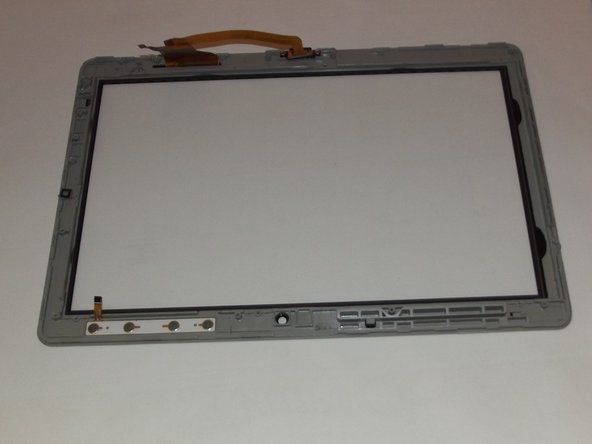
When the board assembly is removed, you should see what is shown in the third picture.
-


To reassemble your device, follow these instructions in reverse order.
To reassemble your device, follow these instructions in reverse order.
2等其他人完成本指南。
团队

Western Carolina University, Team S1-G4, Virtue Fall 2017 Western Carolina University, Team S1-G4, Virtue Fall 2017 的会员
WCU-VIRTUE-F17S1G4
5 名成员
创作了12篇指南
一条评论
So… the outer shell that cracks is the digitizer??? I wonder because my outer shatter resistant safety glass piece is full of cracks…