跳转到主内容

当前版本的文档还未经巡查,您可以查看最新的已查核版本

你所需要的

  1. 这个步骤还没有翻译 帮忙翻译一下

    : 步骤 1 中的图像 1,2 : 步骤 1 中的图像 2,2
    • Slide the cover release button towards the bottom of the phone

    • Once the battery cover pops up, slide the cover towards the top of the phone and lift up.

  2. 这个步骤还没有翻译 帮忙翻译一下

    : 步骤 2 中的图像 1,1
    • Push the battery towards the top of the phone and lift up.

  3. 这个步骤还没有翻译 帮忙翻译一下

    : 步骤 3 中的图像 1,3 : 步骤 3 中的图像 2,3 : 步骤 3 中的图像 3,3
    • With a T5 screwdriver, unscrew the four T5 sized screws that hold the case back cover onto the rest of the case.

    • Remove the plastic case back cover by gently pulling it away from the body of the phone, starting at one edge and working your way down to the other.

  4. 这个步骤还没有翻译 帮忙翻译一下

    : 步骤 4 中的图像 1,3 : 步骤 4 中的图像 2,3 : 步骤 4 中的图像 3,3
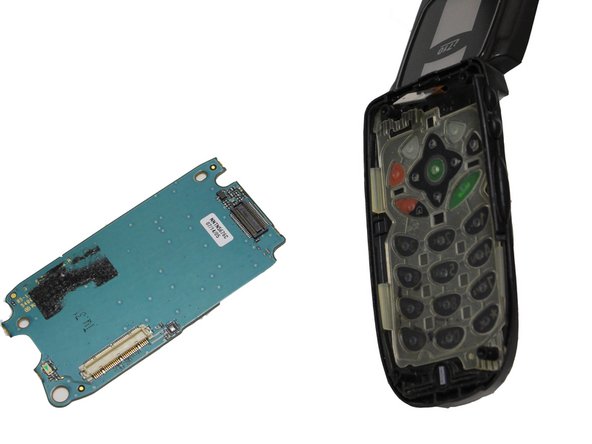
    • Lift the motherboard away from the case of the phone, being careful not to break the wire that goes up into the hinge.

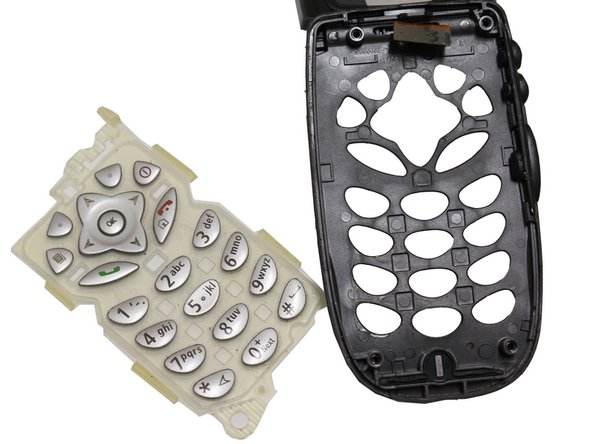
    • Peel the motherboard off of the keypad. The two pieces are glued together and separate without much effort.

    • The motherboard should now be completely disconnected from the phone.

  5. 这个步骤还没有翻译 帮忙翻译一下

    : 步骤 5 中的图像 1,2 : 步骤 5 中的图像 2,2
    • Once the motherboard has been removed from the keypad, the keypad sensor can be detached from the phone at the hinge.

    • Gently pry off the cable connecting the keypad sensor. The keypad sensor should now be completely separated from the phone.

  6. 这个步骤还没有翻译 帮忙翻译一下

    : 步骤 6 中的图像 1,2 : 步骤 6 中的图像 2,2
    • Once the keypad has been removed, the keypad cover can be easily peeled back from the front phone cover molding.

    • Care must be taken when inserting a new keypad cover. The keypad cover will have to be lined up to the corresponding holes of the phone casing.

终点

Katelyn

于10/22/12注册

1 声望

创作了2篇指南

团队

Clemson, Team 14-2, Benson Fall 2012 Clemson, Team 14-2, Benson Fall 2012 的会员

CLEM-BENSON-F12S14G2

4 名成员

创作了17篇指南

0条评论

添加评论

浏览统计数据:

过去 24 小时: 0

过去 7 天: 1

过去 30 天: 14

总计 344