本指南有最近更改,您可查看未经巡查的最新版本。
简介
Be sure to completely power down your Moto X4 before you use the iOpener to open the phone.
你所需要的
-
-
Use an iOpener or a heat gun to heat up all four edges of the display until it's slightly too hot to touch, in order to soften the adhesive holding it in place.
-
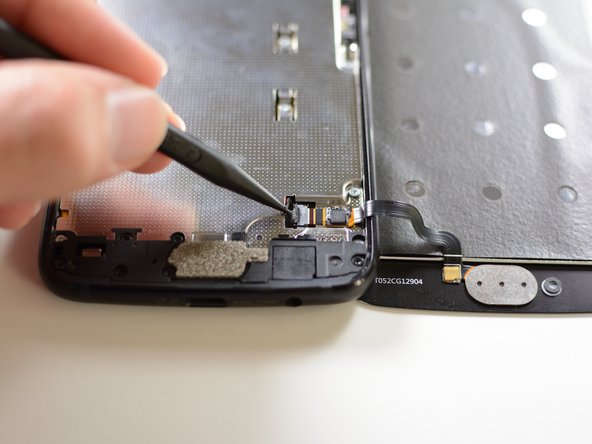
Slide a thin pry tool such as an opening pick or playing card underneath the edge of the display, and work it carefully around the entire perimeter of the phone to slice through the adhesive.
-
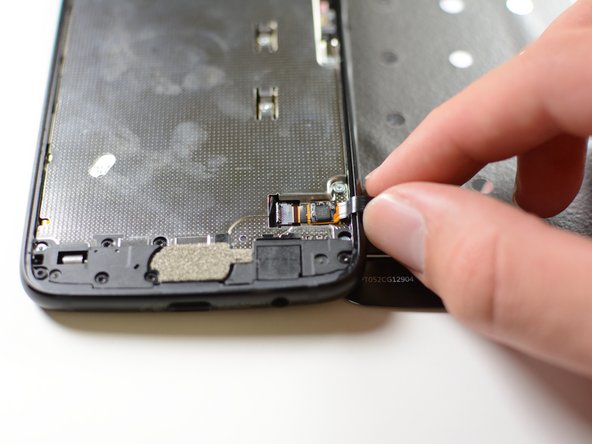
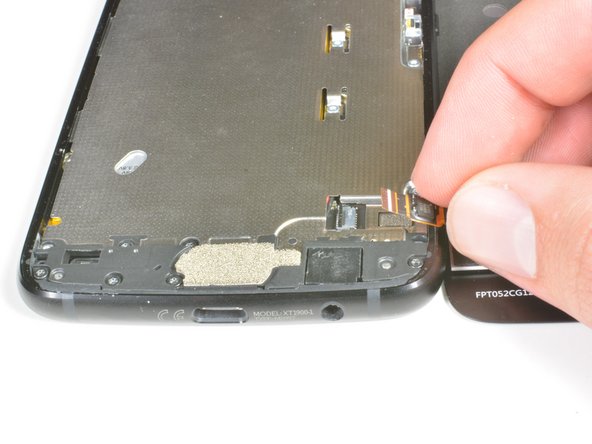
Open the display from the left edge, and swing it to the right. Don't try to fully detach it yet.
-
-


To reassemble your device, follow these instructions in reverse order.
To reassemble your device, follow these instructions in reverse order.
23等其他人完成本指南。
团队

Cal Poly, Team S18-G4, Livingston Winter 2018 Cal Poly, Team S18-G4, Livingston Winter 2018 的会员
CPSU-LIVINGSTON-W18S18G4
4 名成员
创作了13篇指南
8条评论
This guide really only covers screen removal, and should detail replacing the screen as advertised. Here are a few more steps that should be added:
1. Transferring old hardware to the new screen (seals, filters, fingerprint sensor, & the grey carbon mat.
2. Cleaning up old adhesive.
3. Applying new adhesive, whether it’s the one-piece that ifixit carries (recommended), or Tesa tape.
4. Installing the new display assembly
Is it possible to remove and replace only the glass? Can I do that without removing the whole LCD screen and avoid disconnecting/reconnecting wires?
Hi Drew,
I haven’t tried, but I think it is possible to do a glass-only repair for this LCD screen, as long as you have the necessary tools and bonding adhesives. You would still have to deal with the fingerprint sensor, which is sealed onto the glass.
I noticed the fingerprint sensor not being quite as low on the right edge after this. Also, I think it has a bit of “give” now when I press on it with a thumbnail. If the tips of my thumbs weren't so dry right now I might not have noticed, though.
Hey Chris,
Did you add adhesive to the fingerprint sensor, if you didn't add some adhesive it may have some play, as most things need to be glued in place, and you could have forgotten to add some new adhesive.