跳转到主内容

当前版本的文档还未经巡查,您可以查看最新的已查核版本

你所需要的

  1. 这个步骤还没有翻译 帮忙翻译一下

    : 步骤 1 中的图像 1,1
    • Locate the back cover release slide.

    • Use your finger to slide it down.

  2. 这个步骤还没有翻译 帮忙翻译一下

    : 步骤 2 中的图像 1,1
    • Remove the back cover by pulling it away from the phone.

  3. 这个步骤还没有翻译 帮忙翻译一下

    : 步骤 3 中的图像 1,2 : 步骤 3 中的图像 2,2
    • Locate the battery removal slot.

    • Use your finger to pull the battery out from the top.

    • Remove the battery.

  4. 这个步骤还没有翻译 帮忙翻译一下

    : 步骤 4 中的图像 1,1
    • Locate the antenna port on the top of the phone.

  5. 这个步骤还没有翻译 帮忙翻译一下

    : 步骤 5 中的图像 1,2 : 步骤 5 中的图像 2,2
    • Grip the plastic support post and unscrew the apparatus using a counterclockwise twist.

    • Pull the apparatus up and out of the phone.

  6. 这个步骤还没有翻译 帮忙翻译一下

    : 步骤 6 中的图像 1,1
    • Locate the two screws on the backside of the phone.

    • Unscrew the two screws using a T6 Screwdriver.

  7. 这个步骤还没有翻译 帮忙翻译一下

    : 步骤 7 中的图像 1,3 : 步骤 7 中的图像 2,3 : 步骤 7 中的图像 3,3
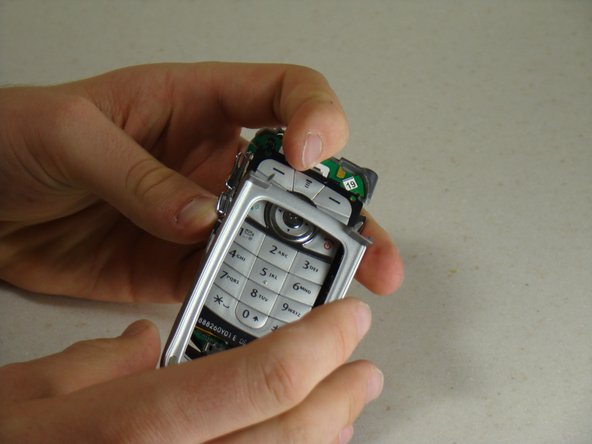
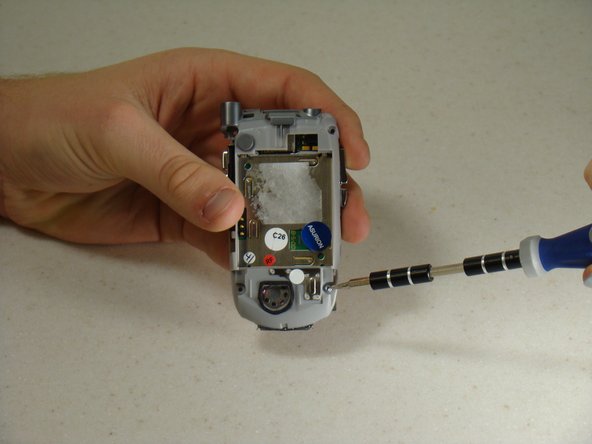
    • Gently pull the top section of the phone upwards until you feel some resistance.

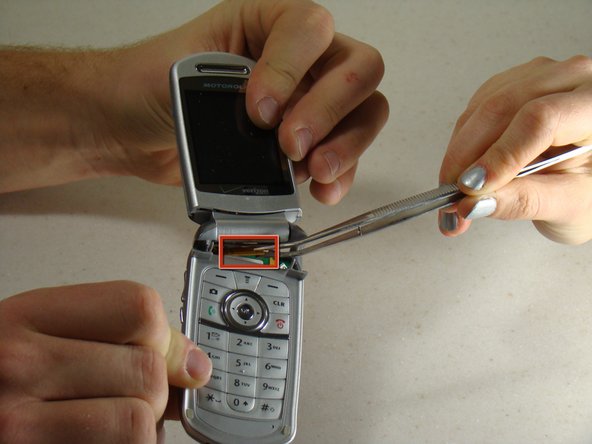
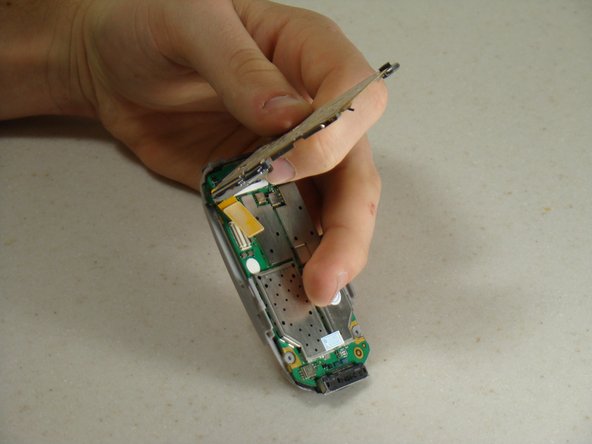
    • Locate the brown connector that runs from the top section of the phone to the circuit board under the keypad.

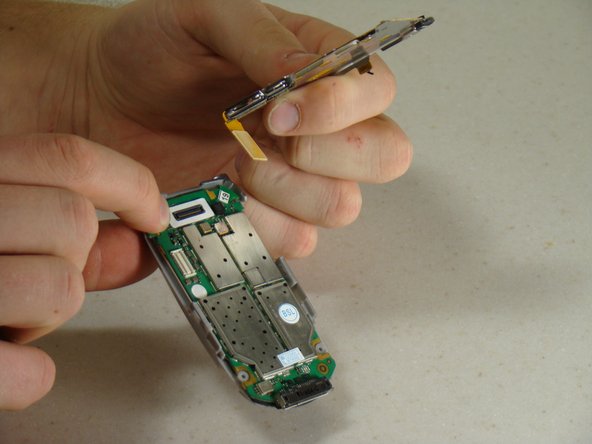
    • Using tweezers, gently pry the connector from the circuit board.

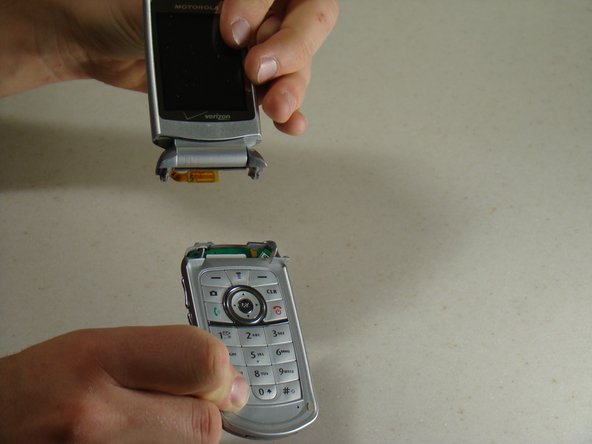
    • Carefully detach the two sections of the phone.

  8. 这个步骤还没有翻译 帮忙翻译一下

    : 步骤 8 中的图像 1,3 : 步骤 8 中的图像 2,3 : 步骤 8 中的图像 3,3
    • Using the blue pry tool, carefully pull the keypad frame away from the keypad.

    • Gently remove the keypad frame from the keypad.

    • Lift the silicone keypad cover off.

  9. 这个步骤还没有翻译 帮忙翻译一下

    : 步骤 9 中的图像 1,2 : 步骤 9 中的图像 2,2
    • Rotate the phone around so that you are looking at the battery cavity.

    • Locate the screws on the bottom base of the phone.

    • Unscrew the two screws using a T6 Screwdriver.

  10. 这个步骤还没有翻译 帮忙翻译一下

    : 步骤 10 中的图像 1,2 : 步骤 10 中的图像 2,2
    • Rotate the phone back to the front side.

    • Slowly lift the bottom portion of the keypad off of the phone until you feel resistance.

  11. 这个步骤还没有翻译 帮忙翻译一下

    : 步骤 11 中的图像 1,3 : 步骤 11 中的图像 2,3 : 步骤 11 中的图像 3,3
    • Using tweezers, carefully detach the yellow connector strip from the circuit board by lifting up.

    • Separate the keypad from the circuit board.

终点

另外一个人完成了本指南。

Zoie E

于01/12/11注册

603 声望

创作了5篇指南

团队

Cal Poly, Team 14-8, Forte Winter 2011 Cal Poly, Team 14-8, Forte Winter 2011 的会员

CPSU-FORTE-W11S14G8

5 名成员

创作了5篇指南

2条评论

We should have a motherboard replacement.

Santi12008 - 回复

We need to fullify more this content.

Santi12008 - 回复

添加评论

浏览统计数据:

过去 24 小时: 0

过去 7 天: 0

过去 30 天: 1

总计 2,085