当前版本的文档还未经巡查,您可以查看最新的已查核版本 。
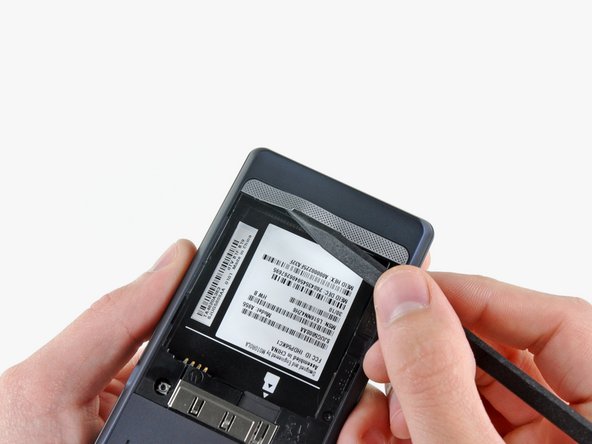
Using the tip of a spudger, peel up one corner of the silver ribbon below the battery compartment.
Peel the ribbon off the phone.
Gently insert a spudger between the rear case and front case at the top of the phone, near the audio jack.
Carefully pry the top edge of the rear case up from the rest of the phone.
With the spudger still inserted between the rear case and front case, slide the spudger along the right edge of the device, moving toward the bottom, prying as you go.
Continue prying along the bottom edge of the device from right to left, freeing it from the front panel.
Continue prying the rear case from the front case along the left side, moving from bottom to top.
Lift the rear case up out of the phone.
At this point, the button covers on the side of the phone are free and may fall out if you tip the phone upside down.
Carefully lift the speaker/antenna assembly up and out of the phone.
If you are re-assembling your phone, insert any power, camera, or volume buttons that may have fallen out at this point.
Use a spudger to pry the antenna cable connectors from their respective sockets on the motherboard and the speaker/antenna board.
De-route the antenna cable by pulling it out of the metal clips along the side of the front case.
Remove three 3.8 mm T5 Torx screws securing the motherboard to the front case.
Don't attempt to remove the motherboard yet, it is still attached by the keypad ribbon connector.
Carefully lift the motherboard from the front case and lay it next to the Droid 2, minding the keypad connector that is still attached.
Disconnect the keypad connector by prying it straight up off its socket on the motherboard.
Remove the motherboard from the Droid 2.
嵌入本指南
选择一个尺寸并复制下面的代码,将本指南作为一个小插件嵌入到你的网站/论坛中。
单个步骤
完整指南
小——600像素
中——800像素
大——1200像素
预览