跳转到主内容

Monster Soundstage S2 Front Panel Replacement

你所需要的

  1. Monster Soundstage S2 Front Panel Replacement, Speaker Grille: 步骤 1 中的图像 1,2 Monster Soundstage S2 Front Panel Replacement, Speaker Grille: 步骤 1 中的图像 2,2
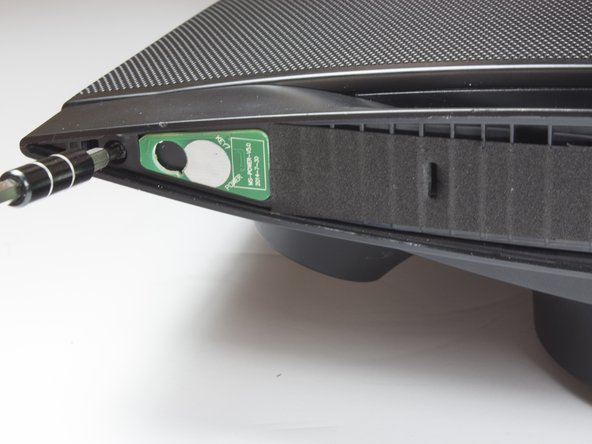
    • Use a spudger or your fingers to pry off and remove the rubber pad on the bottom of the speaker.

  2. Monster Soundstage S2 Front Panel Replacement: 步骤 2 中的图像 1,3 Monster Soundstage S2 Front Panel Replacement: 步骤 2 中的图像 2,3 Monster Soundstage S2 Front Panel Replacement: 步骤 2 中的图像 3,3
    • Remove the five 10mm screws with a TR 10 screwdriver.

    • Use a spudger to break the remaining adhesive holding the grille to the speaker body.

    • Be sure you don't bend the grille; it is not free from the speaker yet.

  3. Monster Soundstage S2 Front Panel Replacement: 步骤 3 中的图像 1,1
    • Flip speaker around and use a plastic opening tool to remove the top panel from the speaker.

  4. Monster Soundstage S2 Front Panel Replacement: 步骤 4 中的图像 1,3 Monster Soundstage S2 Front Panel Replacement: 步骤 4 中的图像 2,3 Monster Soundstage S2 Front Panel Replacement: 步骤 4 中的图像 3,3
    • Use a plastic opening tool to remove the foam and uncover four more screws.

    • Use a TR 10 screwdriver to remove the five 10mm screws on the top of the speaker.

  5. Monster Soundstage S2 Front Panel Replacement: 步骤 5 中的图像 1,2 Monster Soundstage S2 Front Panel Replacement: 步骤 5 中的图像 2,2
    • Carefully remove the top cover.

    • Be careful not to tear or stress the cable that provides power to the power LED.

  6. Monster Soundstage S2 Front Panel Replacement: 步骤 6 中的图像 1,2 Monster Soundstage S2 Front Panel Replacement: 步骤 6 中的图像 2,2
    • Use a TR 10 screwdriver to remove two of the 10mm screws that secure the speaker grille.

    • Do not attempt to remove the grille just yet.

  7. Monster Soundstage S2 Front Panel Replacement: 步骤 7 中的图像 1,3 Monster Soundstage S2 Front Panel Replacement: 步骤 7 中的图像 2,3 Monster Soundstage S2 Front Panel Replacement: 步骤 7 中的图像 3,3
    • With the top panel removed, use a spudger to remove the display panel.

    • The clips on the display panel are quite fragile. Pry up both edges of the display before attempting removal.

    • Use a TR 10 screwdriver to remove the four final 10mm screws securing the speaker grille.

  8. Monster Soundstage S2 Front Panel Replacement: 步骤 8 中的图像 1,1
    • Remove the front speaker grille.

  9. Monster Soundstage S2 Front Panel Replacement, Front Speakers: 步骤 9 中的图像 1,3 Monster Soundstage S2 Front Panel Replacement, Front Speakers: 步骤 9 中的图像 2,3 Monster Soundstage S2 Front Panel Replacement, Front Speakers: 步骤 9 中的图像 3,3
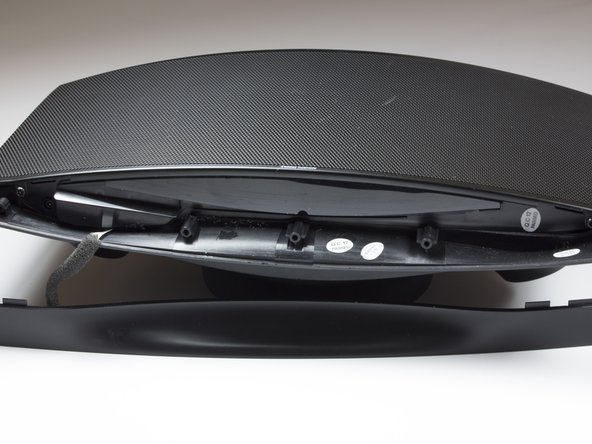
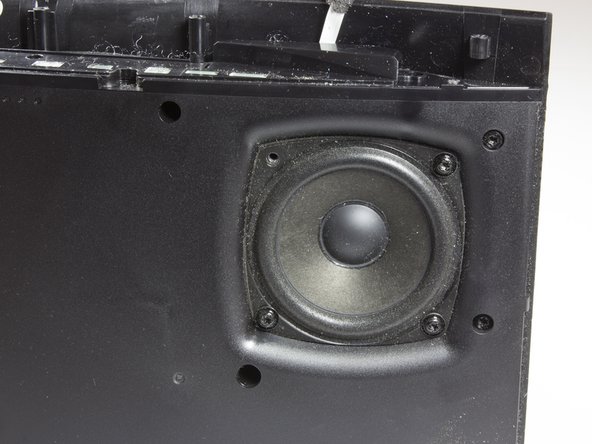
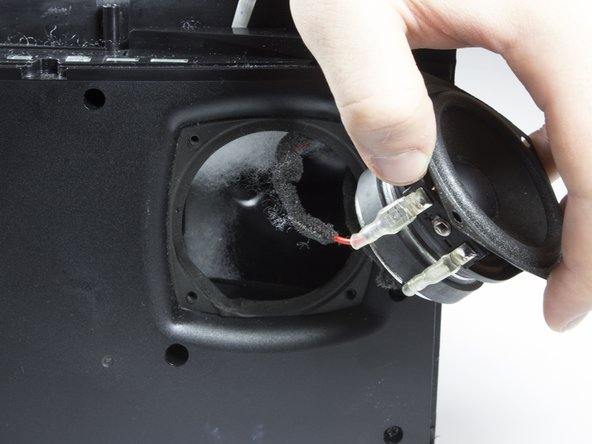
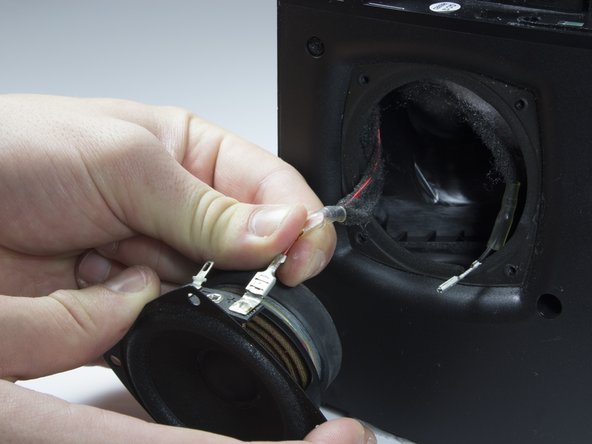
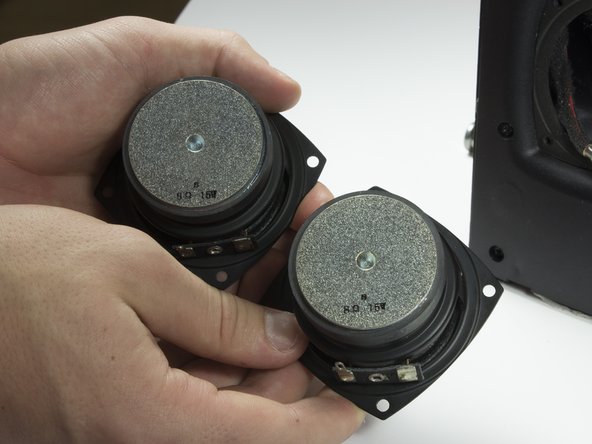
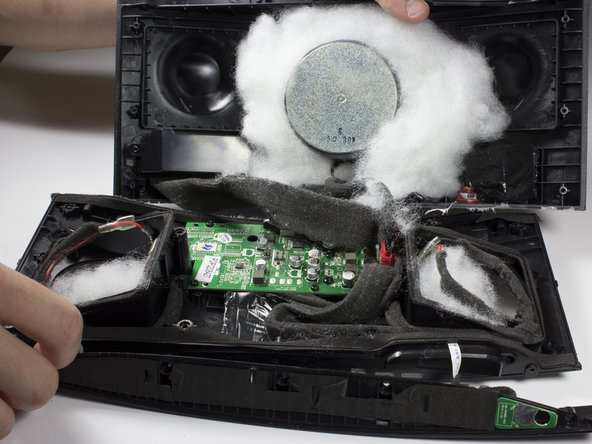
    • After removing grille, you will see the speakers.

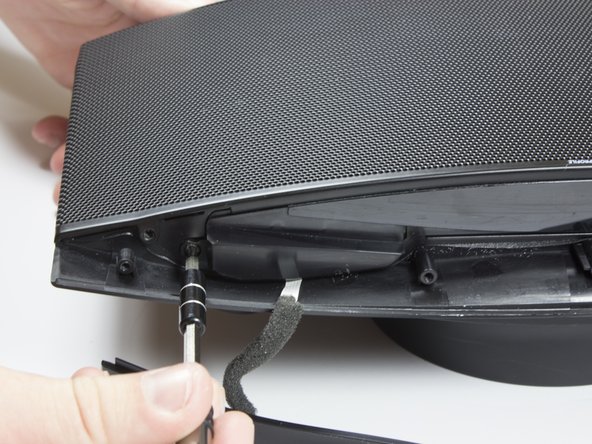
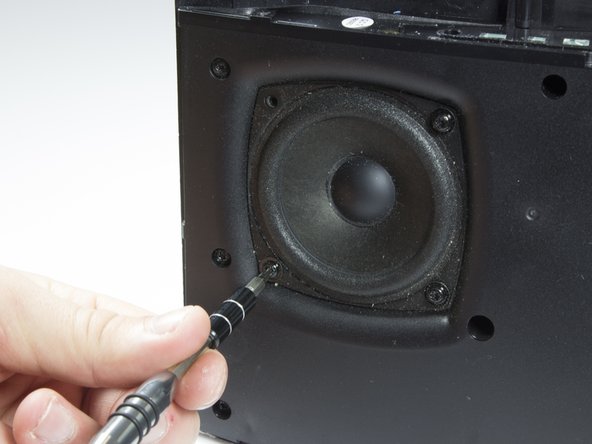
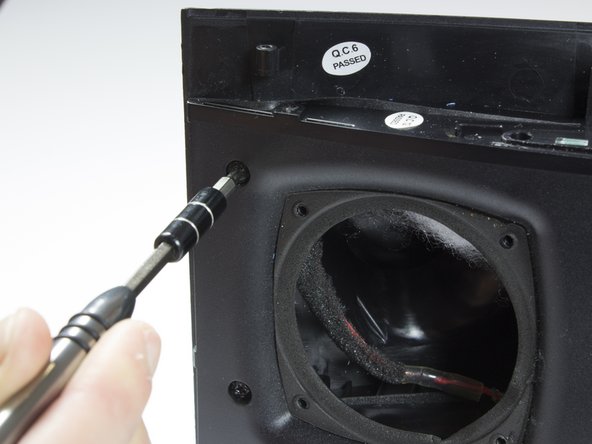
    • Remove the eight 10mm screws that surround the speakers. There will be four around each speaker.

  10. Monster Soundstage S2 Front Panel Replacement: 步骤 10 中的图像 1,2 Monster Soundstage S2 Front Panel Replacement: 步骤 10 中的图像 2,2
    • Carefully lift each speaker from the housing. It may be necessary to break a light adhesive seal.

    • Be aware of the two wires that are connected to each speaker.

    • Set each speaker beside the main housing.

  11. Monster Soundstage S2 Front Panel Replacement: 步骤 11 中的图像 1,3 Monster Soundstage S2 Front Panel Replacement: 步骤 11 中的图像 2,3 Monster Soundstage S2 Front Panel Replacement: 步骤 11 中的图像 3,3
    • Carefully but firmly unplug the two wires from each driver.

    • The front speakers can now be removed.

  12. Monster Soundstage S2 Front Panel Replacement, Front Panel: 步骤 12 中的图像 1,2 Monster Soundstage S2 Front Panel Replacement, Front Panel: 步骤 12 中的图像 2,2
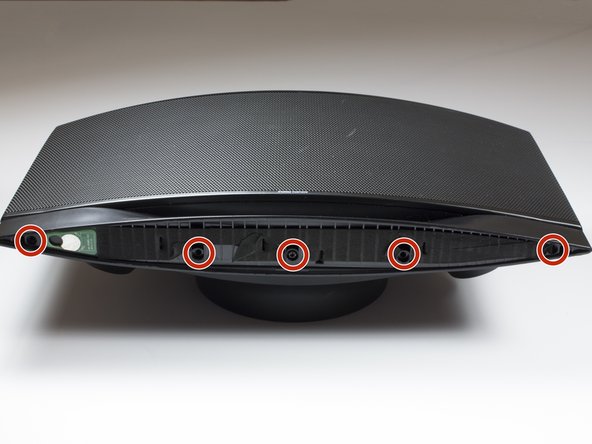
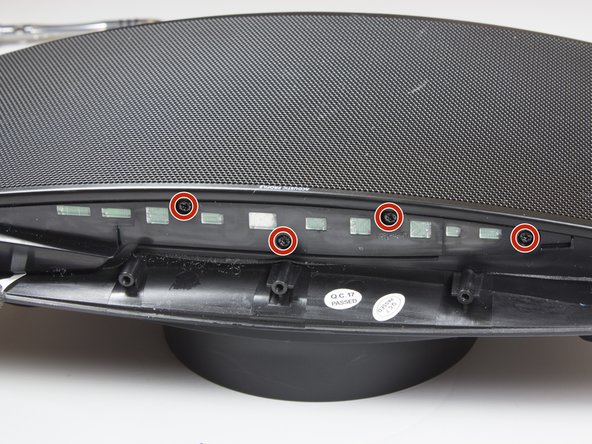
    • Identify the eight screws around the border of the front panel.

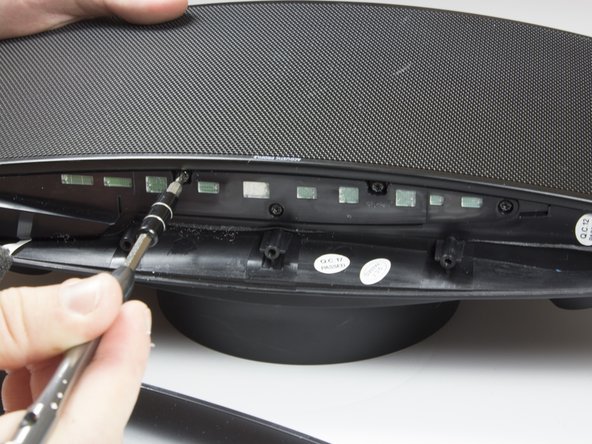
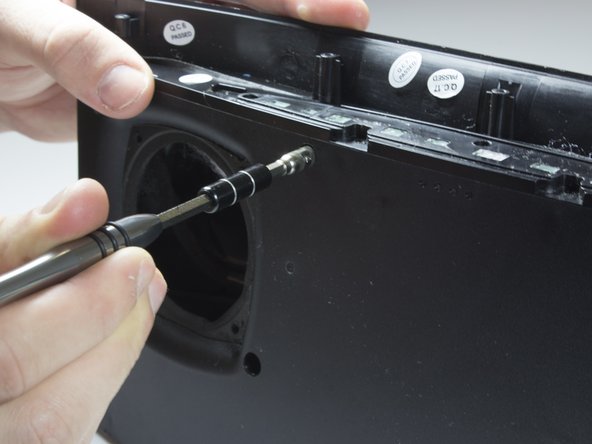
    • Using the TR 10 driver, remove the two 8mm screws.

    • Using the TR 10 driver, remove the six 12mm screws.

  13. Monster Soundstage S2 Front Panel Replacement: 步骤 13 中的图像 1,1
    • Use a 5 mm hex driver to extend the TR 10 driver. This allows the driver to access screws with deeper countersinks.

  14. Monster Soundstage S2 Front Panel Replacement: 步骤 14 中的图像 1,2 Monster Soundstage S2 Front Panel Replacement: 步骤 14 中的图像 2,2
    • Identify the remaining four screws in the front panel.

    • Use the extended driver from the previous step to remove the four 12mm TR 10 screws.

  15. Monster Soundstage S2 Front Panel Replacement: 步骤 15 中的图像 1,2 Monster Soundstage S2 Front Panel Replacement: 步骤 15 中的图像 2,2
    • Gently pull the front panel away from the back panel.

    • There are wires that connect the front and back panels. The two sides can be safely folded away from each other and laid flat on the table.

    • Remove the white sound dampening material from the speaker. Note the location of the material and set aside.

结论

To reassemble your device, follow these instructions in reverse order.

2等其他人完成本指南。

Shaw Hughes

于01/30/17注册

831 声望

创作了5篇指南

团队

Cal Poly, Team 21-5, Maness Winter 2017 Cal Poly, Team 21-5, Maness Winter 2017 的会员

CPSU-MANESS-W17S21G5

4 名成员

创作了12篇指南

0条评论

添加评论

浏览统计数据:

过去 24 小时: 0

过去 7 天: 3

过去 30 天: 9

总计 528