跳转到主内容

Microsoft Zune 80 Hard Drive Replacement

你所需要的

  1. Microsoft Zune 80 Hard Drive Replacement, Case: 步骤 1 中的图像 1,1
    • Use a metal spudger or Zune opening tool to remove the small silver plastic cap on top of the device.

  2. Microsoft Zune 80 Hard Drive Replacement: 步骤 2 中的图像 1,1
    • There are two T3 screws under the cap. Remove both with a T3 screwdriver.

    • Be careful with removing these screws! These screwheads are prone to breaking.

  3. Microsoft Zune 80 Hard Drive Replacement, Remove the Casing: 步骤 3 中的图像 1,2 Microsoft Zune 80 Hard Drive Replacement, Remove the Casing: 步骤 3 中的图像 2,2
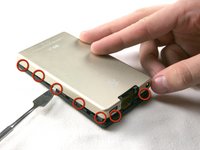
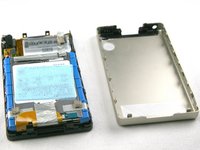
    • Using a metal spudger or Zune opening tool, remove the aluminum backing starting from the top. There are 5 clips on each side and two on the bottom.

    • Be careful not to press the tools in too far; there are exposed cables right inside the edge of the device.

  4. Microsoft Zune 80 Hard Drive Replacement, Remove the Silver Tape: 步骤 4 中的图像 1,2 Microsoft Zune 80 Hard Drive Replacement, Remove the Silver Tape: 步骤 4 中的图像 2,2
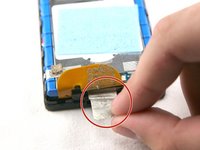
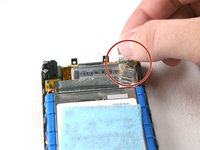
    • Remove the silver tape from the bottom center and the top right. This allows access to the hard drive and the battery.

  5. Microsoft Zune 80 Hard Drive Replacement: 步骤 5 中的图像 1,3 Microsoft Zune 80 Hard Drive Replacement: 步骤 5 中的图像 2,3 Microsoft Zune 80 Hard Drive Replacement: 步骤 5 中的图像 3,3
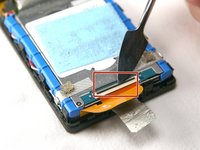
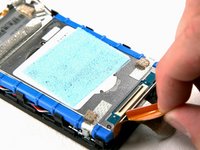
    • Unclick the black bar connecting the orange hard drive cable to the bottom of the hard drive. Gently push towards the bottom of the device on the black bar until you hear a click sound, it is now disengaged from the hard drive.

    • If the cable doesn't come off easily, the black bar has not been un-clicked.

    • The hard drive cable (ZIF cable) is very fragile. Try to keep it in its original shape and bend it as little as possible.

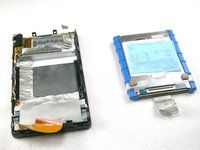
    • Now gently pull the orange hard drive cable to remove it from the hard drive.

    • Lift the hard drive from the device.

    • Hard Drive Replacement Only: Check to make sure the hard drive cable is in good condition and then connect the new hard drive in the same place, following the steps in reverse order.

结论

To reassemble your device, follow these instructions in reverse order.

8等其他人完成本指南。

turey

于11/11/09注册

400 声望

创作了2篇指南

团队

Cal Poly, Team 6-5, Maness Fall 2009 Cal Poly, Team 6-5, Maness Fall 2009 的会员

CPSU-MANESS-F09S6G5

5 名成员

创作了5篇指南

一条评论

what model hard drive did you utilize during its replacement?
thanksss

RAFI V DEMIRJIAN - 回复

添加评论

浏览统计数据:

过去 24 小时: 4

过去 7 天: 9

过去 30 天: 43

总计 12,523