简介
I've owned two of these mice, getting several years hard use from each before experiencing issues with intermittent right-clicks or false clicks while scrolling. They're still highly regarded by FPS gamers and for me cause less fatigue in day-to-day use than any other mouse.
This guide demonstrates the replacement of microswitches for scrollwheel, left and right buttons.
你所需要的
-
-
Start by removing the four feet from the underside of the mouse. It may help to use a blade to lift a corner before gradually peeling off and setting aside.
-
-
-
Using a spudger, release the clips securing the top of the mouse. One of mine proved very stubborn, so I needed to use a flat-blade screwdriver to release. Work carefully so as not to damage the plastic tabs.
-
-
-
Using a Phillips #1 screwdriver, remove the two screws holding the lower PCB.
-
-
-
-
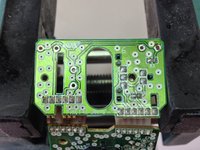
Remove the scrollwheel and release the upper PCB by depressing the two plastic tabs shown.
-
-
-
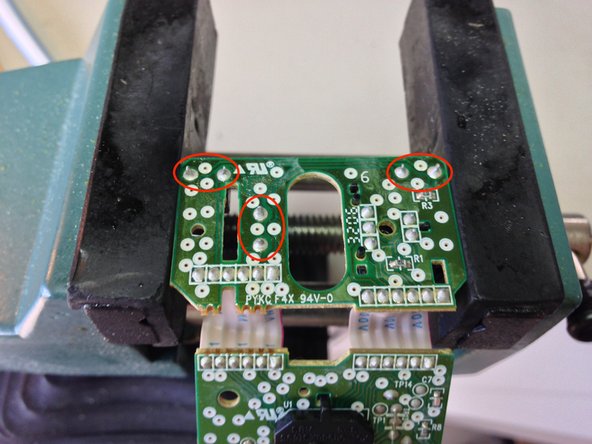
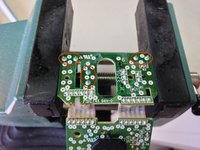
Once the PCB is free, identify the three microswitches - one for the scrollwheel, one each for the left and right mouse buttons. Mount the PCB in a small vice or board holder.
-
-
在这个步骤中使用的工具:Desoldering Pump$3.99
-
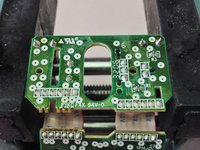
Using a desoldering pump or solder wick, clear the existing solder so that the microswitches can be freely removed. Should you encounter resistance when removing the switch be sure that any residual solder has been removed so as not to damage the pads when the parts are withdrawn.
-
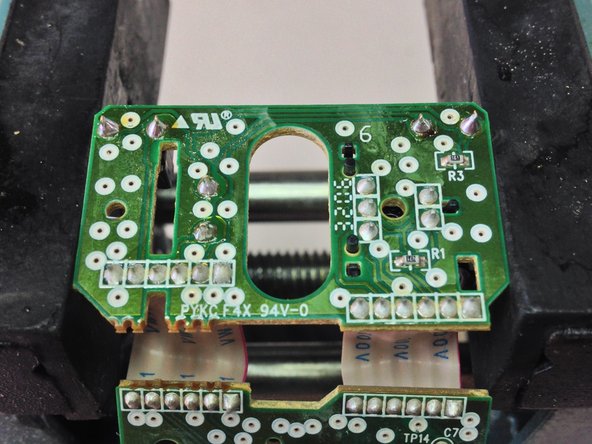
Once the old microswitches have been removed and the board is clean, the new switches can be dropped in place. I used Panasonic EVQ-P0E07K switches which appear to be a direct replacement. These are a 'snap in' component so the legs of the component secure themselves snugly through the board, allowing easy soldering.
-
Note: The suggested Panasonic EVQ-P0E07K switches have a light touch similar to the original part used in the mouse. For a firmer, more mechanical 'click' Panasonic EVQ-P0D07K switches may be used instead.
-
-
-
If there is any flux residue from soldering it may be cleaned with a little isopropyl alcohol. Now is an ideal time to clean out any dust and debris from inside of the casing before reassembly.
-


To reassemble your device, follow these instructions in reverse order.
6等其他人完成本指南。
4指南评论
Hello! I own several of them, if I had known when it was discontinued I would have purchased a truckload of them!
After many years, (more than 10) all of them will start to "turn off". Red light turns off for half a second and come back and this happens every 30 seconds to 2 minutes.
Do you know if it's fixable or they are dead for good?
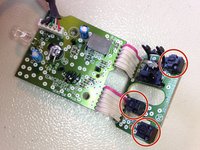
Hey mate, it's hard to tell. I did replace the two electrolytic capacitors in one of mine. I'd take a guess they may have drifted out of spec and aren't holding charge like they should.
Values are:
QTY 1 : 10uF, 16V, 1.5mm pitch, 4mm diameter (Digikey part number 1189-2185-ND)
QTY 1 : 22uF, 16V, 1.5mm pitch, 4mm diameter (Digikey part number 1189-2186-ND)
Those are the parts I ordered but have since been marked obsolete.
Anything branded Panasonic/Nichicon/Rubycon with the same specs will be a good quality part.
Also be sure to wire them in the same orientation as the original parts (if the polarity is reversed the board won't work or it could cause damage).
Hope this helps!
I've replaced the microswitches in some of these vintage mice, and they work like brand new. The hardest part is releasing those two clips. If there's an easy way to release those, I haven't found it.
Still a great tutorial with useful information and tips. I bought the switches on Amazon. Many sellers have them at a variety of prices.