视频概述
-
-
先来看看外部,MX6简直和iPhone一样,那么里面的性能也会和iPhone一样吗?来让我们看看都用了什么,嗨喂狗。
-
联发科 Helio X20 10核处理器 !, ARM Mail-T880 图形处理核心。
-
4 GB LPDDR3 内存以及32 GB 储存。
-
5.5 英寸 1080P 高精准屏幕 (大约401 PPI)。
-
1200万 ƒ/2.0 光圈 1.25 μm 像素 后置镜头,以及500万前置镜头。
-
Flyme OS 5.2 基于Android 6.0 棉花糖。
-
3060毫安时 锂电池支持24W快充技术。
-
USB-C接口,双卡双待,魅族 mTouch 指纹传感器。
-
-
这个步骤还没有翻译 帮忙翻译一下
-
It's a three-phone pile-up as we pull over to take a cursory look at how the MX6 compares to its iPhone idols.
-
A quick comparison reveals...not a whole lot. Apart from the USB-C connector and a slightly shifted microphone port, we're hard pressed to distinguish the MX6 from its Cupertino-based counterparts.
-
It's a similar story topside. Aside from the oval home button and different side button configuration, the MX6 fits right into the iPhone lineup—what with its metal unibody design and 2.5D glass panel.
-
The MX6 differentiates itself with a centered rear camera and dual flash assembly, but those subtle antenna bands are reminiscent of certain iPhone 7 rumors.
-
-
这个步骤还没有翻译 帮忙翻译一下
-
Like the Huawei P9, the MX6 seems inspired by the iPhone in more than just looks: two Pentalobe screws secure the MX6's display assembly to the chassis.
-
We're still baffled as to why manufacturers would copy Apple's screw design, when a regular ol' Phillips or Torx screw does the same job better with less hassle.
-
Not to worry, Scooby Doo— Meizu cut us some slack (literally), so the cable is unlikely to rip when opening the phone.
-
-
这个步骤还没有翻译 帮忙翻译一下
-
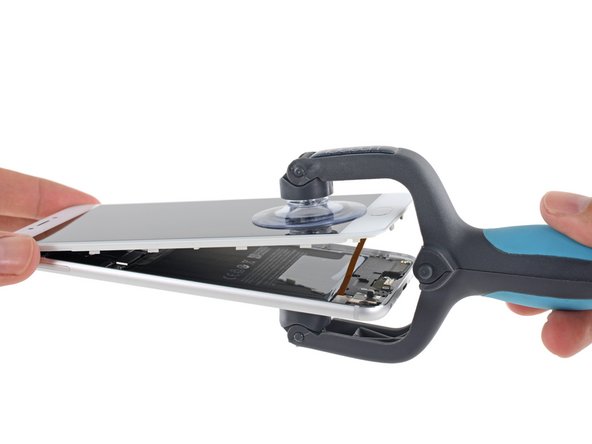
Before diving in, we pause to disconnect the battery; its small connector releases with a flip of the spudger. Safety first.
-
With the MX6 safely de-electrified, we pop the display cable free and peer inside.
-
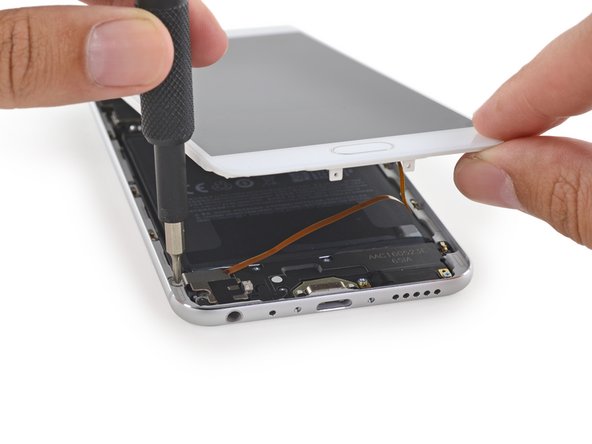
First observation: Phillips screws— everywhere! A small celebration breaks out around the teardown table.
-
Second observation: Looks like the iPhone mold is mostly skin-deep, look at that big ol' battery.!We just can't wait to dig in.
-
-
这个步骤还没有翻译 帮忙翻译一下
-
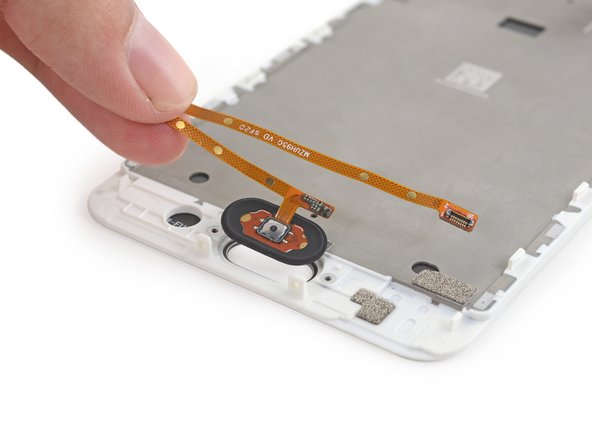
Interestingly, the display's perimeter is all plastic, including its clips and edges. This may be a durability concern, but there's no risk of display bracket separation.
-
Out comes the bracket securing the fingerprint sensor—followed by the sensor itself, with its long switchback cable in tow.
-
-
这个步骤还没有翻译 帮忙翻译一下
-
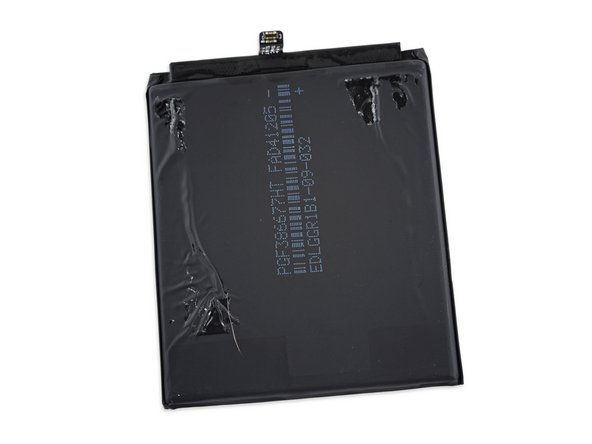
With the display assembly out of the way, we carefully excavate the MX6's stubbornly-adhered battery. Luckily, the battery features an iPhone 4-esque battery pull tab that makes the job a bit easier.
-
The MX6 packs a non-user-removable, 3.8 V, 11.63 Wh Li-poly battery.
-
-
-
这个步骤还没有翻译 帮忙翻译一下
-
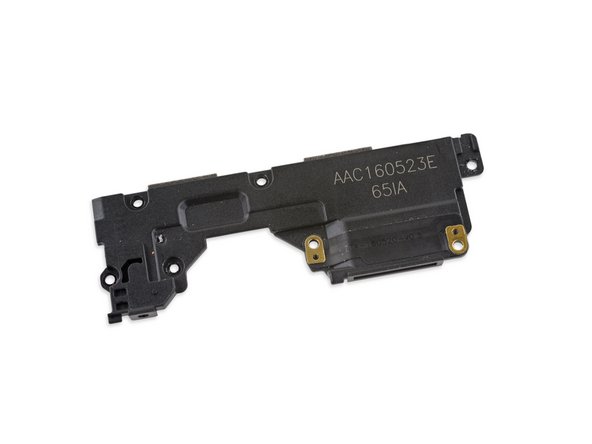
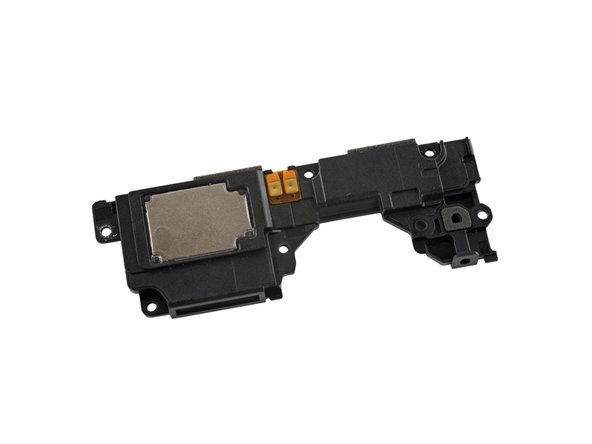
Next to come out? The speaker assembly, complete with spring contacts and what appears to be an antenna sticker of some kind.
-
Part of the assembly lines up with the lower microphone hole—but if you go looking for a mic here, you'll be disappointed!
-
This assembly has a tiny acoustic tube channel with a 90-degree bend, passing sound from the outside world to a mic located elsewhere...
-
-
这个步骤还没有翻译 帮忙翻译一下
-
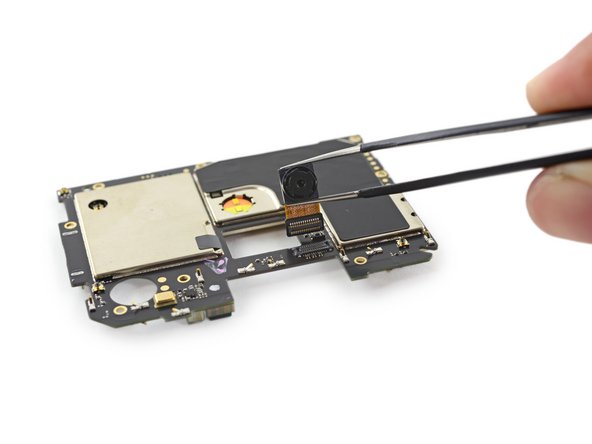
With tweezers in hand, we deftly pluck out several bits 'n pieces:
-
Antenna/vibrator bracket
-
Antenna/front-facing camera bracket
-
Dual SIM card tray
-
-
这个步骤还没有翻译 帮忙翻译一下
-
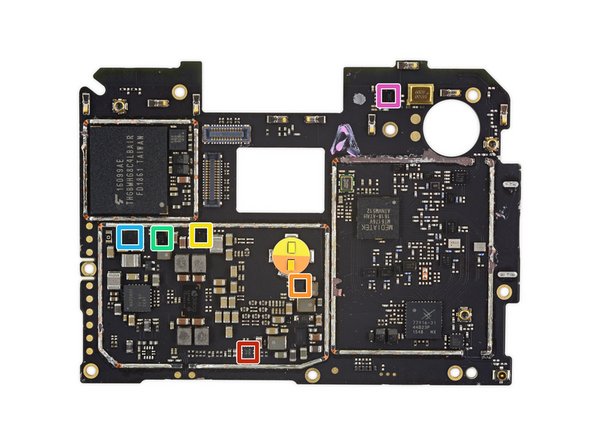
With the motherboard plucked from the the rear case, we take a second to explore the MX6's silicon situation. Highlights include:
-
Micron MT52L512M64D4GN-107 WT:B 32 Gb (4 GB) Mobile LPDDR3 SDRAM with MediaTek Helio X20 SoC layered underneath
-
MediaTek MT6631N Wi-Fi module
-
Texas Instruments BQ25892 fast charging IC
-
NXP TFA9911 audio amplifier
-
MediaTek MT6351V PMIC
-
Skyworks SKY77673-11 power amplifier module (likely)
-
MediaTek MT6300P (possibly an iteration of the MT6302 dual SIM card controller)
-
-
这个步骤还没有翻译 帮忙翻译一下
-
On the flip side:
-
Toshiba THGBMHG8C4LBAIR 32 GB eMMC 5.1 NAND flash
-
Texas Instruments LM36272 LCD backlight driver
-
Texas Instruments BQ25892 fast charging IC
-
Dialog Semiconductor DA9214 PMIC
-
MediaTek MT6176V RF transciever
-
Skyworks SKY13596-397LF RF switch
-
Skyworks SKY77916-31 RF PAM
-
-
这个步骤还没有翻译 帮忙翻译一下
-
IC Identification, pt. 2:
-
ON Semiconductor FUSB301A USB type-C controller
-
Texas Instruments LM3644 camera flash LED driver
-
ON Semiconductor FAN53200UC35X 5 A regulator
-
ON Semiconductor FAN53526UC128X 3.0 A DC-DC converter
-
ON Semiconductor FAN49101 2 A buck-boost regulator (likely)
-
Texas Instruments DRV2604 haptic driver
-
Skyworks SKY9225 antenna tuner (likely)
-
-
这个步骤还没有翻译 帮忙翻译一下
-
IC Identification, Pt. 3 (sensors):
-
STMicroelectronics LSM6DS3 3-axis accelerometer/gyroscope
-
AKM Semiconductor AK09911 3-axis electronic compass
-
Rohm BU52031NVX Hall Effect sensor
-
Rohm BH1745 color sensor
-
Broadcom APDS-9922-001 ambient light/proximity sensor
-
-
这个步骤还没有翻译 帮忙翻译一下
-
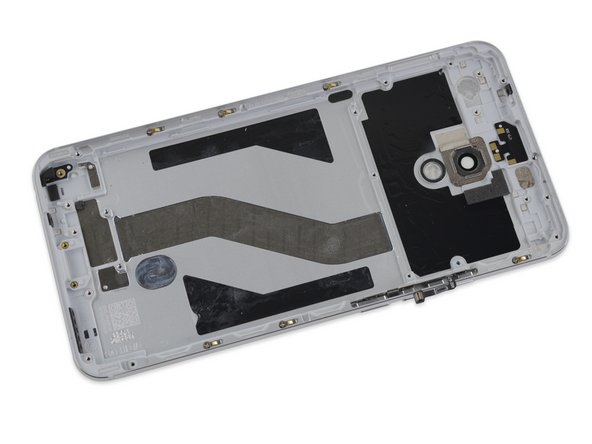
The final few pickings come from the MX6's chassis.
-
We pry out the (tiny!) rotational vibrator motor. It's different from the linear oscillating motors and "Taptic Engines" used in many (not all) iPhone models, but also takes less space.
-
The chassis itself is peppered with spring contacts, which no doubt made our teardown journey that much easier.
-
-
这个步骤还没有翻译 帮忙翻译一下
-
Though the exterior design looks undeniably iPhone-esque, the hardware layout calls to mind another recent Android hit from China.
-
And that's a wrap! Time to give this phone a score.
-
- The display assembly is the first component out, simplifying screen repairs.
- Modular components with spring contacts, large screws, and thoughtful cabling all make repair cheaper and easier.
- The battery is equipped with a pull-tab for removal, but tough adhesive means lots of force is needed to remove it.
- The MX6 uses Pentalobe security screws on the exterior, requiring a specialty screwdriver to open the phone before any repair.


最后的想法
可修复性评分


(10是最容易修复)

2条评论
that phone looks like the OnePlus 3 and iPhone 6 had a child
Max Warsaw - 回复
The overall design is very smart. Rough guess about the antenna design can be seen at : http://wenku.baidu.com/view/28f9ea96e43a...