跳转到主内容

Meizu MX3 Screen Replacement

你所需要的

  1. Meizu MX3 Screen Replacement, Screen: 步骤 1 中的图像 1,1
    • Remove the back panel, and unscrew everything to remove the second back panel. Some screw are longer than other. But I mixed them without issue. Here I saw the solution for the network issue: the little contacts between motherboard and screen were bended.

    • I removed the battery, but I think it's not mandatory. If you do, be careful, it's very well glued, and there is some wires behind.

  2. Meizu MX3 Screen Replacement: 步骤 2 中的图像 1,1
    • Unplug all the connectors to the motherboard, included the two antennas The small flat ribbon in the corner is a little tricky, you have to switch the black part of the connector, not the white one like some other similar I saw before.

  3. Meizu MX3 Screen Replacement: 步骤 3 中的图像 1,1
    • Remove the jack connector, removes the lasts screws (mark the placement for later)

    • Remove the motherboard, starting by the upper part: There is a last connector to unplug at the bottom, behind.

  4. Meizu MX3 Screen Replacement: 步骤 4 中的图像 1,2 Meizu MX3 Screen Replacement: 步骤 4 中的图像 2,2
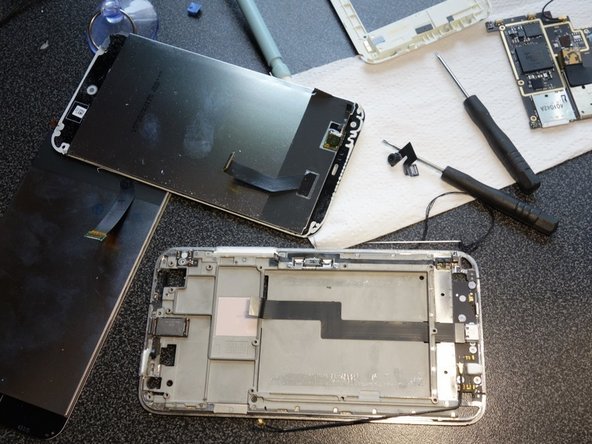
    • Now, remove the old screen. It's glued, try to lift a corner, then with a plastic tool, unglue everything.

    • Clean the glue inside the metal part.

  5. Meizu MX3 Screen Replacement: 步骤 5 中的图像 1,1
    • Put some adhesive (or some glue?) I used thin double-sided tape I had cut the right shape. the side of the screen are less than 1mm wide, it's hard to do here...

    • Put the screen in the frame, and put everything back in place.

    • Voila!

结论

To reassemble your device, follow these instructions in reverse order.

5等其他人完成本指南。

Feyris

于04/10/15注册

135 声望

撰写一个指南

0条评论

添加评论

浏览统计数据:

过去 24 小时: 0

过去 7 天: 0

过去 30 天: 6

总计 3,436