跳转到主内容

Macintosh PowerBook 165c Lower Case Replacement

你所需要的

  1. Macintosh PowerBook 165c Lower Case Replacement, Battery: 步骤 1 中的图像 1,1
    • Orient the computer so the battery is facing you.

    • Slide the gray plastic battery cover to the right.

  2. Macintosh PowerBook 165c Lower Case Replacement: 步骤 2 中的图像 1,1
    • Pull the battery toward yourself until it is fully detached.

  3. Macintosh PowerBook 165c Lower Case Replacement, Input/Output Door: 步骤 3 中的图像 1,1
    • Orient the computer right side up with the rear facing you.

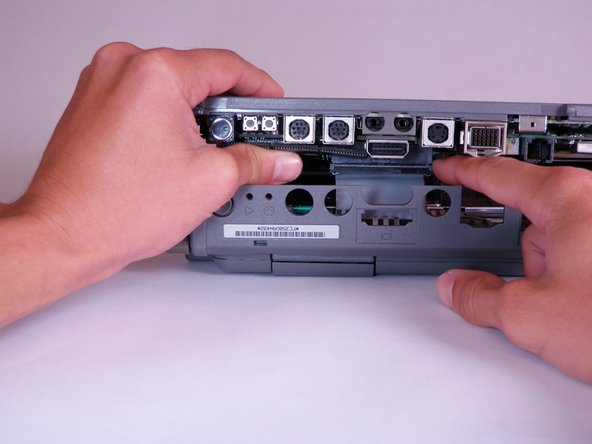
    • Open the Input/Output (I/O) door.

  4. Macintosh PowerBook 165c Lower Case Replacement: 步骤 4 中的图像 1,1
    • Carefully bend the door into an arch until one of the pins releases from its slot.

    • Once one of the pins is free, remove the I/O door from the computer.

  5. Macintosh PowerBook 165c Lower Case Replacement, Lower Case: 步骤 5 中的图像 1,1
    • Orient the computer with the bottom facing up and rear facing you. You should be able to read the Macintosh label in this position.

  6. Macintosh PowerBook 165c Lower Case Replacement: 步骤 6 中的图像 1,1
    • Use a T8 torx screwdriver to remove the 6.8mm long screw above and to the right of the modem jack.

    • Twist counter clockwise to remove the screw.

  7. Macintosh PowerBook 165c Lower Case Replacement: 步骤 7 中的图像 1,1
    • Use a T10 torx screwdriver to remove the four, 18mm long screws from the lower case.

  8. Macintosh PowerBook 165c Lower Case Replacement: 步骤 8 中的图像 1,2 Macintosh PowerBook 165c Lower Case Replacement: 步骤 8 中的图像 2,2
    • Place your hands on the lower case, just above the I/O panel, and slowly lift the lower case a few inches above the main body of the computer.

    • Release the large, gray interconnect ribbon cable just behind the I/O panel.

    • Caution: Lower case cannot be fully removed until two plastic clips in the front corners are released. See the following step for details.

  9. Macintosh PowerBook 165c Lower Case Replacement: 步骤 9 中的图像 1,2 Macintosh PowerBook 165c Lower Case Replacement: 步骤 9 中的图像 2,2
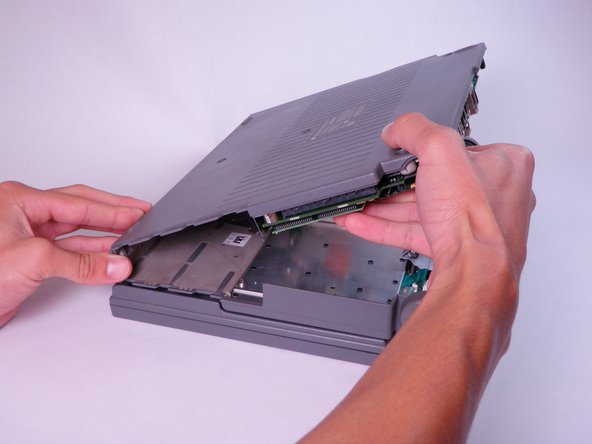
    • Place your thumb on the upper case, inside the empty battery slot, and your index finger near your thumb on the left side of the lower case.

    • Pinch your thumb and index finger towards each other to release the clip. Without releasing pressure on the pinch grip, use your index finger to push the lower case upwards.

    • Lift the lower case to remove it.

结论

To reassemble your device, follow these instructions in reverse order.

Jason

于10/12/11注册

89 声望

创作了4篇指南

团队

Cal Poly, Team 6-3, Regan Fall 2011 Cal Poly, Team 6-3, Regan Fall 2011 的会员

CPSU-REGAN-F11S6G3

4 名成员

创作了12篇指南

0条评论

添加评论

浏览统计数据:

过去 24 小时: 0

过去 7 天: 1

过去 30 天: 5

总计 1,049