本指南有最近更改,您可查看未经巡查的最新版本。
简介
Keep your display opening smoothly by using this guide to replace a broken left clutch hinge.
你所需要的
-
-
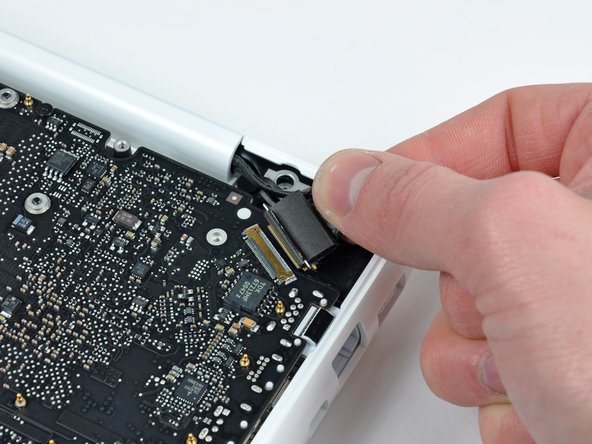
Use the flat end of a spudger to lift the battery connector up out of its socket on the logic board.
-
-
-
Remove the following screws from the optical drive side of the rear vent:
-
Two 10 mm T8 Torx
-
Two 5.2 mm Phillips
-
-
-
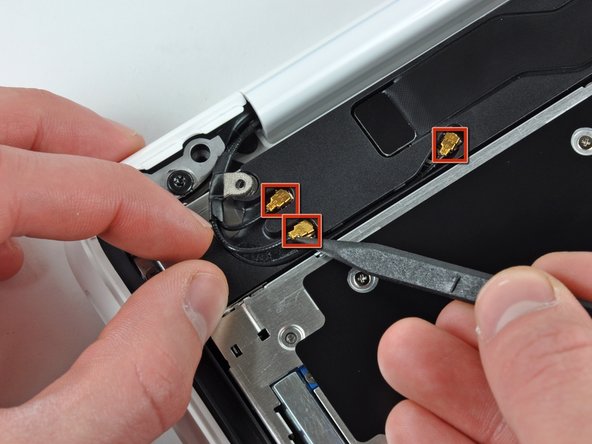
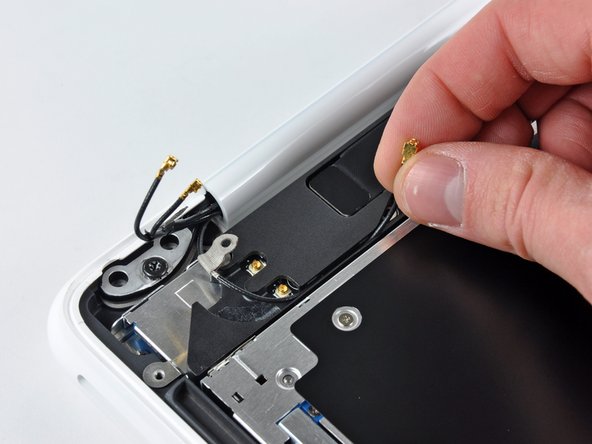
Remove the single 3 mm Phillips screw securing the AirPort/Bluetooth antenna ground strap to the rear speaker.
-
-
-
-
Insert the flat end of a spudger between the thin rubber strip surrounding the front display bezel and the rear display bezel.
-
Use the flat end of your spudger to carefully pry the front display bezel away from the adhesive securing it to the rear display bezel.
-
Continue prying until the front display bezel is free along the right side of the display and behind the right clutch hinge.
-
-
-
Remove the two 3 mm Phillips screws securing the clutch cover to the rear display bezel.
-
-
-
Remove the three 4.7 mm T6 Torx screws securing the left clutch hinge to the front display bezel.
-


To reassemble your device, follow these instructions in reverse order.
To reassemble your device, follow these instructions in reverse order.
6等其他人完成本指南。

一条评论
By the way, if like me, you're doing this because you need to tighten the internal hinge screws on the display, I found that pulling up the bottom portion of the screen bezel was enough to remove the clutch cover and get to the screws. Thank you IFIXIT!
Kirk Gable - 回复