当前版本的文档还未经巡查,您可以查看最新的已查核版本。
你所需要的
-
-
这个步骤还没有翻译 帮忙翻译一下
-
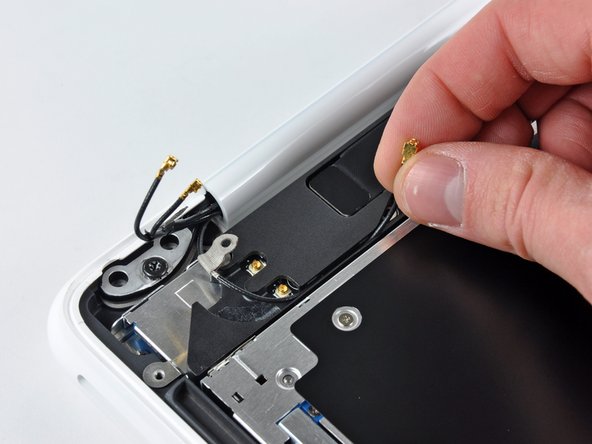
Grab the plastic pull tab secured to the display data cable lock and rotate it toward the DC-In side of the computer.
-
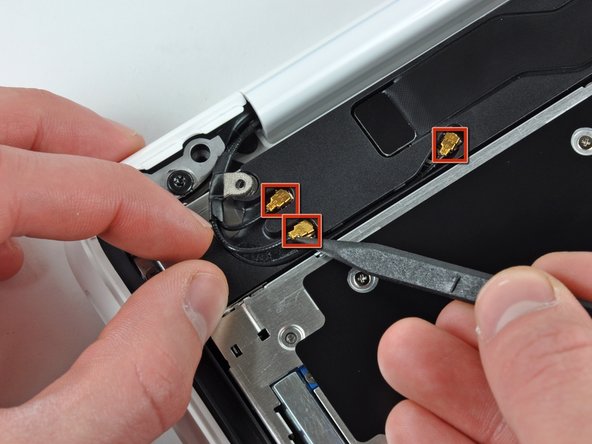
There is also a thin metal lock clip under the plastic tab that has to be released ( Use the tip of a spudger ) before you can disconnect the display data cable.
-
-
这个步骤还没有翻译 帮忙翻译一下
-
Open your MacBook so the display is perpendicular to the upper case.
-
Place your opened MacBook on a table as pictured.
-
While holding the display and upper case together with your left hand, remove the remaining 7.8 mm with lock washer T8 Torx screw from the lower display bracket.
-


78等其他人完成本指南。

3条评论
Great guide worked perfectly....
The problems I encountered….
1) (IMPORTANT) The vent cover has a small beveled slot were the picture cable fits into nicely and the first time I reassembled my mac I did not allow the cord adequate space between the vent cover and the computer housing. This lead to a red, green, and blue alternating screen upon booting and troubleshooting the issue to find out that it was just a pinched cable took longer than I would have liked.
2) The picture cable removal and reassembly was not as seamless as it seemed in the picture. The metal connector under the cable was very flimsy and weak. It did not break however it did bend slightly and I wasn’t the happiest about it.
3) The power cord broke (chipped) a small amount. As previously mentioned. Not a big deal but not fun. (Be careful)
Whole process took 45 min… very easy
Couldn’t have done it without the guides and the tools
Thanks for saving me like $300
Joshua Poe - 回复
In your opinion, could I replace the screen of my A1342 (2011) by the screen of a A1181 (mid 2009)?
They seem to be identical.
Wow, what an excellent guide. I watched the video first and it looked easy enough. I ensure I had the right equipment first, followed the steps as per the instructions. Had to be careful with Step 9; i.e. removing the plastic pull tab secured to the display data cable lock as it’s fragile. Step 13/14 was difficult too but followed the advice and got there eventually. Reversing back, step 13/14 took a while as did Step 10 and Step 8. Step 8 was a pain actually as I found it really difficult to get the AirPort and Blue tooth antenna back in again.
All in all, as I’m a novice I think it took me almost 90 minutes but I did it and I now have a new screen working perfectly so have renewed my Apple mac laptop. I’ve been meaning to do this for 2 years, but was too scared and thought hey just buy the part and give it a go. If I mess it up, i’ve not used the laptop in 2-years+ so it can go in the bin. Fortunately, even I (complete novice) was able to follow the instructions! Thank you as I now have use of my mac again.