当前版本的文档还未经巡查,您可以查看最新的已查核版本。
你所需要的
-
这个步骤还没有翻译 帮忙翻译一下
-
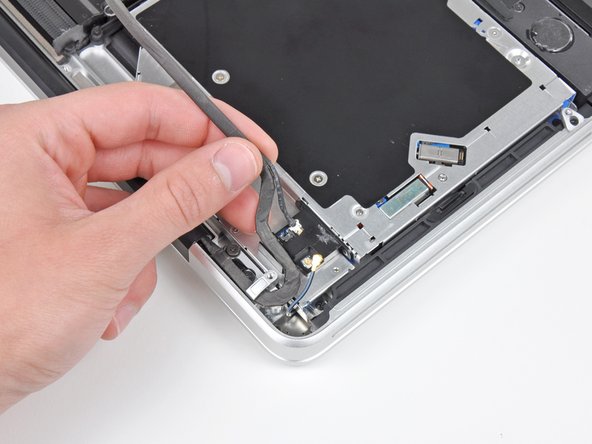
If present, grab the plastic tab attached to the battery connector and pull it toward the front edge of the device. For Late-2011 models the battery connector will not have a tab and is simply a plug that inserts straight down into the motherboard--to remove pry the plug straight up.
-
-
-
这个步骤还没有翻译 帮忙翻译一下
-
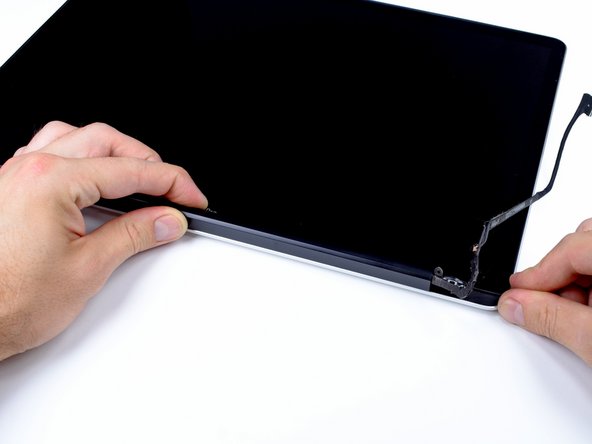
Grab the upper case with your right hand and rotate it slightly toward the top of the display so the upper display bracket clears the edge of the upper case.
-
Rotate the display slightly away from the upper case.
-
Lift the display up and away from the upper case, minding any brackets or cables that may get caught.
-


7等其他人完成本指南。

4条评论
I had a broken right hinge and replaced it using this guide. The pictures were amazingly spot-on and clearly illustrated the procedure to be followed.
The one thing I did not find (perhaps because Apple Support had previously opened this up to test the hinge) was the "plastic hinge guard" - would be great if you folk could add a pic of this.
The other thing I found a bit hard was the final separation of the display unit and its reattachment which I got through kind of by trial and error. But no biggie. Thanks for this guide - it was MOST helpful!
Hello everyone, does this guide also apply for the 15 inch late 2011 model?
My teardown revealed that the real failure was of the thread locking compound on the screws permitting them to come loose and the hinge to therefore rock, not an internal hinge failure. The new hinges were therefore installed with fresh fastener locking compound. This would be a recommended additional supply for this solution.
Any advice on finding parts? I just picked up an Early 2011, 17-incher and the screen hinges are less than tight, if not "floppy."