跳转到主内容

本指南有最近更改,您可查看未经巡查的最新版本

MacBook Pro 15" Unibody Late 2008 and Early 2009 Optical Drive Replacement

仅作为前提条件
本指南仅用作其他指南的先决条件。不能单独食用。

你所需要的

  1. MacBook Pro 15" Unibody Late 2008 and Early 2009 Optical Drive Replacement, Optical Drive: 步骤 1 中的图像 1,1
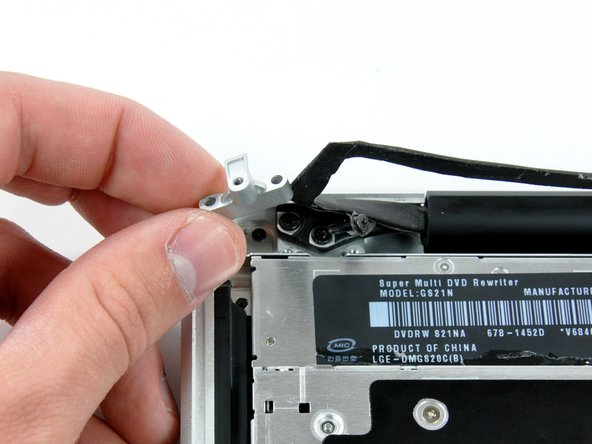
    • Disconnect the camera cable by pulling the male end straight away from its socket.

  2. MacBook Pro 15" Unibody Late 2008 and Early 2009 Optical Drive Replacement: 步骤 2 中的图像 1,1
    • Deroute the camera data cable from the channel in the optical drive.

  3. MacBook Pro 15" Unibody Late 2008 and Early 2009 Optical Drive Replacement: 步骤 3 中的图像 1,1
    • Use a spudger to pry the optical drive connector straight up off the logic board.

  4. MacBook Pro 15" Unibody Late 2008 and Early 2009 Optical Drive Replacement: 步骤 4 中的图像 1,2 MacBook Pro 15" Unibody Late 2008 and Early 2009 Optical Drive Replacement: 步骤 4 中的图像 2,2
    • Remove two 8 mm Phillips screws securing the camera cable bracket to the upper case.

    • The rightmost screw may remain captive in the camera cable.

    • Lift the camera cable bracket out from the upper case.

  5. MacBook Pro 15" Unibody Late 2008 and Early 2009 Optical Drive Replacement: 步骤 5 中的图像 1,1
    • Remove the following three Phillips screws securing the optical drive to the upper case:

    • One 3.5 mm Phillips screw.

    • Two 2.5 mm Phillips screws.

  6. MacBook Pro 15" Unibody Late 2008 and Early 2009 Optical Drive Replacement: 步骤 6 中的图像 1,1
    • Lift the optical drive from its left edge and pull it out of the computer.

结论

To reassemble your device, follow these instructions in reverse order.

0条评论

添加评论

浏览统计数据:

过去 24 小时: 0

过去 7 天: 0

过去 30 天: 1

总计 1,241