跳转到主内容

当前版本的文档还未经巡查,您可以查看最新的已查核版本

你所需要的

  1. , 底壳: 步骤 1 中的图像 1,1
    • 拆除以下十颗固定在机壳上的螺丝

    • 三颗13.5mm(14.1 mm) 菲利普斯十字螺丝 。

    • 七颗3 mm 菲利普斯十字螺丝。

    • 卸下这些螺丝时,请注意它们如何以很小的角度伸出。必须以相同的方式重新安装它们。

  2. : 步骤 2 中的图像 1,1
    • 使用双手在后壳接近风扇处提起固定后壳的两个卡扣。

    • 将后壳放置在一边。

  3. , 电池排线: 步骤 3 中的图像 1,2 , 电池排线: 步骤 3 中的图像 2,2
    • 对于某些维修(例如硬盘),不需要断开电池连接器,但断开连接器可防止主板上电子设备的意外短路。 如果不断开电池连接器,请小心,因为主板的部件可能会通电造成短路或其他伤害。

    • 使用撬棒的边缘从逻辑板上的插座向上撬开电池连接器。

    • 在连接器的两个短边上分别向上撬起插座是十分有效的手段。

  4. : 步骤 4 中的图像 1,1
    • 将电池电缆稍微掰离主板上的插座,以免在进行其他工作时插头与插座意外连接。

  5. 这个步骤还没有翻译 帮忙翻译一下

    : 步骤 5 中的图像 1,3 : 步骤 5 中的图像 2,3 : 步骤 5 中的图像 3,3
    • Use a spudger to pry the fan connector straight up off the logic board.

    • It is useful to twist the spudger axially from beneath the fan cable wires to release the connector.

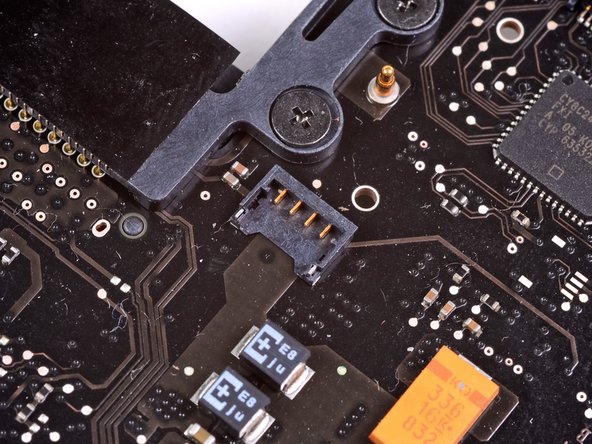
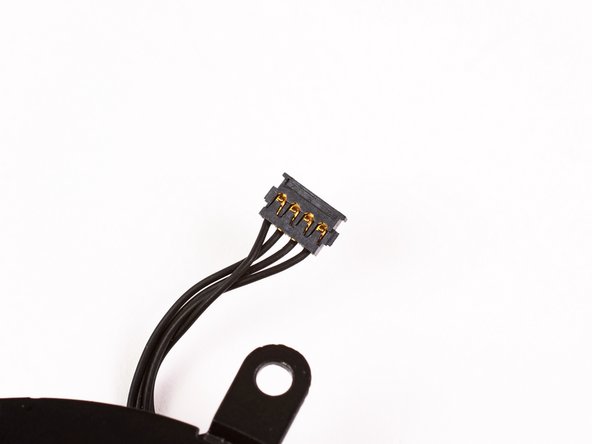
    • The fan socket and the fan connector can be seen in the second and third pictures. Be careful not to break the plastic fan socket off the logic board as you use your spudger to lift the fan connector straight up and out of its socket. The layout of the logic board shown in the second picture may look slightly different than your machine but the fan socket is the same.

  6. 这个步骤还没有翻译 帮忙翻译一下

    : 步骤 6 中的图像 1,1
    • Remove three T6 Torx screws securing the right fan to the logic board and upper case.

  7. 这个步骤还没有翻译 帮忙翻译一下

    : 步骤 7 中的图像 1,1
    • Lift the right fan out of the upper case.

终点

44等其他人完成本指南。

2条评论

I broke the plastic fan socket off the logic board. Any suggestions?

AdPrinceadventure - 回复

Thanks for the article, I just need to find a place to purchase the fan. :-)

Mr Anderson - 回复

添加评论

浏览统计数据:

过去 24 小时: 0

过去 7 天: 2

过去 30 天: 31

总计 18,692