当前版本的文档还未经巡查,您可以查看最新的已查核版本 。
仅作为前提条件
本指南仅用作其他指南的先决条件。不能单独食用。
Remove the pieces of yellow kapton tape from the bottom left corner of the display.
Peel the three green antenna ground straps off the copper tape along the bottom edge of the LCD.
The adhesive connecting these straps to the display is very strong. An edged tool is helpful to separate the adhesive while you peel the straps off.
Remove the piece of tape securing the camera cable to the LCD.
Gently pull the camera cable away from its socket on the camera board.
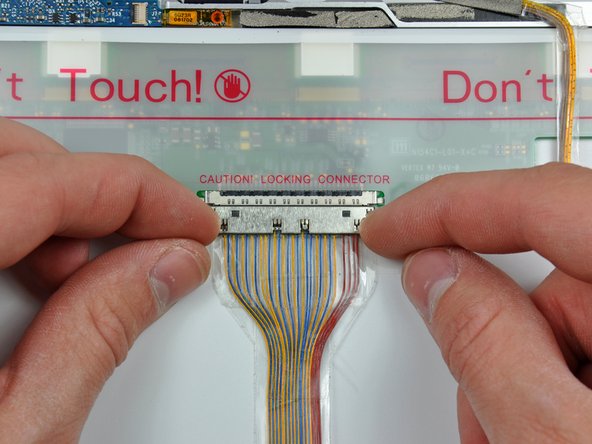
Pull the display data cable connector away from its socket on the LCD.
Pull both cables parallel to the face of the logic board.
If you have a Core Duo machine, refer to picture 1 and remove three Phillips screws connecting the clutch assembly to the lower edge of the front display bezel near the display data cable.
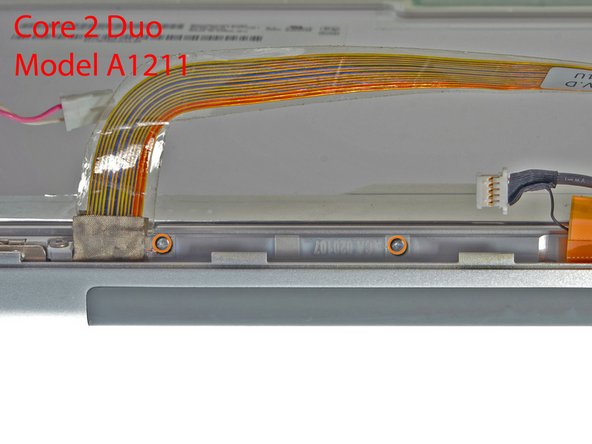
If you have a Core 2 Duo Model A1211 machine, refer to picture 2 and remove two Phillips screws connecting the clutch assembly to the lower edge of the front display bezel near the display data cable.
Remove the small Phillips screw from behind the display data cable.
Remove the small rectangular steel bracket by sliding it away from the right clutch hinge.
If you have a Core 2 Duo Model A1211, there is no steel bracket. Simply remove the screw and continue to the next step.
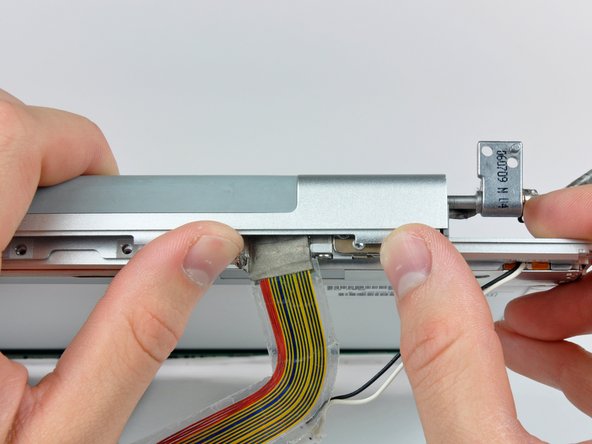
Push the open edge of the clutch cover away from the left clutch hinge to pop it off the clips attaching the two parts.
If necessary, repeat this process for the right side of the clutch assembly.
Remove the clutch assembly from the front display bezel.
嵌入本指南
选择一个尺寸并复制下面的代码,将本指南作为一个小插件嵌入到你的网站/论坛中。
单个步骤
完整指南
小——600像素
中——800像素
大——1200像素
预览