跳转到主内容

当前版本的文档还未经巡查,您可以查看最新的已查核版本

你所需要的

  1. , 后壳: 步骤 1 中的图像 1,1
    • 移除下列将 MacBook Pro 13" Unibody后壳固定的 10个 螺丝:

    • 7个3 mm Phillips螺丝

    • 3个13.5 mm Phillips 螺丝

  2. : 步骤 2 中的图像 1,1
    • 轻轻提起后壳然后推向电脑的后方来松开卡舌。

  3. , 电池: 步骤 3 中的图像 1,1
    • 为了预防意外发生,我们建议您从逻辑板上断开电池连接器,以避免任何放电。

    • 使用一个平端撬棒将电池连接器分离逻辑板插座。

  4. , 硬盘: 步骤 4 中的图像 1,1
    • 拆下将硬盘固定到支架上盖上的两个十字螺丝。

    • 这些螺丝固定在硬盘支架上。

  5. : 步骤 5 中的图像 1,1
    • 将固定支架从上盖上提起。

  6. : 步骤 6 中的图像 1,1
    • 通过其拉片提起硬盘,并将其从外壳中拉出,将电线连接到电脑上。

  7. : 步骤 7 中的图像 1,1
    • 将硬盘的电线从硬盘上拔下即可。

  8. 这个步骤还没有翻译 帮忙翻译一下

    : 步骤 8 中的图像 1,1
    • Remove the following four screws securing the hard drive and IR sensor cable to the upper case:

    • Two 1.5 mm Phillips screws.

    • Two 9.5 mm Phillips screws.

  9. 这个步骤还没有翻译 帮忙翻译一下

    : 步骤 9 中的图像 1,2 : 步骤 9 中的图像 2,2
    • Slide the hard drive and IR sensor bracket away from the edge of the upper case.

    • Carefully peel the hard drive and IR sensor cable from the upper case.

  10. 这个步骤还没有翻译 帮忙翻译一下

    : 步骤 10 中的图像 1,1
    • Use the flat end of a spudger to pry the hard drive cable connector up off the logic board.

  11. 这个步骤还没有翻译 帮忙翻译一下

    : 步骤 11 中的图像 1,1
    • Lift the hard drive/IR sensor cable assembly out of the upper case.

    • If your replacement part does not come with the hard drive bracket and indicator light, you will need to pull those off of the part you are removing and install them on the new part.

    • Your replacement part may come with several adhesive foam bumpers. These are to ensure a snug fit of both bracket and hard drive. Apply only as needed.

终点

292等其他人完成本指南。

7条评论

Used a Phillips #00 and a creditcard. It's an easy job, takes about 10 minutes. :)

sjoerdstra - 回复

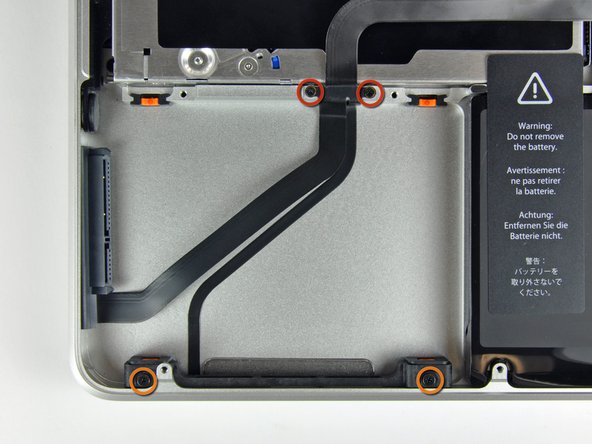
In step #8 the two small screws were very tight in my computer. The Phillips #00 was too large and damaging the screws. I changed to a Phillips #000 applied substantial pressure and voila, the screws came off.

Reassembly: placing the IR sensor cable (the one you"peeled off" in step #9) is a bit tricky. Start from the side opposite the IR sensor (the side with the two small screws of step 8) and press first along the short vertical side and then across towards the IR section. There should be a little left for a vertical section at the IR sensor end.

bgrinstein - 回复

Very Easy and clearly written instructions

omar - 回复

Can you illustrate how to attach the gold strip cable?

Rene - 回复

if i change the HDD cable and get the same results what could be the the real problem , because the original problem as we all know was the we were getting the question mark on the white screen .

Curtis O'brien - 回复

添加评论

浏览统计数据:

过去 24 小时: 2

过去 7 天: 19

过去 30 天: 67

总计 165,607