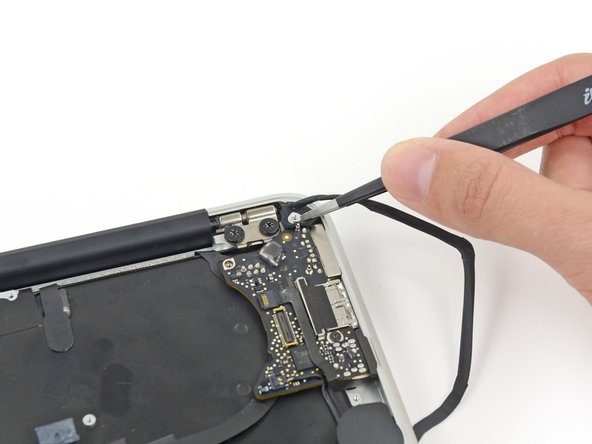
Gently push the tip of a spudger under the black plastic flap stuck to the display data cable lock to make the lock pop upward and away from the socket.
While holding the lock away from the socket, gently pull the display data cable out of its socket.
Do not pull upward on the display data cable as you disconnect it, as its socket may break off the logic board.
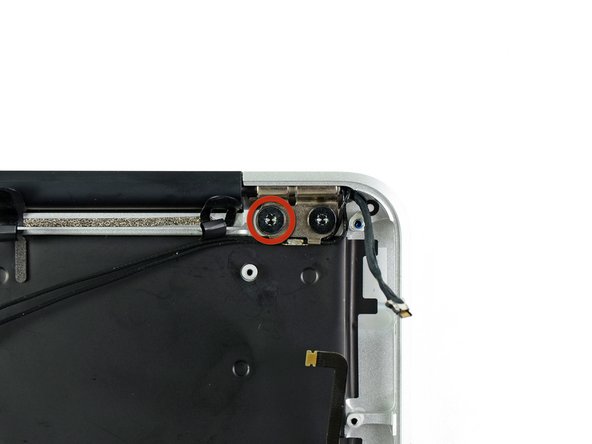
Before removing the last display screw, be sure to hold the display and upper case steady with your other hand. Failure to do so may allow the components to fall onto the table, causing potentially expensive damage.
Remove the last 4.9 mm T8 Torx screw securing the display to the upper case.
I was able to bring back my MacBook Air for just the cost of the parts after the Apple Store quoted the repair at costing almost as much as the device itself! My Ifixit kit had everything I needed to do the job with ease.
This is an amazing guide. I was able to replace the screen in an hour. Noticed that in 13” models, I believe that this is a bit easier. Apple made it not super easy to replace the screen on this one, since we literally have to take everything apart to replace the display.
The tricky part was the little loops in which the bluetooth cables go through - I used a pair of tweezers to be careful not to remove them off and put the new cables back. Too bad Apple use a mix of so many different screws - I put each set of screws on a paper page and wrote where the screws go.
Everything else was fairly easy. Super important to have the right tools though.
Thanks Sam for your work, I saved $400 thanks to this guide.