跳转到主内容

本指南有最近更改,您可查看未经巡查的最新版本

Mac Pro Late 2013 Power Supply Assembly Replacement

仅作为前提条件
本指南仅用作其他指南的先决条件。不能单独食用。

你所需要的

  1. Mac Pro Late 2013 Power Supply Assembly Replacement, Power Supply Assembly: 步骤 1 中的图像 1,1
    • Flip the Mac Pro back over and set it gently on a flat surface.

    • We recommend laying the Mac Pro on the corner of the heat sink and the two standoff screw posts that attach to the interconnect board.

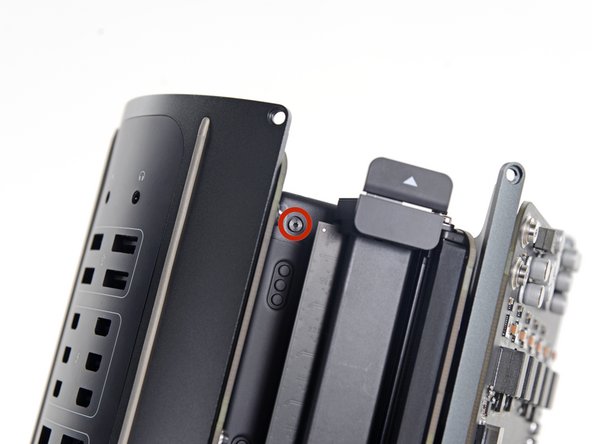
  2. Mac Pro Late 2013 Power Supply Assembly Replacement: 步骤 2 中的图像 1,2 Mac Pro Late 2013 Power Supply Assembly Replacement: 步骤 2 中的图像 2,2
    • Remove the two 3.6 mm T5 Torx screws from the sides of the power supply cage (one on each side).

  3. Mac Pro Late 2013 Power Supply Assembly Replacement: 步骤 3 中的图像 1,1
    • Remove the power supply cage from the top of the power supply.

    • By removing this cage, you are exposing internal components of the power supply. Be very careful not to touch any of the power supply components or circuitry.

    • Be careful not to drop any screws or tools into the power supply, as this may damage the power supply.

  4. Mac Pro Late 2013 Power Supply Assembly Replacement: 步骤 4 中的图像 1,1
    • Remove the four 5.5 mm T8 Torx screws securing the power supply assembly to the Mac Pro.

  5. Mac Pro Late 2013 Power Supply Assembly Replacement: 步骤 5 中的图像 1,1
    • Remove the power supply assembly from the Mac Pro.

结论

To reassemble your device, follow these instructions in reverse order.

团队

iFixit iFixit 的会员

Staff

135 名成员

创作了16,817篇指南

0条评论

添加评论

浏览统计数据:

过去 24 小时: 0

过去 7 天: 0

过去 30 天: 0

总计 92