跳转到主内容

当前版本的文档还未经巡查,您可以查看最新的已查核版本

你所需要的

  1. , 外壳: 步骤 1 中的图像 1,2 , 外壳: 步骤 1 中的图像 2,2
    • 拨动图中所示的闩子至右侧“unlocked”位置。

  2. : 步骤 2 中的图像 1,3 : 步骤 2 中的图像 2,3 : 步骤 2 中的图像 3,3
    • 向上垂直提起Mac pro外壳。

    • 提起外壳时,可以按着顶部的散热风扇。

  3. 这个步骤还没有翻译 帮忙翻译一下

    : 步骤 3 中的图像 1,3 : 步骤 3 中的图像 2,3 : 步骤 3 中的图像 3,3
    • Remove five 5.1 mm T10 Torx screws from around the outer perimeter of the fan assembly.

  4. 这个步骤还没有翻译 帮忙翻译一下

    : 步骤 4 中的图像 1,2 : 步骤 4 中的图像 2,2
    • The fan assembly is attached to the rest of the computer by two cables on the IO board side.

    • Tilt the assembly up away from the IO board.

    • Do not try to remove the fan assembly yet, as it is still attached by two cables.

  5. 这个步骤还没有翻译 帮忙翻译一下

    : 步骤 5 中的图像 1,1
    • While supporting the fan assembly with one hand, loosen the two T8 captive screws in the fan cable bracket.

    • These screws are captive in the Mac Pro. Do not try to remove these screws from your Mac Pro.

  6. 这个步骤还没有翻译 帮忙翻译一下

    : 步骤 6 中的图像 1,1
    在这个步骤中使用的工具:
    Tweezers
    $4.99
    购买
    • Use a pair of tweezers to pull the fan cable bracket away from the fan assembly.

  7. 这个步骤还没有翻译 帮忙翻译一下

    : 步骤 7 中的图像 1,2 : 步骤 7 中的图像 2,2
    • Use the flat end of a spudger to disconnect the fan assembly ribbon cable from the IO board.

  8. 这个步骤还没有翻译 帮忙翻译一下

    : 步骤 8 中的图像 1,1
    • Disconnect the fan assembly antenna cable from the IO board.

    • Remove the fan assembly from the Mac Pro.

  9. 这个步骤还没有翻译 帮忙翻译一下

    : 步骤 9 中的图像 1,3 : 步骤 9 中的图像 2,3 : 步骤 9 中的图像 3,3
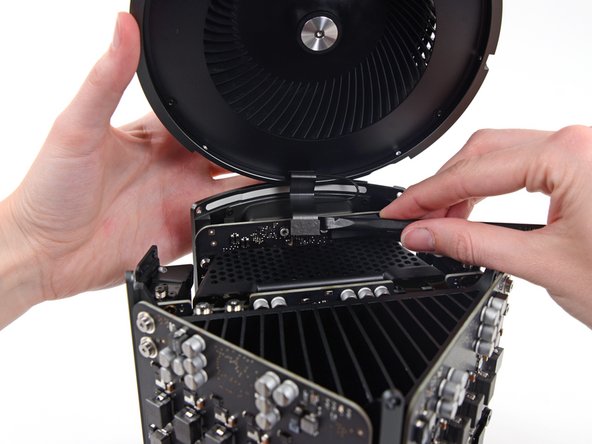
    • Use the flat end of a spudger to pry the fan assembly lid up off the fan assembly.

    • Remove the fan assembly lid.

  10. 这个步骤还没有翻译 帮忙翻译一下

    : 步骤 10 中的图像 1,1
    • Remove the three 3.7 mm T4 screws securing the metal cover to the AirPort board bay.

  11. 这个步骤还没有翻译 帮忙翻译一下

    : 步骤 11 中的图像 1,1
    • Lift and remove the metal cover from the AirPort board bay.

  12. 这个步骤还没有翻译 帮忙翻译一下

    : 步骤 12 中的图像 1,3 : 步骤 12 中的图像 2,3 : 步骤 12 中的图像 3,3
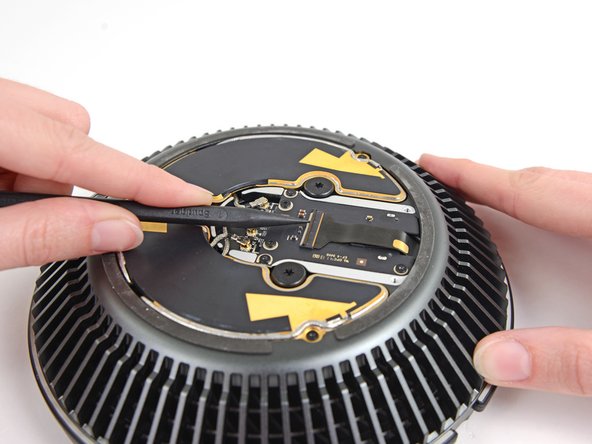
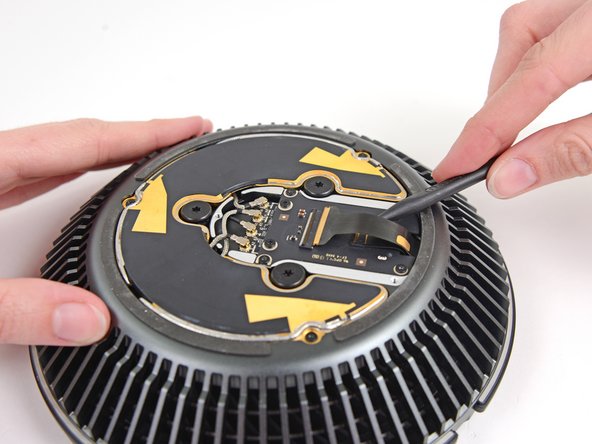
    • Use the tip of a spudger to flip the ZIF retaining tab on the fan assembly ribbon cable connector.

    • Remove the fan assembly ribbon cable from its ZIF socket.

  13. 这个步骤还没有翻译 帮忙翻译一下

    : 步骤 13 中的图像 1,3 : 步骤 13 中的图像 2,3 : 步骤 13 中的图像 3,3
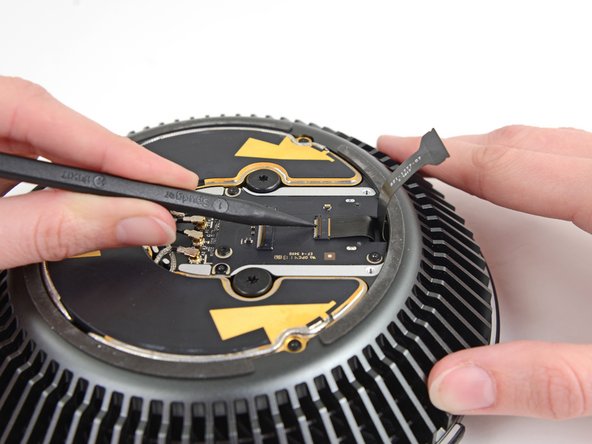
    • Use the tip of a spudger to flip the ZIF retaining tab on the fan ribbon cable.

    • Disconnect the fan ribbon cable.

  14. 这个步骤还没有翻译 帮忙翻译一下

    : 步骤 14 中的图像 1,1
    • Remove the three 3.7 mm T4 screws securing the fan bezel to the fan assembly.

  15. 这个步骤还没有翻译 帮忙翻译一下

    : 步骤 15 中的图像 1,2 : 步骤 15 中的图像 2,2
    • Remove the fan bezel.

  16. 这个步骤还没有翻译 帮忙翻译一下

    : 步骤 16 中的图像 1,1
    • Remove the following screws from the top of the fan assembly:

    • One 10.4 mm T10 screw

    • Three 3.7 mm T4 screws

  17. 这个步骤还没有翻译 帮忙翻译一下

    : 步骤 17 中的图像 1,2 : 步骤 17 中的图像 2,2
    • Flip the AirPort board over.

  18. 这个步骤还没有翻译 帮忙翻译一下

    : 步骤 18 中的图像 1,1
    • Remove the remaining two 10.4 mm T10 screws securing the fan to the fan assembly.

  19. 这个步骤还没有翻译 帮忙翻译一下

    : 步骤 19 中的图像 1,3 : 步骤 19 中的图像 2,3 : 步骤 19 中的图像 3,3
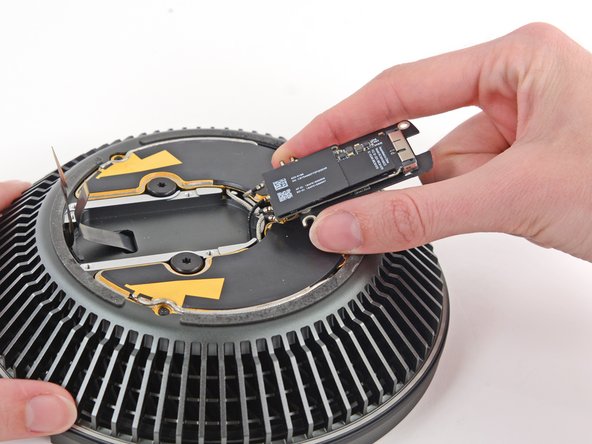
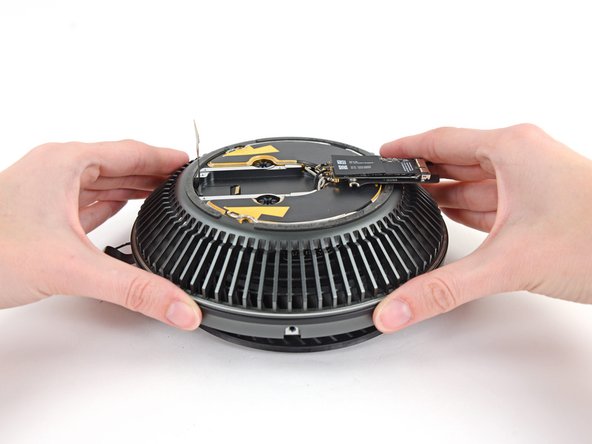
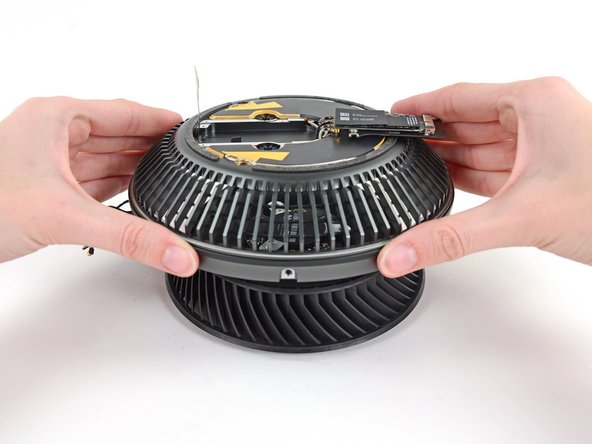
    • Lift the fan assembly up from the fan.

终点

14等其他人完成本指南。

团队

iFixit iFixit 的会员

Staff

136 名成员

创作了17,299篇指南

5条评论

using my iFixit bit set, I'd have to say that the tiny screws for Airport card & cover, as well as fan bezel, are actually T5, not T4 - came very close to stripping the heads on two of the Airport card screws with the recommended T4 bit, but firm pressure and a steady hand with T5 bit got them out. Thanks for the guide - many careful steps to get a scrap of scotch tape out of the fan where its gentle ticks-ticka was driving us crazy thinking something far worse was going wrong.....

vbob - 回复

Ha! I wondered what would happen if some tiny flotsam was dropped in through the top - terrible! Thanks for the tip!

Wagon Fixin - 回复

Likewise, I've had a random noise in the fan at startup, and finally took the fan assembly apart to grab it. It was some even tinier screw from somewhere that had lodged in part of the fan housing. All is very, very well now!!!!

Colin Wright - 回复

Hey Colin, I have same fan startup nois in my MP. Can you help me and tell how to fix in few steps?

Deny -

Using Macs Fan Control, I noticed the baseline fan speed of my “trashcan” slowly creeping up from 790 RPM (the usual) to 8 or 900 RPM. Using this guide I took the fan assembly off, and vacuumed and dusted everything with a vacuum, soft brush and canned air. It wasn’t necessary to disassemble the fan unit itself. That did the trick - fan speed is back down to 790 RPM after putting it back together.

PS - in Step 5, a Torx T8 screwdriver seemed to fit just fine for the fan cable bracket screws.

isonno - 回复

添加评论

浏览统计数据:

过去 24 小时: 4

过去 7 天: 60

过去 30 天: 295

总计 26,353