跳转到主内容

MSI GT72 2QE Dominator Pro CD Drive Replacement

你所需要的

  1. MSI GT72 2QE Dominator Pro CD Drive Replacement, CD Drive: 步骤 1 中的图像 1,2 MSI GT72 2QE Dominator Pro CD Drive Replacement, CD Drive: 步骤 1 中的图像 2,2
    • Remove the indicated seven (7) 6 mm Phillips #0 screws for the back cover.

    • The same PHO screwdriver bit can be used throughout all the steps.

  2. MSI GT72 2QE Dominator Pro CD Drive Replacement: 步骤 2 中的图像 1,2 MSI GT72 2QE Dominator Pro CD Drive Replacement: 步骤 2 中的图像 2,2
    • Lift the back cover using the tab to expose the hardware beneath.

  3. MSI GT72 2QE Dominator Pro CD Drive Replacement: 步骤 3 中的图像 1,3 MSI GT72 2QE Dominator Pro CD Drive Replacement: 步骤 3 中的图像 2,3 MSI GT72 2QE Dominator Pro CD Drive Replacement: 步骤 3 中的图像 3,3
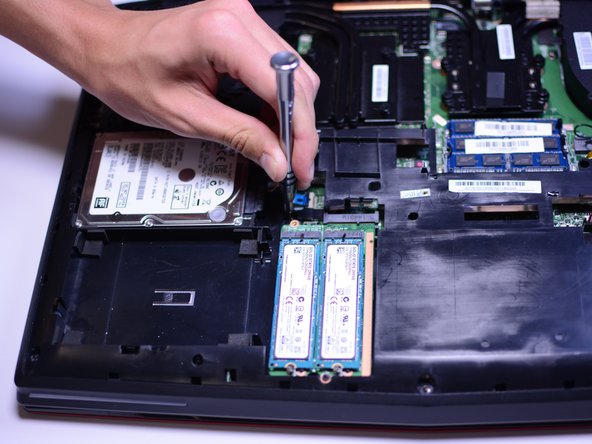
    • Remove the indicated 5mm Phillips #0 screw.

    • This is the only screw holding the CD drive in place. Do not lose it.

  4. MSI GT72 2QE Dominator Pro CD Drive Replacement: 步骤 4 中的图像 1,1
    • Using the plastic opening tool, pull out the CD drive.

  5. MSI GT72 2QE Dominator Pro CD Drive Replacement: 步骤 5 中的图像 1,2 MSI GT72 2QE Dominator Pro CD Drive Replacement: 步骤 5 中的图像 2,2
    • Remove the indicated 4mm Phillips #0 screw and metal hinge.

  6. MSI GT72 2QE Dominator Pro CD Drive Replacement: 步骤 6 中的图像 1,2 MSI GT72 2QE Dominator Pro CD Drive Replacement: 步骤 6 中的图像 2,2
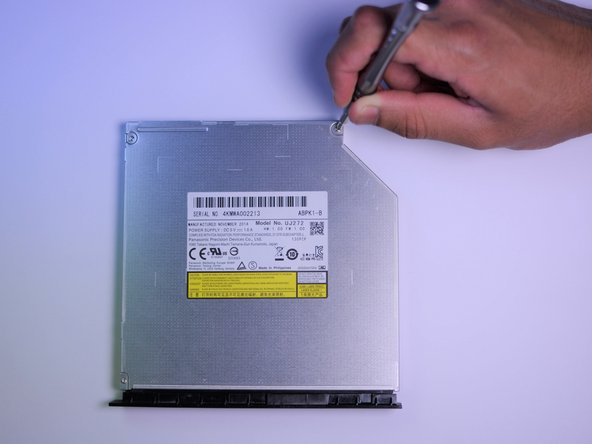
    • Remove the three (3) indicated 2mm Phillips #0 screws.

  7. MSI GT72 2QE Dominator Pro CD Drive Replacement: 步骤 7 中的图像 1,2 MSI GT72 2QE Dominator Pro CD Drive Replacement: 步骤 7 中的图像 2,2
    • Lift metal cover gently, using the tab like indent located where the arrow is pointed.

    • This should expose the inside of the CD drive.

结论

To reassemble your device, follow these instructions in reverse order.

3等其他人完成本指南。

Ankit Maurya

于04/18/17注册

201 声望

撰写一个指南

团队

Cal Poly, Team S17-G2, Banghart Spring 2017 Cal Poly, Team S17-G2, Banghart Spring 2017 的会员

CPSU-BANGHART-S17S17G2

5 名成员

创作了7篇指南

0条评论

添加评论

浏览统计数据:

过去 24 小时: 1

过去 7 天: 7

过去 30 天: 15

总计 1,723