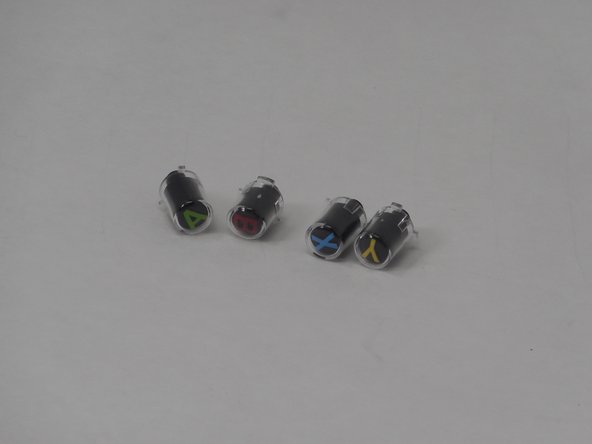
跳转到主内容

MSI Force GC30 V2 ABXY Buttons Replacement

你所需要的

  1. MSI Force GC30 V2 ABXY Buttons Replacement, Back Cover: 步骤 1 中的图像 1,1
    • Puncture the sticker where indicated using a screwdriver.

    • Remove the 9.1 mm-long Phillips #0 screw.

    • Remove the remaining six 9.2 mm-long Phillips #0 screws with a Philips #0 screwdriver.

  2. MSI Force GC30 V2 ABXY Buttons Replacement: 步骤 2 中的图像 1,3 MSI Force GC30 V2 ABXY Buttons Replacement: 步骤 2 中的图像 2,3 MSI Force GC30 V2 ABXY Buttons Replacement: 步骤 2 中的图像 3,3
    • Insert an opening pick in the gap between the front and rear case.

    • Slide the pick around the perimeter of the controller while prying.

    • Once the rear case is released, gently pull it away from the front case.

  3. MSI Force GC30 V2 ABXY Buttons Replacement, Battery: 步骤 3 中的图像 1,1
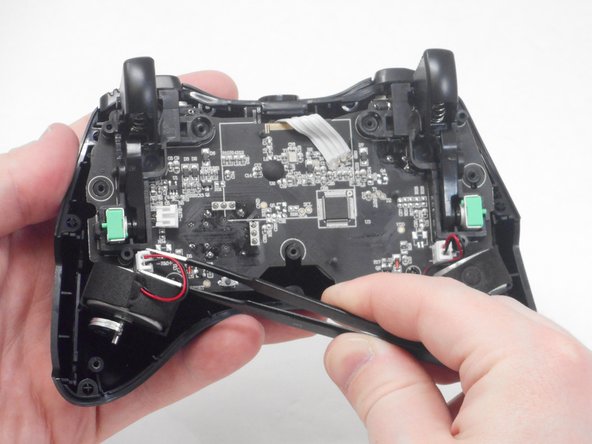
    • Use tweezers to grip the white battery connector.

    • Pull the battery connector directly out of its port.

    • Do not pull on the wires.

  4. MSI Force GC30 V2 ABXY Buttons Replacement: 步骤 4 中的图像 1,1
    • The battery is secured to the motherboard with a mild adhesive. If necessary, apply a small amount of high-concentration isopropyl alcohol beneath the battery to loosen the adhesive.

    • Pry carefully around the battery until it fully releases.

    • Remove the battery.

  5. MSI Force GC30 V2 ABXY Buttons Replacement, Vibration Motor: 步骤 5 中的图像 1,3 MSI Force GC30 V2 ABXY Buttons Replacement, Vibration Motor: 步骤 5 中的图像 2,3 MSI Force GC30 V2 ABXY Buttons Replacement, Vibration Motor: 步骤 5 中的图像 3,3
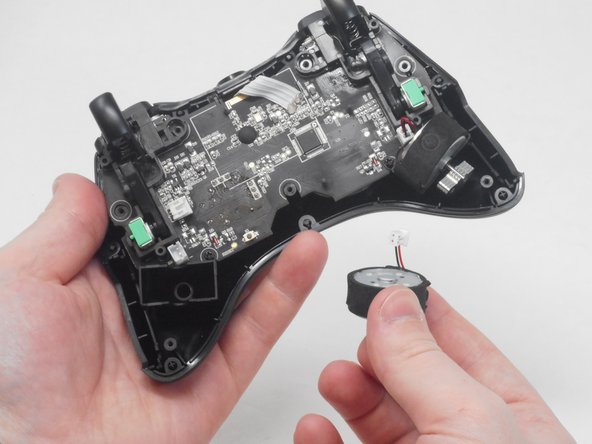
    • Use blunt tweezers to disconnect both of the vibration motor connectors from the motherboard.

    • Grip the white connectors, not the wires.

    • Carefully remove both the right and left vibration motors from their housing.

  6. MSI Force GC30 V2 ABXY Buttons Replacement, ABXY Buttons: 步骤 6 中的图像 1,2 MSI Force GC30 V2 ABXY Buttons Replacement, ABXY Buttons: 步骤 6 中的图像 2,2
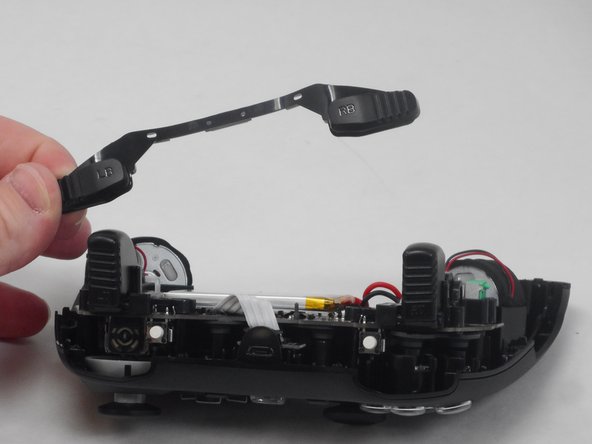
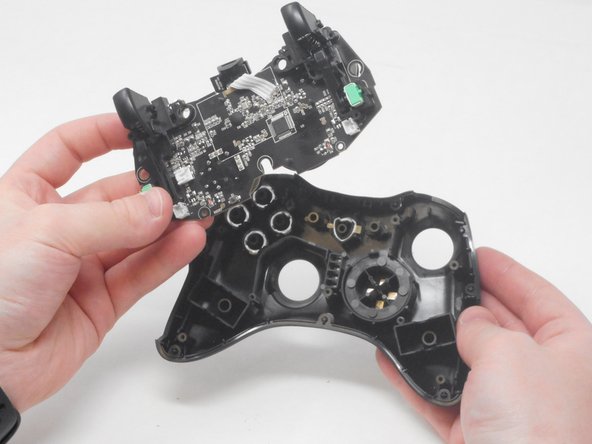
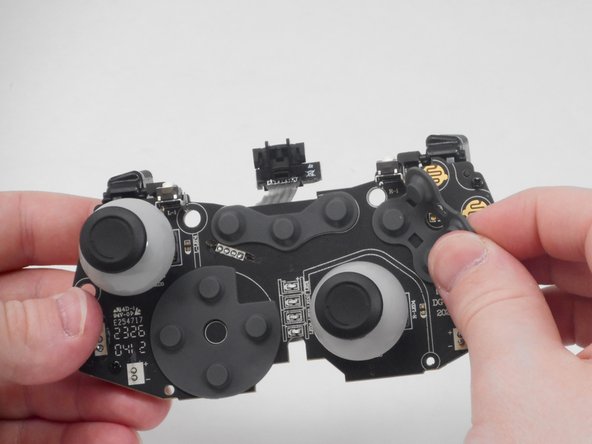
    • Remove the 7.1 mm-long Phillips #0 screw.

    • Remove the 7 mm-long Phillips #0 screw.

  7. MSI Force GC30 V2 ABXY Buttons Replacement: 步骤 7 中的图像 1,2 MSI Force GC30 V2 ABXY Buttons Replacement: 步骤 7 中的图像 2,2
    • Remove the left/right bumper assembly.

  8. MSI Force GC30 V2 ABXY Buttons Replacement: 步骤 8 中的图像 1,2 MSI Force GC30 V2 ABXY Buttons Replacement: 步骤 8 中的图像 2,2
    • Carefully lift the motherboard out of its casing and remove it.

  9. MSI Force GC30 V2 ABXY Buttons Replacement: 步骤 9 中的图像 1,2 MSI Force GC30 V2 ABXY Buttons Replacement: 步骤 9 中的图像 2,2
    • Remove the ABXY button either by pulling them out or turning the controller the other side and letting the buttons fall out.

  10. MSI Force GC30 V2 ABXY Buttons Replacement: 步骤 10 中的图像 1,3 MSI Force GC30 V2 ABXY Buttons Replacement: 步骤 10 中的图像 2,3 MSI Force GC30 V2 ABXY Buttons Replacement: 步骤 10 中的图像 3,3
    • Remove the ABXY button membrane by carefully lifting it off the motherboard.

结论

To reassemble your device, follow these instructions in reverse order.

0条评论

添加评论

浏览统计数据:

过去 24 小时: 0

过去 7 天: 3

过去 30 天: 20

总计 56