跳转到主内容

Logitech MX Master 2s Mouse Disassembly

你所需要的

  1. Logitech MX Master 2s Mouse Disassembly, Open the mouse: 步骤 1 中的图像 1,3 Logitech MX Master 2s Mouse Disassembly, Open the mouse: 步骤 1 中的图像 2,3 Logitech MX Master 2s Mouse Disassembly, Open the mouse: 步骤 1 中的图像 3,3
    • We verify that the mouse is off, we turn it over to access 6 screws at the bottom.

    • Note that to access the screws underneath the stickers, you must remove them or at least lift each end. In this guide I do not remove them, I only carefully lift each end.

    • Remove the Two screws on the front T5.

    • and 4 Phillip type under the stickers, 2 on each side.

    • If handled carefully and the stickers are not worn with use, they can be reused without any problem.

  2. Logitech MX Master 2s Mouse Disassembly, Separate the two parts: 步骤 2 中的图像 1,3 Logitech MX Master 2s Mouse Disassembly, Separate the two parts: 步骤 2 中的图像 2,3 Logitech MX Master 2s Mouse Disassembly, Separate the two parts: 步骤 2 中的图像 3,3
    • To separate the two parts that make up the mouse, help yourself with a card or iFixit Opening Tool, mainly in the front part, and the side that does not have buttons. Then the back, and finally the side where the side button is, be careful when lifting these two, as they require a slight movement.

    • Note that both parts are connected inside by a ribbon-type connector. Do not abruptly separate them.

    • Carefully separate the parts

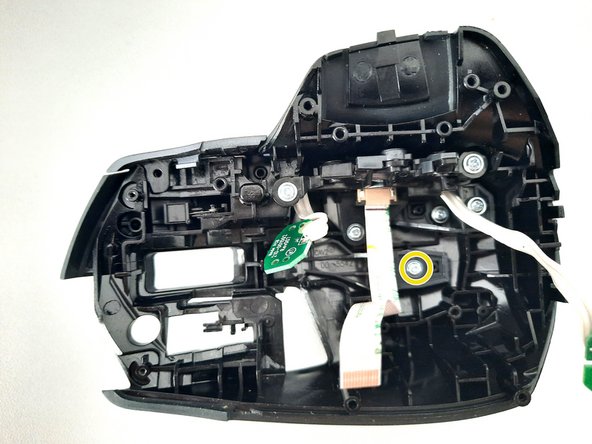
    • Lift the plastic latch to release the ribbon cable.

    • Disconnect the ribbon cable from its socket.

  3. Logitech MX Master 2s Mouse Disassembly, Separate the base button: 步骤 3 中的图像 1,3 Logitech MX Master 2s Mouse Disassembly, Separate the base button: 步骤 3 中的图像 2,3 Logitech MX Master 2s Mouse Disassembly, Separate the base button: 步骤 3 中的图像 3,3
    • Remove the black screws from the button plate.

    • Additionally unscrew, the screw that holds the upper case and the side cover.

    • Remove the button mechanism.

    • Throughout the top, there are two types of screws, both require Phillips screwdrivers. The 4 black ones hold the electronic boards and the rest (silver color) hold all the plastic parts.

  4. Logitech MX Master 2s Mouse Disassembly, Separate the diffuser for the charging LEDs: 步骤 4 中的图像 1,3 Logitech MX Master 2s Mouse Disassembly, Separate the diffuser for the charging LEDs: 步骤 4 中的图像 2,3 Logitech MX Master 2s Mouse Disassembly, Separate the diffuser for the charging LEDs: 步骤 4 中的图像 3,3
    • Remove the screw that holds the piece, carefully remove. also if you wish you can separate it into two parts very easy, for cleaning.

  5. Logitech MX Master 2s Mouse Disassembly, Detach the right click button: 步骤 5 中的图像 1,3 Logitech MX Master 2s Mouse Disassembly, Detach the right click button: 步骤 5 中的图像 2,3 Logitech MX Master 2s Mouse Disassembly, Detach the right click button: 步骤 5 中的图像 3,3
    • Unscrew the two screws holding the button.

    • When removing the screws gently pull the button forward.

    • Be careful with the spring that supports the button. It is used to prevent the button from moving up, it is not supported on the button, only on the face of the mouse, there is no need to touch it, although if you wish, once you remove the button you can remove it.

  6. Logitech MX Master 2s Mouse Disassembly, Remove top button: 步骤 6 中的图像 1,3 Logitech MX Master 2s Mouse Disassembly, Remove top button: 步骤 6 中的图像 2,3 Logitech MX Master 2s Mouse Disassembly, Remove top button: 步骤 6 中的图像 3,3
    • Remove the black screws from the button plate.

    • Unscrew the screw holding the button.

    • Remove the plastic button carefully.

  7. Logitech MX Master 2s Mouse Disassembly, Removing the secondary scroll mechanism and side buttons: 步骤 7 中的图像 1,3 Logitech MX Master 2s Mouse Disassembly, Removing the secondary scroll mechanism and side buttons: 步骤 7 中的图像 2,3 Logitech MX Master 2s Mouse Disassembly, Removing the secondary scroll mechanism and side buttons: 步骤 7 中的图像 3,3
    • Remove the screws that hold the entire scroll mechanism and two side buttons. We also removed most of the screws that hold the right click button.

    • Gently press the scroll in from the outside of the mouse, pull up the inside of the piece, it can be helped with a plastic lever, but it is not necessary, all the action make it very smooth, so as not to damage the cables and the mechanism.

  8. Logitech MX Master 2s Mouse Disassembly, Disassembling the mechanism that contains the side scroll and buttons: 步骤 8 中的图像 1,3 Logitech MX Master 2s Mouse Disassembly, Disassembling the mechanism that contains the side scroll and buttons: 步骤 8 中的图像 2,3 Logitech MX Master 2s Mouse Disassembly, Disassembling the mechanism that contains the side scroll and buttons: 步骤 8 中的图像 3,3
    • Remove the screws that hold the buttons and scroll.

    • Using a lever or plastic wedge, finish disassembling the scroll.

    • Then remove the screw that holds the board with the circuits.

  9. Logitech MX Master 2s Mouse Disassembly, Remove the side cover: 步骤 9 中的图像 1,3 Logitech MX Master 2s Mouse Disassembly, Remove the side cover: 步骤 9 中的图像 2,3 Logitech MX Master 2s Mouse Disassembly, Remove the side cover: 步骤 9 中的图像 3,3
    • The side cover has several hooks to the mouse housing, look at the images below, and using plastic elements such as Spudger or iFixit Opening Tool, to help you. At the same time you can remove the right click button, which you will see in the next part.

  10. Logitech MX Master 2s Mouse Disassembly, Detach the left click button: 步骤 10 中的图像 1,2 Logitech MX Master 2s Mouse Disassembly, Detach the left click button: 步骤 10 中的图像 2,2
    • Unscrew the screw holding the button.

    • When removing the screw gently pull the button forward.

    • Remember the spring, just like the right button.

  11. Logitech MX Master 2s Mouse Disassembly, Remove one of the two motherboards: 步骤 11 中的图像 1,3 Logitech MX Master 2s Mouse Disassembly, Remove one of the two motherboards: 步骤 11 中的图像 2,3 Logitech MX Master 2s Mouse Disassembly, Remove one of the two motherboards: 步骤 11 中的图像 3,3
    • Unscrew the three screws from the battery holder and remove the connection to the motherboard.

    • Remove the screws from one of the two electronic boards.

    • Be careful with the electronic tape that joins the two plates, safe it aided by a spunger or other element, without damaging it

  12. Logitech MX Master 2s Mouse Disassembly, Removing the entire main scroll mechanism: 步骤 12 中的图像 1,3 Logitech MX Master 2s Mouse Disassembly, Removing the entire main scroll mechanism: 步骤 12 中的图像 2,3 Logitech MX Master 2s Mouse Disassembly, Removing the entire main scroll mechanism: 步骤 12 中的图像 3,3
    • The whole mechanism is only held by two screws and the connection of the cable that feeds a small motor. At the bottom of the mechanism there is a small spring anchored, be careful when lifting the system.

    • Remove the two screws and disconnect the cable.

  13. Logitech MX Master 2s Mouse Disassembly, Disassembling the scroll mechanism: 步骤 13 中的图像 1,3 Logitech MX Master 2s Mouse Disassembly, Disassembling the scroll mechanism: 步骤 13 中的图像 2,3 Logitech MX Master 2s Mouse Disassembly, Disassembling the scroll mechanism: 步骤 13 中的图像 3,3
    • Remove the two screws that secure the motor rotor cover, and then gently remove the cover.

    • Remove the screw that holds the piece, plastic. Note that to remove it you must carefully remove the small spring that connects it to the transparent support where the scroll wheel rests.

    • Note the strap that helps the motor head, and the spring of the plastic part.

    • Disassemble the rotor or motor head by prying very gently with an iFixit Opening Tool or other instrument. Note the position where it was before dismounting, as it has only one position for mounting.

  14. Logitech MX Master 2s Mouse Disassembly, Removing the motor from the scroll mechanism: 步骤 14 中的图像 1,3 Logitech MX Master 2s Mouse Disassembly, Removing the motor from the scroll mechanism: 步骤 14 中的图像 2,3 Logitech MX Master 2s Mouse Disassembly, Removing the motor from the scroll mechanism: 步骤 14 中的图像 3,3
    • The red arrow shows you the strap that was shown in the previous step, keep this in mind during the disassembly process.

    • The blue arrow shows you the "rubber mount" that supports the motor, when you remove the motor it will likely come out as well. It is very easy to reassemble, fix it in the position it has before removing the motor and help yourself with an instrument such as the Spunger or tweezers.

    • Remove the two screws that hold the motor, it will be completely free.

  15. Logitech MX Master 2s Mouse Disassembly, Removing the motherboard: 步骤 15 中的图像 1,3 Logitech MX Master 2s Mouse Disassembly, Removing the motherboard: 步骤 15 中的图像 2,3 Logitech MX Master 2s Mouse Disassembly, Removing the motherboard: 步骤 15 中的图像 3,3
    • Remove the three screws that hold the motherboard.

    • Remove the power button, and look at the position as it was.

结论

To reassemble your device, follow these instructions in reverse order.

37等其他人完成本指南。

Victor Crespo

于07/20/15注册

1,637 声望

撰写一个指南

30条评论

I’m not sure I see any reason why anyone would to this and risk it being ruined. In other words, what are the potential benefits? Cleaning?

John Smith - 回复

Yup cleaning that scroll wheel, and maybe even the switches if your really dirty. 15 min made my mouse new again

drawsmatthew -

Hello!! It is a spectacular product, with its mistakes (nothing is perfect ;)). The fundamental objective of this guide is simply to answer the question How does it work, what is inside? It can serve as a guide to clean it (either both scrolls or the button contacts), change the battery, etc. Everything that can contribute to extend its useful life much more.

Victor Crespo -

Read the name of the site

Fabrizio Schwarz -

There is a very clear example of why one would need to do this. Certain 2s's, including my own, have a fundamental flaw. At some point, the pressing of the thumb-button, the one located below where the thumb is positioned, gradually results in the button getting stuck. For some reason, this results in the mouse movement not registering.

To resolve this issue, you can loosen a screw located button, but this can only be done when the mouse is disassembled, as it is contained within the mouse itself.

Yize H. -

添加评论

浏览统计数据:

过去 24 小时: 42

过去 7 天: 325

过去 30 天: 1,396

总计 54,363