跳转到主内容

此翻译可能不反映源指南的最新更新。 帮助更新翻译查看源指南

Logitech MX Keys 电池更换

你所需要的

  1. Logitech MX Keys 电池更换, 关闭键盘: 步骤 1 中的图像 1,1
    • 将键盘的电源开关拨到 OFF 位置。

    • 当开关处于关闭位置时,可以在开关下方看到一个红色指示灯。

  2. Logitech MX Keys 电池更换, 加热左脚垫: 步骤 2 中的图像 1,2 Logitech MX Keys 电池更换, 加热左脚垫: 步骤 2 中的图像 2,2
    • 将键盘翻转过来,将其正面朝下放在干净的工作台面上。

    • 如果你的工作表面可能会划伤键盘,请将键盘放在柔软的毛巾上。

    • 加热 iOpener 并将其放在左塑料脚上约两分钟。

    • 你也可以使用吹风机或热风枪,但要小心不要使键盘过热。

  3. Logitech MX Keys 电池更换, 取下支脚垫: 步骤 3 中的图像 1,3 Logitech MX Keys 电池更换, 取下支脚垫: 步骤 3 中的图像 2,3 Logitech MX Keys 电池更换, 取下支脚垫: 步骤 3 中的图像 3,3
    • 将撬棒的尖端插入脚的边缘。

    • 将撬棒推到脚底下,然后向上撬以释放其粘合剂。

    • 脚应该在没有太大力的情况下离开键盘。如果感觉卡住了,请加热并重试。

    • 一旦你可以用手指抓住支脚,将其从键盘上剥下以将其取下。

    • 对剩下的两个支脚重复步骤 2-3。

  4. Logitech MX Keys 电池更换, 取下电池盖: 步骤 4 中的图像 1,3 Logitech MX Keys 电池更换, 取下电池盖: 步骤 4 中的图像 2,3 Logitech MX Keys 电池更换, 取下电池盖: 步骤 4 中的图像 3,3
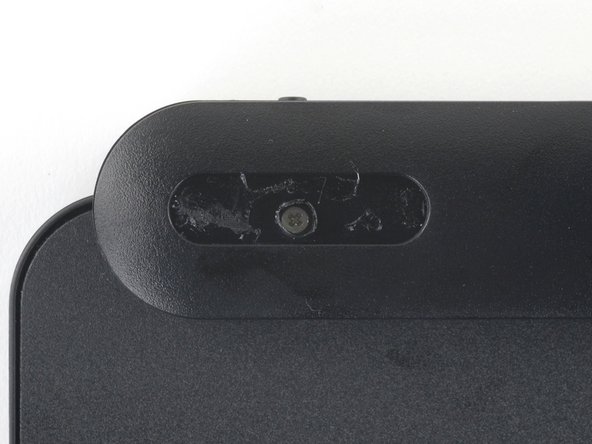
    • 使用撬棒的尖端戳穿每只脚下方的薄膜以接触下方的螺丝。

  5. Logitech MX Keys 电池更换: 步骤 5 中的图像 1,1
    • 使用十字螺丝刀卸下固定电池盖的三颗 7.6 毫米螺丝。

    • 电池盖将通过塑料夹固定到位。

  6. Logitech MX Keys 电池更换: 步骤 6 中的图像 1,3 Logitech MX Keys 电池更换: 步骤 6 中的图像 2,3 Logitech MX Keys 电池更换: 步骤 6 中的图像 3,3
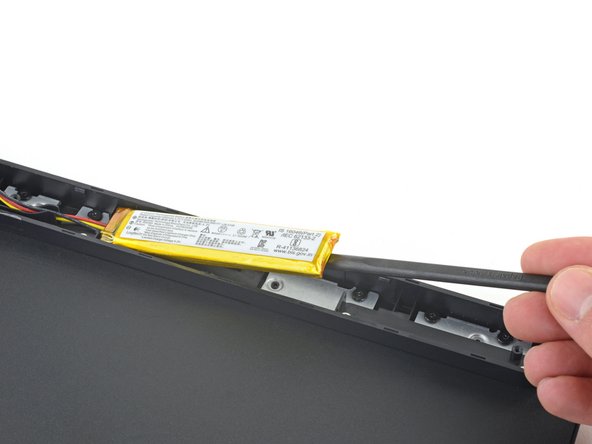
    • 在电池盖和键盘之间沿其顶部边缘插入三角撬片,以松开固定电池盖的夹子。

    • 其余的电池盖夹此时可能会自行松开。如果是,请跳过下一步。

  7. Logitech MX Keys 电池更换: 步骤 7 中的图像 1,2 Logitech MX Keys 电池更换: 步骤 7 中的图像 2,2
    • 沿另一边将撬片插入电池盖和键盘之间,以松开其余的夹子。

    • 重新组装期间,请检查以确保电池盖安装方向正确。如果向后安装,螺丝孔将不会对齐。

  8. Logitech MX Keys 电池更换: 步骤 8 中的图像 1,2 Logitech MX Keys 电池更换: 步骤 8 中的图像 2,2
    • 取下电池盖。

  9. Logitech MX Keys 电池更换, 断开电池: 步骤 9 中的图像 1,3 Logitech MX Keys 电池更换, 断开电池: 步骤 9 中的图像 2,3 Logitech MX Keys 电池更换, 断开电池: 步骤 9 中的图像 3,3
    • 使用撬棒轻轻地将电池电缆从接口中“走”出来。

    • 在重新组装过程中,在插入之前确保电池接口没有颠倒。

  10. Logitech MX Keys 电池更换, 取出电池: 步骤 10 中的图像 1,2 Logitech MX Keys 电池更换, 取出电池: 步骤 10 中的图像 2,2
    • 从键盘中的通道中取出三根电源线。

  11. Logitech MX Keys 电池更换: 步骤 11 中的图像 1,3 Logitech MX Keys 电池更换: 步骤 11 中的图像 2,3 Logitech MX Keys 电池更换: 步骤 11 中的图像 3,3
    • 将撬棒的扁平端插入与电缆相对的电池短端下方。

    • 将撬棒推入电池下方,将其与将其固定在键盘上的粘合剂分离。

    • 确保将电池推入下方而不是推入其中。不要弯曲或变形电池。

    • 如果电池不易取出,请在下方滴几滴高强度 (≥90%) 异丙醇,然后左右倾斜键盘以将酒精引导到粘合剂上。

    • 取出电池。

    • 要安装更换电池:

    • 从电池槽中清除所有剩余的粘合剂。

    • 使用双面胶带或预切粘合剂固定新电池。

结论

要重新组装你的设备,请按逆序执行上述步骤。

将你的电子垃圾送到 R2 或 e-Stewards 认证的回收商

维修没有按计划进行?查看我们的 [链接|https://www.ifixit.com/Answers/Device/Lo...|论坛] 以获取故障排除帮助。

16等其他人完成本指南。

由衷感谢以下译者:

en zh

18%

Yuting Zhao正在帮助我们修复这个世界! 您也想加入吗?
开始翻译 ›

Sam Omiotek

于02/25/19注册

73,089 声望

创作了288篇指南

8条评论

按照锂电池循环的寿命500次计算,mx key 充一次电至少可以用10天,那就是5000天,10几年后你才需要看这篇文章。

timo - 回复

I wish ifixit would sell the battery as well.

Peter Liu - 回复

Though @timo is technically correct with his calculations, I use this keyboard so often that after only eight months, the battery needs to be recharged about once every two days. Time to replace it! Such calculations can never account for usability. I use the backlight feature constantly which I'm sure is why my battery degraded as quickly as it did.

Mike Sims - 回复

Yes I agree with you. Ever since Logi PC SW failed to control the auto-backlit function, my MX Keys just lights up every second. The battery status went poor after using it like 11 months.

Evan Zhao -

Found this item on ebay as a replacement battery. Voltage, capacity, and dimensions are on spec, but it will require some soldering to move the connector to the replacement battery. I recommend clipping off the original connector closer to the battery to leave some slack for future replacements. Always use heat shrink to protect those solder connections and prevent shorting out the battery.

Mike Sims - 回复

添加评论

浏览统计数据:

过去 24 小时: 39

过去 7 天: 295

过去 30 天: 1,289

总计 28,380