跳转到主内容
加入维修社区 - 创建账户

Lite-On LightScribe SHM-165H6S Disc Tray Replacement

你所需要的

  1. Lite-On LightScribe SHM-165H6S Disc Tray Replacement, Chassis: 步骤 1 中的图像 1,2 Lite-On LightScribe SHM-165H6S Disc Tray Replacement, Chassis: 步骤 1 中的图像 2,2
    • Insert an open paper clip into the small hole on the left side of the faceplate.

    • After the tray opens, extend it fully.

    询问修复机器人
  2. Lite-On LightScribe SHM-165H6S Disc Tray Replacement: 步骤 2 中的图像 1,3 Lite-On LightScribe SHM-165H6S Disc Tray Replacement: 步骤 2 中的图像 2,3 Lite-On LightScribe SHM-165H6S Disc Tray Replacement: 步骤 2 中的图像 3,3
    • Use an opening device to push in the black tabs on the left, right and bottom of the outer chassis to unhook the faceplate.

    询问修复机器人
  3. Lite-On LightScribe SHM-165H6S Disc Tray Replacement: 步骤 3 中的图像 1,1
    • Pull the faceplate away from the main chassis.

    询问修复机器人
  4. Lite-On LightScribe SHM-165H6S Disc Tray Replacement: 步骤 4 中的图像 1,1
    • Unscrew the four 8.5 mm screws on the bottom chassis using a Philips #2 screwdriver.

    询问修复机器人
  5. Lite-On LightScribe SHM-165H6S Disc Tray Replacement: 步骤 5 中的图像 1,2 Lite-On LightScribe SHM-165H6S Disc Tray Replacement: 步骤 5 中的图像 2,2
    • Lift the top and bottom chassis straight up in order to remove them.

    询问修复机器人
  6. Lite-On LightScribe SHM-165H6S Disc Tray Replacement, Disc Tray: 步骤 6 中的图像 1,3 Lite-On LightScribe SHM-165H6S Disc Tray Replacement, Disc Tray: 步骤 6 中的图像 2,3 Lite-On LightScribe SHM-165H6S Disc Tray Replacement, Disc Tray: 步骤 6 中的图像 3,3
    • Extend the tray fully.

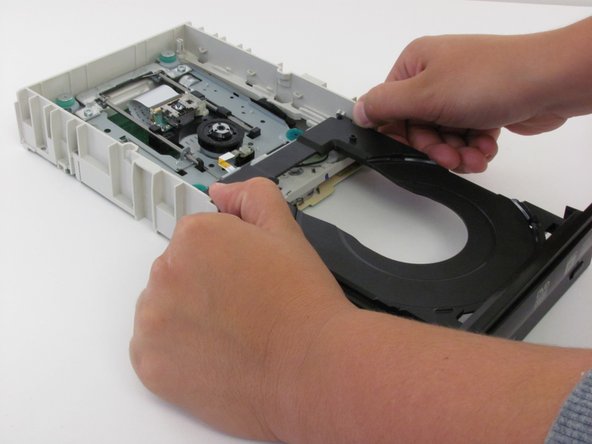
    • Push the tab on the right side to the left.

    • Push the tab on the left side to the left.

    • Remove the tray carefully.

    询问修复机器人
  7. Lite-On LightScribe SHM-165H6S Disc Tray Replacement: 步骤 7 中的图像 1,3 Lite-On LightScribe SHM-165H6S Disc Tray Replacement: 步骤 7 中的图像 2,3 Lite-On LightScribe SHM-165H6S Disc Tray Replacement: 步骤 7 中的图像 3,3
    • Guide the replacement tray under the beige tabs.

    • Make sure the grey piece is slid to the right, so the grey nob is under the right-hand groove of the tray.

    • Check to see that the tray extends and closes smoothly.

    询问修复机器人
结论

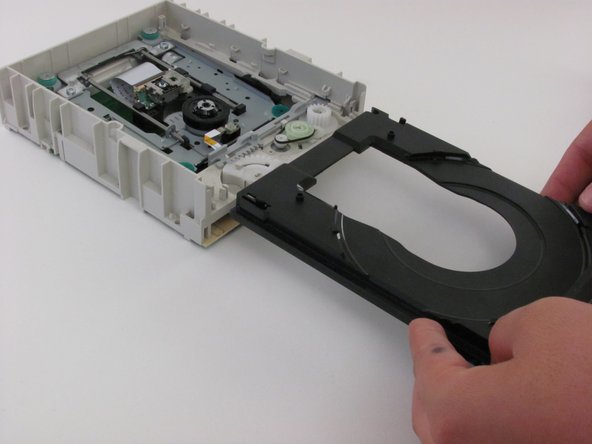
To reassemble your device, follow these instructions in reverse order.

2等其他人完成本指南。

团队

Cal Poly, Team 6-5, Regan Fall 2011 Cal Poly, Team 6-5, Regan Fall 2011 的会员

CPSU-REGAN-F11S6G5

2 名成员

创作了6篇指南

0指南评论

添加评论

浏览统计数据:

过去 24 小时: 1

过去 7 天: 11

过去 30 天: 69

总计 4,763