跳转到主内容

Linksys EA6900 Antenna Replacement

你所需要的

  1. Linksys EA6900 Antenna Replacement, Linksys EA6900 Disassembly: 步骤 1 中的图像 1,3 Linksys EA6900 Antenna Replacement, Linksys EA6900 Disassembly: 步骤 1 中的图像 2,3 Linksys EA6900 Antenna Replacement, Linksys EA6900 Disassembly: 步骤 1 中的图像 3,3
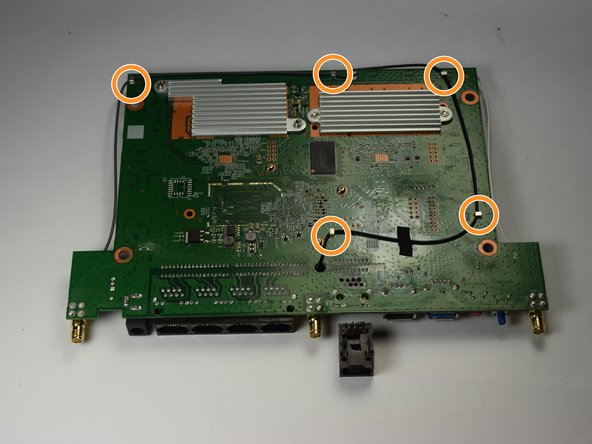
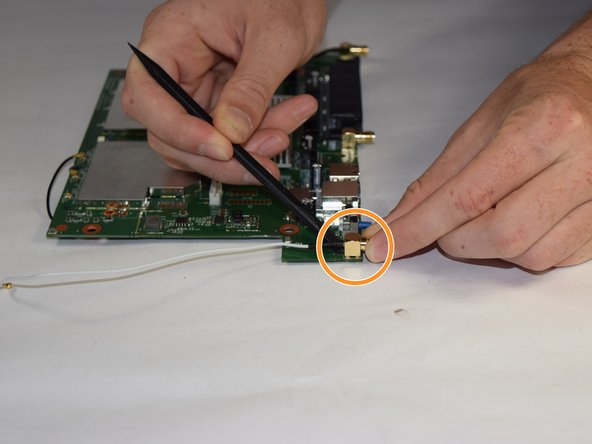
    • Remove the antennas by unscrewing them from the base.

    • Flip over the device and locate the four rubber feet on the bottom.

    • Remove the rubber feet with tweezers

  2. Linksys EA6900 Antenna Replacement: 步骤 2 中的图像 1,1
    • Remove the 0.4cm head screws from each slot with the #1 Phillips head Screwdriver.

  3. Linksys EA6900 Antenna Replacement: 步骤 3 中的图像 1,1
    • Use a blue plastic opening tool to remove the top cover.

    • Move the blue plastic opening tool gently underneath the top cover from side to side.

  4. Linksys EA6900 Antenna Replacement: 步骤 4 中的图像 1,3 Linksys EA6900 Antenna Replacement: 步骤 4 中的图像 2,3 Linksys EA6900 Antenna Replacement: 步骤 4 中的图像 3,3
    • Gently lift the motherboard and remove it from the case

    • Put the motherboard over a (preferably white) surface.

  5. Linksys EA6900 Antenna Replacement, Antenna: 步骤 5 中的图像 1,2 Linksys EA6900 Antenna Replacement, Antenna: 步骤 5 中的图像 2,2
    • Detach the wires from the motherboard.

    • Flip the motherboard and repeat the process.

  6. Linksys EA6900 Antenna Replacement: 步骤 6 中的图像 1,2 Linksys EA6900 Antenna Replacement: 步骤 6 中的图像 2,2
    • Locate the four solder points on each port and melt them using a soldering iron.

    • Wait between five and seven minutes for the ports to cool down.

    • Remove each port using a nylon spudger

结论

To reassemble your device, follow these instructions in reverse order.

4等其他人完成本指南。

Denis

于09/15/16注册

584 声望

创作了3篇指南

团队

USF Tampa, Team 11-1, Blackwell Fall 2016 USF Tampa, Team 11-1, Blackwell Fall 2016 的会员

USFT-BLACKWELL-F16S11G1

4 名成员

创作了12篇指南

0条评论

添加评论

浏览统计数据:

过去 24 小时: 0

过去 7 天: 0

过去 30 天: 11

总计 2,233