跳转到主内容

Lenovo Yoga Tablet 10 Battery Replacement

你所需要的

  1. Lenovo Yoga Tablet 10 Battery Replacement, Back Cover: 步骤 1 中的图像 1,1
    • Remove the two Phillips #000 screws.

    • These screws are located behind the stand for the device.

    • Our device did not include these screws.

  2. Lenovo Yoga Tablet 10 Battery Replacement: 步骤 2 中的图像 1,1
    • Use a plastic iFixit opening tool to pry the edges of the back case loose by placing it in between the edge of the cover and the screen.

    • Do not immediately attempt to remove the back of the case without attempting Step three, or you risk snapping the back cover.

  3. Lenovo Yoga Tablet 10 Battery Replacement: 步骤 3 中的图像 1,2 Lenovo Yoga Tablet 10 Battery Replacement: 步骤 3 中的图像 2,2
    • Use the spudger to reach into the center of the device and pry off the back case by giving it a light force upwards.

  4. Lenovo Yoga Tablet 10 Battery Replacement, Back Camera: 步骤 4 中的图像 1,2 Lenovo Yoga Tablet 10 Battery Replacement, Back Camera: 步骤 4 中的图像 2,2
    • Remove one 5mm screw using the Phillips #00 Screwdriver.

  5. Lenovo Yoga Tablet 10 Battery Replacement: 步骤 5 中的图像 1,3 Lenovo Yoga Tablet 10 Battery Replacement: 步骤 5 中的图像 2,3 Lenovo Yoga Tablet 10 Battery Replacement: 步骤 5 中的图像 3,3
    • Use the spudger to disconnect the camera and battery from the printed circuit board by putting the spudger in between the connections and the printed circuit board and pushing the spudger up.

  6. Lenovo Yoga Tablet 10 Battery Replacement: 步骤 6 中的图像 1,1
    • Remove one 5mm screw with the Phillips #00 screwdriver.

  7. Lenovo Yoga Tablet 10 Battery Replacement: 步骤 7 中的图像 1,3 Lenovo Yoga Tablet 10 Battery Replacement: 步骤 7 中的图像 2,3 Lenovo Yoga Tablet 10 Battery Replacement: 步骤 7 中的图像 3,3
    • Use the nylon tip tweezers to push the camera out from between the power button and the kickstand.

  8. Lenovo Yoga Tablet 10 Battery Replacement, Headphone Jack: 步骤 8 中的图像 1,2 Lenovo Yoga Tablet 10 Battery Replacement, Headphone Jack: 步骤 8 中的图像 2,2
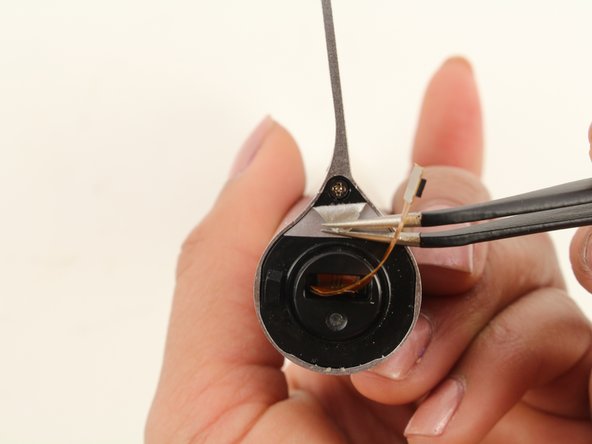
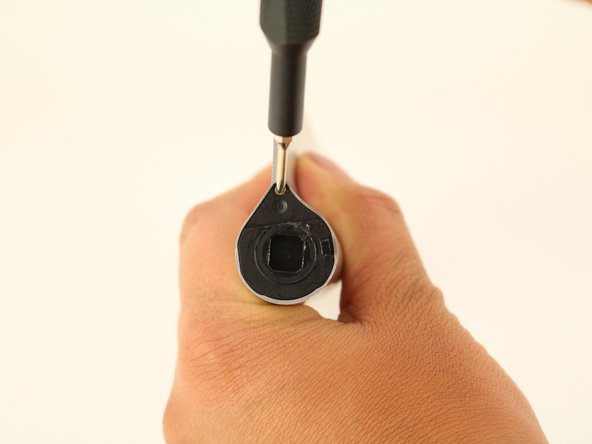
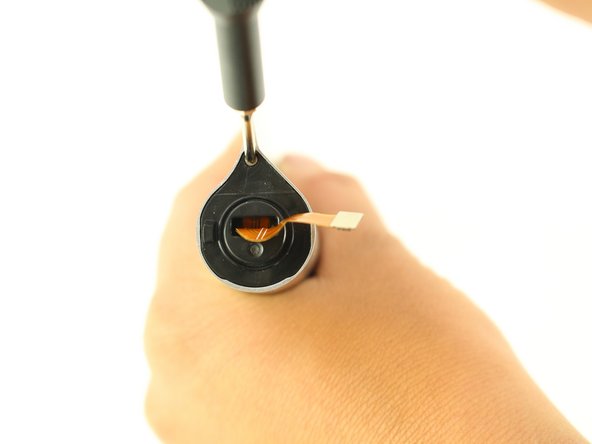
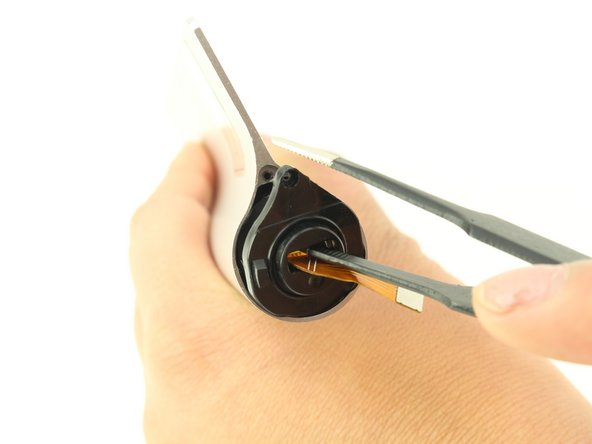
    • Remove the headphone jack cover with tweezers by grabbing it and pulling directly up and away from the device.

  9. Lenovo Yoga Tablet 10 Battery Replacement: 步骤 9 中的图像 1,3 Lenovo Yoga Tablet 10 Battery Replacement: 步骤 9 中的图像 2,3 Lenovo Yoga Tablet 10 Battery Replacement: 步骤 9 中的图像 3,3
    • Remove the two 3.5mm screws using the Phillips #00 Screwdriver.

  10. Lenovo Yoga Tablet 10 Battery Replacement: 步骤 10 中的图像 1,3 Lenovo Yoga Tablet 10 Battery Replacement: 步骤 10 中的图像 2,3 Lenovo Yoga Tablet 10 Battery Replacement: 步骤 10 中的图像 3,3
    • Disconnect the headphone jack from the motherboard by placing the spudger in between the connections and motherboard and pushing up towards you.

    • Pull the wire towards the headphone jack to disconnect it.

  11. Lenovo Yoga Tablet 10 Battery Replacement: 步骤 11 中的图像 1,2 Lenovo Yoga Tablet 10 Battery Replacement: 步骤 11 中的图像 2,2
    • Use tweezers to remove the headphone jack by pulling it up and towards you.

  12. Lenovo Yoga Tablet 10 Battery Replacement, Battery: 步骤 12 中的图像 1,2 Lenovo Yoga Tablet 10 Battery Replacement, Battery: 步骤 12 中的图像 2,2
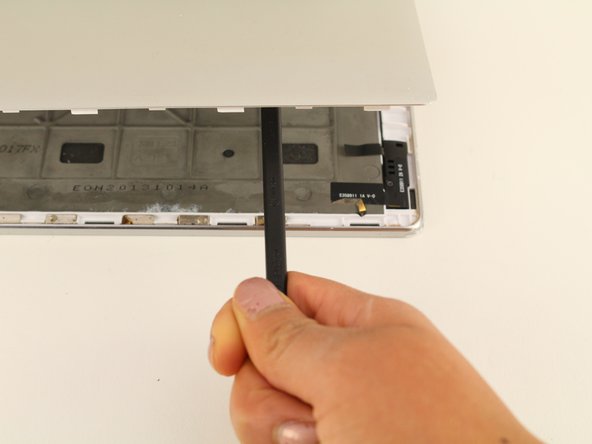
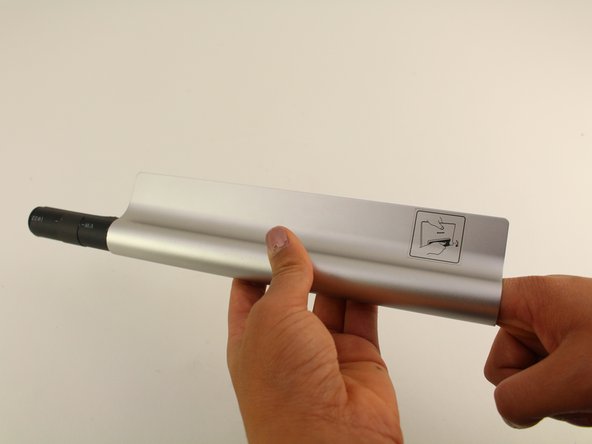
    • Use the metal spudger to push out the lock of the battery compartment by putting the metal spudger between the kickstand and the plastic and applying a force upwards.

    • Be careful as applying to much force with the metal spudger could break the plastic covering. If you feel like the plastic is going to break, change the angle at which you use the metal spudger.

    • You can only use the metal spudger on the same side as the headphone jack. Using the metal spudger on the other side will give you no results.

  13. Lenovo Yoga Tablet 10 Battery Replacement: 步骤 13 中的图像 1,2 Lenovo Yoga Tablet 10 Battery Replacement: 步骤 13 中的图像 2,2
    • Pull the battery compartment away from the device.

    • The battery compartment is the kickstand.

  14. Lenovo Yoga Tablet 10 Battery Replacement: 步骤 14 中的图像 1,2 Lenovo Yoga Tablet 10 Battery Replacement: 步骤 14 中的图像 2,2
    • Use tweezers to remove the gray tape and reveal a screw at each end of the compartment.

  15. Lenovo Yoga Tablet 10 Battery Replacement: 步骤 15 中的图像 1,3 Lenovo Yoga Tablet 10 Battery Replacement: 步骤 15 中的图像 2,3 Lenovo Yoga Tablet 10 Battery Replacement: 步骤 15 中的图像 3,3
    • Remove one 3.5 mm screw from each end using the Phillips #00 screwdriver.

  16. Lenovo Yoga Tablet 10 Battery Replacement: 步骤 16 中的图像 1,2 Lenovo Yoga Tablet 10 Battery Replacement: 步骤 16 中的图像 2,2
    • Use tweezers to remove the cap from the side with the orange connector coming out of it.

    • You should hear a loud snap when you insert the tweezers in the middle of the cap and pull up.

  17. Lenovo Yoga Tablet 10 Battery Replacement: 步骤 17 中的图像 1,3 Lenovo Yoga Tablet 10 Battery Replacement: 步骤 17 中的图像 2,3 Lenovo Yoga Tablet 10 Battery Replacement: 步骤 17 中的图像 3,3
    • Use your hands to push the battery out towards the other side of the compartment.

    • Do not lose the cap from the other side of the compartment.

结论

To reassemble your device, follow these instructions in reverse order.

4等其他人完成本指南。

Luis Lopez

于01/24/19注册

329 声望

撰写一个指南

团队

Cal Poly, Team S2-G6, White Winter 2019 Cal Poly, Team S2-G6, White Winter 2019 的会员

CPSU-WHITE-W19S2G6

4 名成员

创作了7篇指南

一条评论

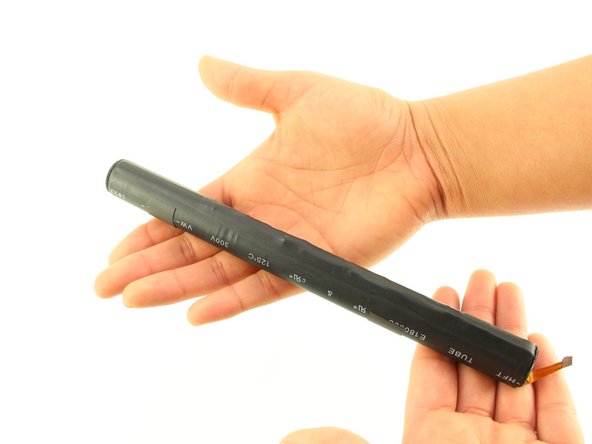
the battery removal is shown to be difficult

here shows the right way

https://www.youtube.com/watch?v=w0hjaxkQ...

accesscafe4015 - 回复

添加评论

浏览统计数据:

过去 24 小时: 1

过去 7 天: 13

过去 30 天: 62

总计 4,648