跳转到主内容

当前版本的文档还未经巡查,您可以查看最新的已查核版本

你所需要的

  1. 这个步骤还没有翻译 帮忙翻译一下

    : 步骤 1 中的图像 1,2 : 步骤 1 中的图像 2,2
    • Before you begin, be sure to turn off your laptop and unplug it from the outlet.

    • Turn the laptop over and remove the ten Torx T5 screws along the perimeter of the bottom panel.

    • Remove the panel.

  2. 这个步骤还没有翻译 帮忙翻译一下

    : 步骤 2 中的图像 1,1
    • Remove all 4 screws attached to the battery with a small Phillips head screwdriver.

    • Each screw on the back is M2 x 1.7mm

    • After the screws are taken out, remove the battery.

  3. 这个步骤还没有翻译 帮忙翻译一下

    : 步骤 3 中的图像 1,1
    • Remove all 6 screws attached to the trackpad with a small Phillips head screwdriver.

    • Each screw on the back is M2 x 1.7mm

    • Detach the ribbon cable connected to the trackpad using a wedge device.

    • Remove the trackpad using a wedge device

  4. 这个步骤还没有翻译 帮忙翻译一下

    : 步骤 4 中的图像 1,1
    • Remove all 6 screws attached to the USB ports on both sides of the device with a small Philips head screwdriver.

    • Detach both ribbon cables attached to each USB port with a wedge device, then detach the USB ports.

  5. 这个步骤还没有翻译 帮忙翻译一下

    : 步骤 5 中的图像 1,3 : 步骤 5 中的图像 2,3 : 步骤 5 中的图像 3,3
    • Remove all 4 screws attached to SSD stick with a small Phillips head screwdriver.

    • Pull the SSD stick directly to the right until it shifts out of place to remove it.

    • The storage chip above it (further away from you) may also simply be detached by pulling it directly to the right until it clicks out.
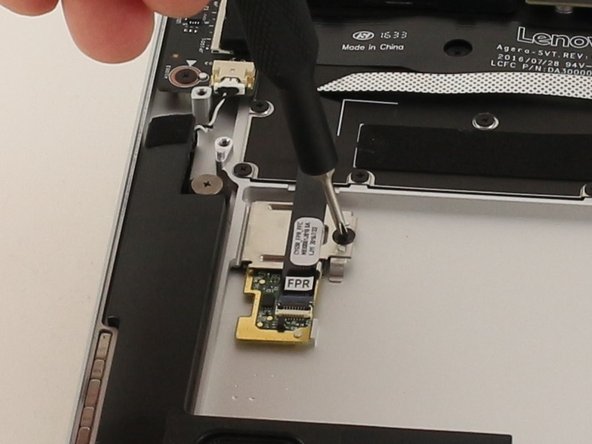
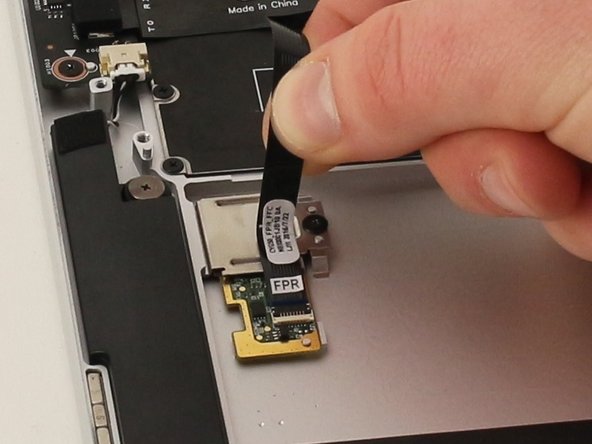
  6. 这个步骤还没有翻译 帮忙翻译一下

    : 步骤 6 中的图像 1,3 : 步骤 6 中的图像 2,3 : 步骤 6 中的图像 3,3
    • Remove all 4 screws attached to both fans, and the back connector strip (long metal piece furthest from you with screws in it) with a small Phillips head screwdriver

    • Remove the back connector strip using a wedge device to pry it off of the device

    • With the back connector strip removed, pry the fans (which are attached) using a wedge device and the fans will now be maintainable.

  7. , 电池: 步骤 7 中的图像 1,1
    • 卸下将电池固定到位的四颗 3 mm 菲利普 #0 螺丝。

  8. : 步骤 8 中的图像 1,3 : 步骤 8 中的图像 2,3 : 步骤 8 中的图像 3,3
    • 将电池排线轻轻拉向电池,断开电池排线与其主板插座的连接。 你可能需要撬棒来撬开翻盖密封。

    • 请与电池平行拉动,而不是直接向上拉。

    • 请均匀用力拉动排线的宽边,以免个别电线过度拉紧而断裂。

    • 取出电池

  9. 这个步骤还没有翻译 帮忙翻译一下

    : 步骤 9 中的图像 1,2 : 步骤 9 中的图像 2,2
    • Remove the one 3mm JIS #00 screw on the right side of the silver component.

  10. 这个步骤还没有翻译 帮忙翻译一下

    : 步骤 10 中的图像 1,2 : 步骤 10 中的图像 2,2
    • Gently pull up on the ribbon cable to detach it from the metal housing.

  11. 这个步骤还没有翻译 帮忙翻译一下

    : 步骤 11 中的图像 1,1
    • Lift the metal housing out and set it aside. This component holds the reader in place.

    • The left side of the component is tucked under the lip of the computer, so lift from the right side of the component.

  12. 这个步骤还没有翻译 帮忙翻译一下

    : 步骤 12 中的图像 1,1
    • Remove the fingerprint reader from its place.

终点

另外一个人完成了本指南。

Nikki Sorfleet

于01/23/20注册

166 声望

撰写一个指南

团队

Cal Poly, Team S1-G5, White Winter 2020 Cal Poly, Team S1-G5, White Winter 2020 的会员

CPSU-WHITE-W20S1G5

4 名成员

创作了14篇指南

0条评论

添加评论

浏览统计数据:

过去 24 小时: 1

过去 7 天: 2

过去 30 天: 15

总计 395