跳转到主内容

Lenovo Yoga 900-13ISK Charging Port Replacement

你所需要的

  1. Lenovo Yoga 900-13ISK Charging Port Replacement, Back Cover: 步骤 1 中的图像 1,2 Lenovo Yoga 900-13ISK Charging Port Replacement, Back Cover: 步骤 1 中的图像 2,2
    • Using a T5 Torx screwdriver, remove the ten 5.5 mm screws from the back case of the laptop.

  2. Lenovo Yoga 900-13ISK Charging Port Replacement: 步骤 2 中的图像 1,3 Lenovo Yoga 900-13ISK Charging Port Replacement: 步骤 2 中的图像 2,3 Lenovo Yoga 900-13ISK Charging Port Replacement: 步骤 2 中的图像 3,3
    • Use a spudger to pry open the back case at the hinges of the laptop.

    • There are plastic clips around the perimeter of the case holding down the back cover. These will need to be popped off as the cover is removed.

    • Use your fingers to completely pop off the back cover.

  3. Lenovo Yoga 900-13ISK Charging Port Replacement, Battery: 步骤 3 中的图像 1,3 Lenovo Yoga 900-13ISK Charging Port Replacement, Battery: 步骤 3 中的图像 2,3 Lenovo Yoga 900-13ISK Charging Port Replacement, Battery: 步骤 3 中的图像 3,3
    • Remove the five 3.6 mm screws from the battery with a Phillips #00 screwdriver.

  4. Lenovo Yoga 900-13ISK Charging Port Replacement: 步骤 4 中的图像 1,3 Lenovo Yoga 900-13ISK Charging Port Replacement: 步骤 4 中的图像 2,3 Lenovo Yoga 900-13ISK Charging Port Replacement: 步骤 4 中的图像 3,3
    • Grab the bottom corners of the battery and gently pull the battery until the cable disconnects from the connector on the motherboard.

    • While reassembling, use a plastic spudger to push the battery cable into the connector on the underside of the motherboard. This will be easier to do before the screws are replaced.

  5. Lenovo Yoga 900-13ISK Charging Port Replacement, Solid State Drive: 步骤 5 中的图像 1,3 Lenovo Yoga 900-13ISK Charging Port Replacement, Solid State Drive: 步骤 5 中的图像 2,3 Lenovo Yoga 900-13ISK Charging Port Replacement, Solid State Drive: 步骤 5 中的图像 3,3
    • Use a Phillips #00 screwdriver to remove the 2.7 mm screw that is holding down the SSD card.

  6. Lenovo Yoga 900-13ISK Charging Port Replacement: 步骤 6 中的图像 1,3 Lenovo Yoga 900-13ISK Charging Port Replacement: 步骤 6 中的图像 2,3 Lenovo Yoga 900-13ISK Charging Port Replacement: 步骤 6 中的图像 3,3
    • Pull the SSD card out of the port to the right.

  7. Lenovo Yoga 900-13ISK Charging Port Replacement, Wi-Fi Card Prereq: 步骤 7 中的图像 1,3 Lenovo Yoga 900-13ISK Charging Port Replacement, Wi-Fi Card Prereq: 步骤 7 中的图像 2,3 Lenovo Yoga 900-13ISK Charging Port Replacement, Wi-Fi Card Prereq: 步骤 7 中的图像 3,3
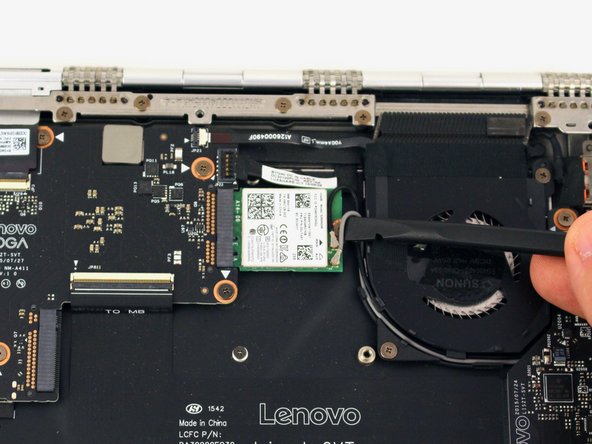
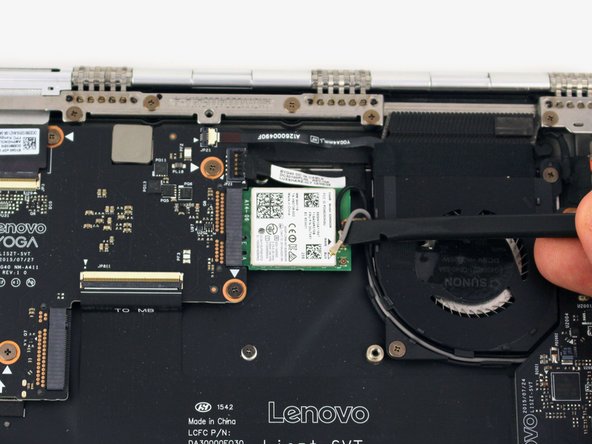
    • Pry up the gray and black coaxial cables from the Wi-Fi card using a spudger.

    • Move the cables to the side.

  8. Lenovo Yoga 900-13ISK Charging Port Replacement: 步骤 8 中的图像 1,3 Lenovo Yoga 900-13ISK Charging Port Replacement: 步骤 8 中的图像 2,3 Lenovo Yoga 900-13ISK Charging Port Replacement: 步骤 8 中的图像 3,3
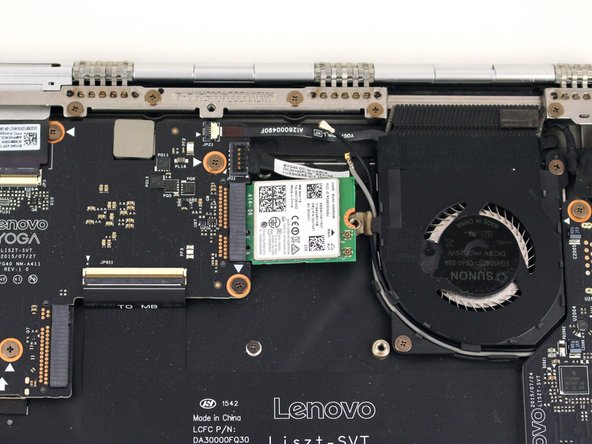
    • Using a Phillips #00 screwdriver, remove the 2.2 mm screw holding down the Wi-Fi card.

    • The Wi-Fi card may pop up to rest at an angle to the motherboard after the screw is removed.

  9. Lenovo Yoga 900-13ISK Charging Port Replacement: 步骤 9 中的图像 1,3 Lenovo Yoga 900-13ISK Charging Port Replacement: 步骤 9 中的图像 2,3 Lenovo Yoga 900-13ISK Charging Port Replacement: 步骤 9 中的图像 3,3
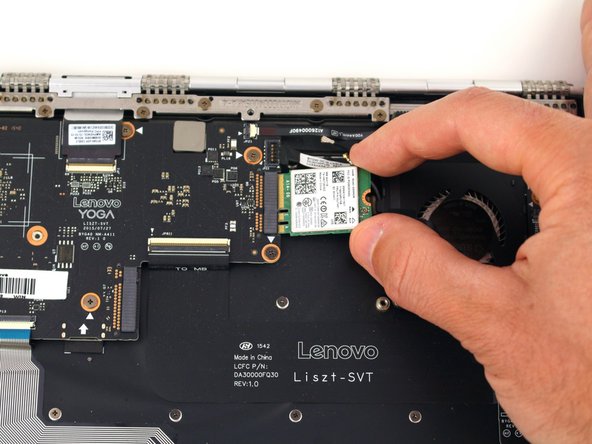
    • Pull the WiFi card out from the connector on the motherboard.

  10. Lenovo Yoga 900-13ISK Charging Port Replacement, Motherboard: 步骤 10 中的图像 1,3 Lenovo Yoga 900-13ISK Charging Port Replacement, Motherboard: 步骤 10 中的图像 2,3 Lenovo Yoga 900-13ISK Charging Port Replacement, Motherboard: 步骤 10 中的图像 3,3
    • Using the pointed end of a spudger, flip up the hinged locking tabs of the eight ZIF connectors on the motherboard.

    • Pull the eight cables out from their connectors using a pair of blunt nose tweezers.

  11. Lenovo Yoga 900-13ISK Charging Port Replacement: 步骤 11 中的图像 1,3 Lenovo Yoga 900-13ISK Charging Port Replacement: 步骤 11 中的图像 2,3 Lenovo Yoga 900-13ISK Charging Port Replacement: 步骤 11 中的图像 3,3
  12. Lenovo Yoga 900-13ISK Charging Port Replacement: 步骤 12 中的图像 1,3 Lenovo Yoga 900-13ISK Charging Port Replacement: 步骤 12 中的图像 2,3 Lenovo Yoga 900-13ISK Charging Port Replacement: 步骤 12 中的图像 3,3
    • Remove the five 3.6 mm screws from the motherboard using a Phillips #00 screwdriver.

  13. Lenovo Yoga 900-13ISK Charging Port Replacement: 步骤 13 中的图像 1,3 Lenovo Yoga 900-13ISK Charging Port Replacement: 步骤 13 中的图像 2,3 Lenovo Yoga 900-13ISK Charging Port Replacement: 步骤 13 中的图像 3,3
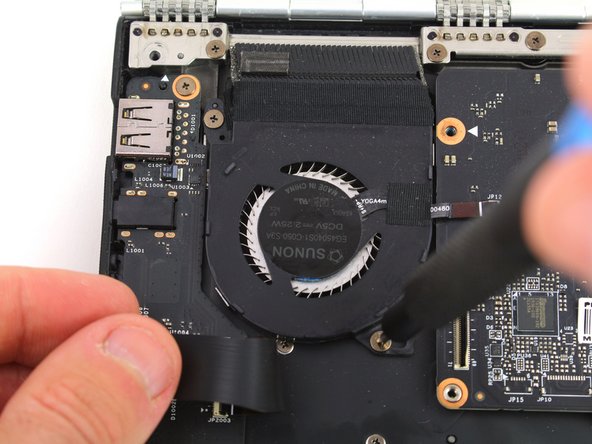
    • Pull back the interconnect cable on the left side of the motherboard to reveal one of the fan screws for the left fan.

    • Remove the two 3.6 mm screws from the left fan with a Phillips #00 screwdriver.

  14. Lenovo Yoga 900-13ISK Charging Port Replacement: 步骤 14 中的图像 1,3 Lenovo Yoga 900-13ISK Charging Port Replacement: 步骤 14 中的图像 2,3 Lenovo Yoga 900-13ISK Charging Port Replacement: 步骤 14 中的图像 3,3
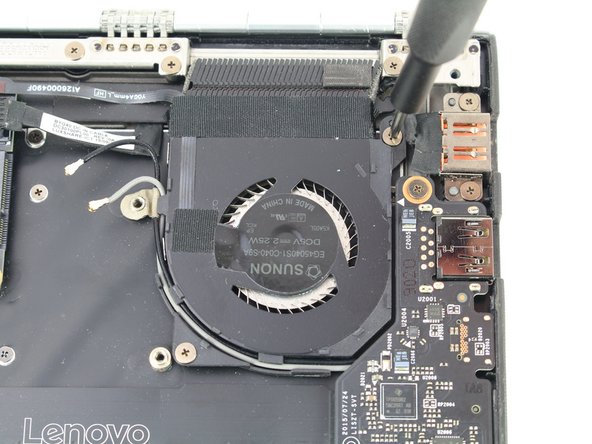
    • Remove the two 3.6 mm screws from the right fan using a Phillips #00 screwdriver.

  15. Lenovo Yoga 900-13ISK Charging Port Replacement: 步骤 15 中的图像 1,3 Lenovo Yoga 900-13ISK Charging Port Replacement: 步骤 15 中的图像 2,3 Lenovo Yoga 900-13ISK Charging Port Replacement: 步骤 15 中的图像 3,3
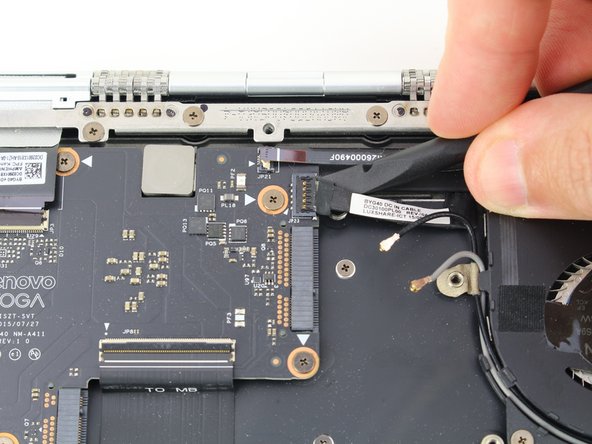
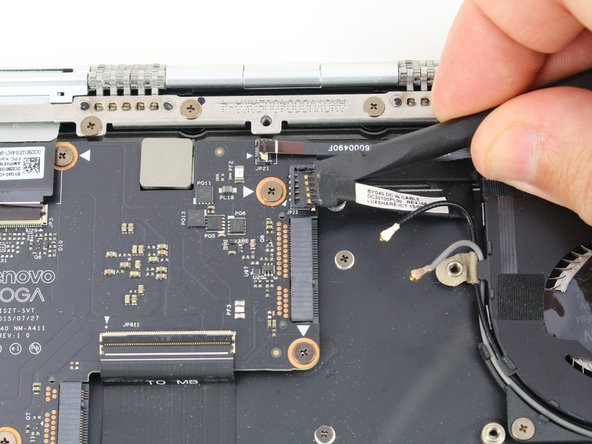
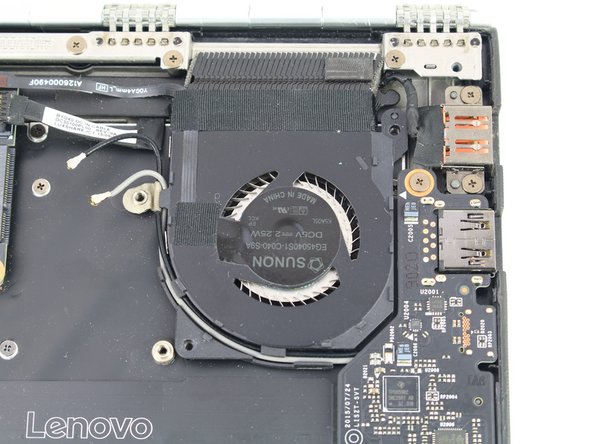
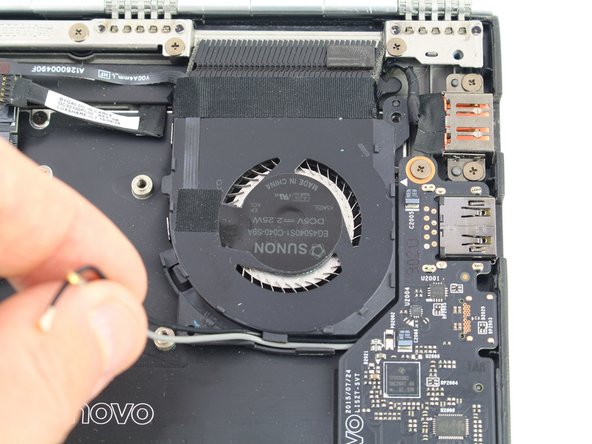
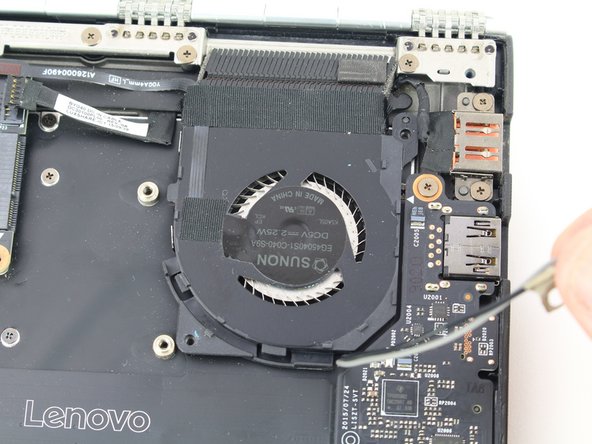
    • Unwind the black and white coaxial cables from the hooks on the right fan casing.

  16. Lenovo Yoga 900-13ISK Charging Port Replacement: 步骤 16 中的图像 1,2 Lenovo Yoga 900-13ISK Charging Port Replacement: 步骤 16 中的图像 2,2
    • Lift the motherboard from the bottom edge and pull it up and out of the case.

    • If you need to remove the fan assembly to swap it over to your new motherboard, continue to follow along with the heatsink guide.

  17. Lenovo Yoga 900-13ISK Charging Port Replacement, Charging Port: 步骤 17 中的图像 1,3 Lenovo Yoga 900-13ISK Charging Port Replacement, Charging Port: 步骤 17 中的图像 2,3 Lenovo Yoga 900-13ISK Charging Port Replacement, Charging Port: 步骤 17 中的图像 3,3
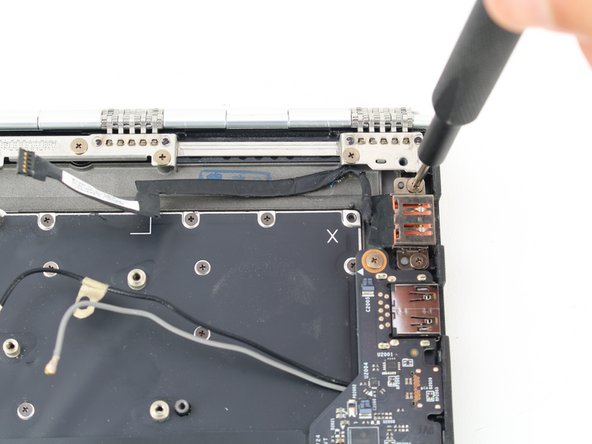
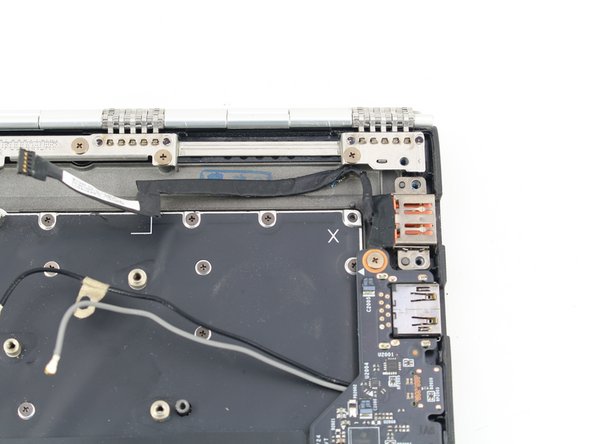
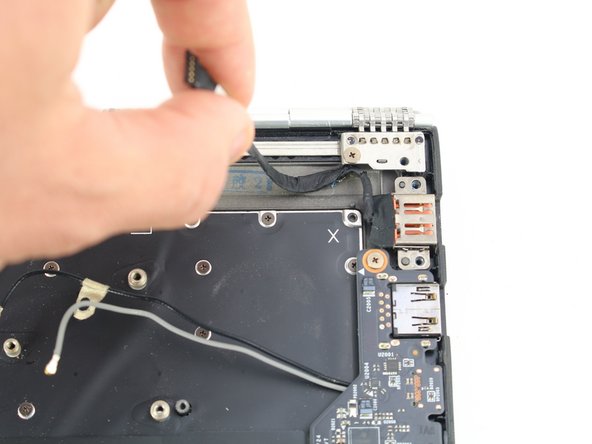
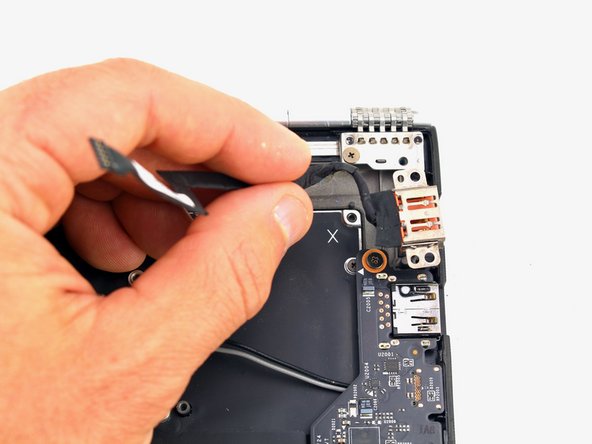
    • Remove the two 3.5 mm screws from the charging port with a Phillips #00 screwdriver.

  18. Lenovo Yoga 900-13ISK Charging Port Replacement: 步骤 18 中的图像 1,3 Lenovo Yoga 900-13ISK Charging Port Replacement: 步骤 18 中的图像 2,3 Lenovo Yoga 900-13ISK Charging Port Replacement: 步骤 18 中的图像 3,3
    • Peel up the charging port cable and remove the charging port.

结论

To reassemble your device, follow these instructions in reverse order.

Austin Blakely

于03/11/19注册

19,479 声望

创作了53篇指南

团队

iFixit iFixit 的会员

Staff

135 名成员

创作了16,757篇指南

2条评论

Why did you have to remove the motherboard and all of its connections to replace the DC in cable? Couldn’t you have just removed the fan to get access to the DC in cable?

Chris - 回复

Bruh, why don't you show how to reconnect the charging port? That's what I am stuck on. It looked easy and now I can't get it back in.

dianadiazsing - 回复

添加评论

浏览统计数据:

过去 24 小时: 0

过去 7 天: 7

过去 30 天: 50

总计 1,507